


Views: 0 Author: Site Editor Publish Time: 2026-09-14 Origin: Site


An unpredictable outdoor fixture disrupts property safety instantly. When your exterior illumination continuously cycles on and off, it creates immediate security vulnerabilities and serious operational risks. You might initially brush this blinking off as a random glitch or a minor annoyance. However, this behavior usually points directly to a solvable mechanical or electrical failure rather than a passing anomaly.
Ignoring these persistent symptoms often leads to complete equipment breakdown or severe electrical hazards over time. We will thoroughly explore the exact reasons behind this frustrating behavior in the sections below. You will learn a systematic troubleshooting framework to help you isolate the underlying fault quickly and safely. Finally, we will help you assess the repair-versus-replace viability and outline strict evaluation criteria if a fixture upgrade becomes your safest path forward.
Most Common Culprit: Photocell interference (light reflection loops) or dirty sensors are the leading causes of rapid on/off cycling.
Thermal Cycling: Older fixtures or poorly designed LEDs will shut down to protect against overheating, then turn back on once cooled.
Electrical Faults: Loose wiring, voltage drops, or failing drivers pose significant fire and safety hazards requiring immediate assessment.
Replacement Threshold: If an area light is repeatedly failing due to internal thermal degradation or driver death, upgrading to a commercial-grade LED Area Light is often more cost-effective than continuous component swapping.
Identifying the exact reason your outdoor fixture blinks requires careful observation. The cycle frequency often reveals the underlying mechanical or electrical fault. We can categorize these failures into three distinct categories.
Photocells rely on ambient light levels to trigger power. Sometimes, the fixture creates its own artificial daylight. The mechanism here is a simple optical illusion. The fixture illuminates, and the beam reflects off a nearby surface. This surface could be a bright wall, a newly planted tree, or an adjacent pole. The reflected glare bounces back into the photocell lens. The sensor incorrectly assumes the sun has risen and cuts the power.
Once the bulb goes dark, the sensor detects nightfall again. It restores power, and the entire cycle repeats. You will usually observe this symptom as rapid, highly predictable on/off cycling immediately after dusk.
Heat acts as the primary enemy of electrical components. Poor heat dissipation routinely causes an LED driver or older HID ballast to overheat. Modern components feature an internal thermal switch designed for self-preservation. When temperatures reach a critical threshold, this switch cuts the power to prevent a catastrophic meltdown or fire.
The unit subsequently cools down in the dark. Once internal temperatures stabilize, the thermal switch resets. Power is restored, and the fixture lights up again until it overheats once more. You can recognize this symptom by its slower, irregular cycling. An overheating Area Light might stay on for thirty minutes, shut down for fifteen, and repeat. You will often notice this problem worsening significantly during warmer summer months.
Electrical inconsistencies also force fixtures to cycle unpredictably. Loose connection points interrupt the steady flow of current. Alternatively, localized voltage drops starve the fixture of its required operating voltage. You often see this happen when heavy machinery, HVAC units, or large industrial equipment activate nearby. The sudden draw temporarily drains the available line voltage.
The symptom here manifests as random shutting off. You might also notice flickering or dimming immediately prior to a total shutdown. These electrical faults represent urgent safety hazards. They demand immediate inspection to prevent potential electrical fires.
Troubleshooting Diagnostic Matrix
Cycling Symptom | Probable Root Cause | Safety Risk Level | Initial Action Required |
|---|---|---|---|
Rapid on/off (every few minutes) | Photocell reflection loop | Low | Clean sensor / Check reflections |
Slow cycle (30 mins on, 15 off) | Thermal overload / Failing driver | Medium | Inspect heat sinks / Plan replacement |
Random, accompanied by dimming | Voltage sag / Loose wiring | High | Call certified electrician immediately |
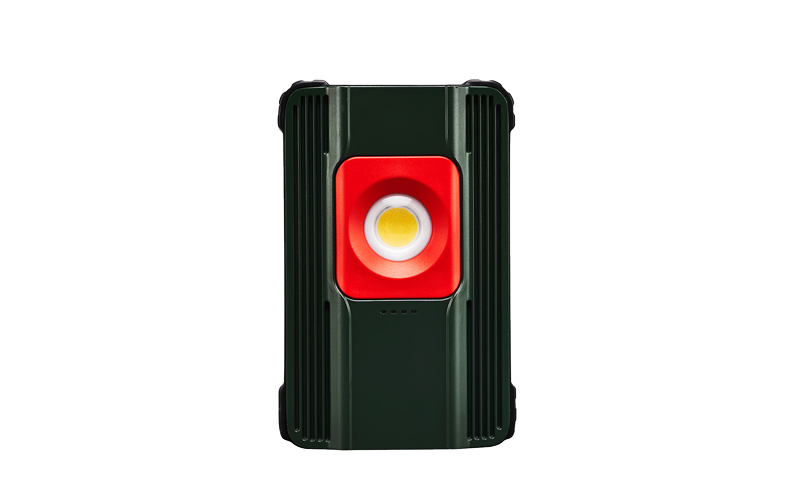
Not every flickering fixture requires a complete replacement. A systematic approach helps you separate minor maintenance tasks from terminal hardware failures. Follow these steps to determine your most cost-effective path forward.
Start your diagnosis at the component level. Clean the photocell lens thoroughly. Dirt, bird droppings, or heavy dust can trick the sensor into behaving erratically. Next, tape off the photocell lens completely using black electrical tape. This forces the fixture into manual operation mode.
Monitor the outcome closely. If the cycling stops completely, your fixture is fundamentally healthy. You simply have a sensor issue. You can resolve this by adjusting the sensor angle. Alternatively, you can install a cheap photocell shield to block unwanted reflections.
If the sensor audit fails to resolve the cycling, you must assess the electrical supply. We strongly recommend hiring a qualified electrical technician for this phase. They should inspect the junction box, breaker panel, and internal wire nuts. They will look specifically for corrosion, loose connections, or signs of arcing.
If the technician identifies and resolves a voltage-drop issue, your problem is solved. However, if they confirm the supply wiring is completely sound, the fault lies within the internal hardware. You must then evaluate the health of the internal components.
This final step requires basic logic. If the photocell functions perfectly and the external wiring is perfectly secure, the internal ballast or LED driver is failing. You have reached a critical decision point.
Repairing individual internal components in an aging, non-modular fixture rarely yields a positive long-term return on investment. The labor hours required to open a sealed housing, splice a new driver, and reseal it often exceed the unit's value. In these scenarios, moving toward a full replacement represents the smartest operational decision.
When you decide to replace a failing unit, you must select hardware designed to survive harsh conditions. You want to avoid buying a product prone to the exact same thermal or electrical failures. Use these strict criteria when selecting a modern LED Area Light.
Heat destroys electronics. You must prioritize robust thermal management when evaluating new fixtures. Look specifically for heavy-duty, die-cast aluminum housings featuring integrated heat sinks. These deep fins maximize surface area and promote rapid heat dissipation.
The business outcome here is straightforward. Superior heat sinks prevent internal thermal buildup. This effectively eliminates the thermal cycling issue causing your current hardware failure. Proper cooling extends the lifespan of the diodes and the driver significantly.
The LED driver serves as the engine of your fixture. Cheap drivers fail quickly when exposed to minor grid fluctuations. You should specify drivers built with high surge protection ratings. We recommend looking for a minimum of 10kV surge protection for outdoor commercial applications.
Furthermore, seek out drivers offering broad input voltage ranges. Common acceptable ranges include 120-277V or 347-480V. This specification shields the fixture from momentary power outages and harmful localized voltage sags. It guarantees stable illumination even when your local grid proves unreliable.
Hardwired sensors cause massive maintenance headaches. If a hardwired sensor fails, a technician must open the entire fixture to splice new wires. You should avoid this design entirely.
Instead, opt for NEMA or Zhaga twist-lock receptacles. These standardized sockets sit on top of the fixture housing. They allow for cheap, toolless sensor replacement in the future. A maintenance worker can swap a broken photocell in seconds without replacing the entire expensive fixture.
Purchasing new fixtures solves the hardware problem, but installation introduces a new set of challenges. You must mitigate several logistical risks to ensure a smooth transition from your old, cycling lights.
Mismatched mounting hardware causes severe installation delays. An old pole might use a round tenon, while your new fixture requires a square pole mount. Standard mounting options include slip fitters, trunnion mounts, and direct arm mounts. Bringing the wrong bracket to a job site wastes expensive bucket truck hours.
You can mitigate this risk through a pre-purchase audit. Have your maintenance team measure existing pole tenons carefully. Furthermore, check the wind load ratings and weight capacities of your existing poles before mounting heavier, modernized fixtures.
Modern LEDs produce incredibly intense beams. If you select the wrong optic lens, you risk over-lighting your property. Worse, you might cause blinding glare in unintended areas, creating light trespass into neighboring residential zones.
Mitigate this hazard by reviewing BUG ratings. BUG stands for Backlight, Uplight, and Glare. You should select fixtures featuring specific distribution patterns suited to your exact footprint. Type III works well for perimeters, Type IV pushes light forward, and Type V provides a wide, circular spread.
Do not blindly trust marketing materials. Many manufacturers boast about "10-year warranties" in bold print. However, the fine print often reveals severe limitations. Sometimes these warranties do not cover the driver or the photocell. Ironically, these are the most common failure points in any outdoor fixture.
You must demand transparency regarding warranty inclusions. Specifically, ask about component-level exclusions. Furthermore, clarify whether the warranty covers labor costs for uninstallation and reinstallation, or if it merely covers the replacement parts.
Moving from troubleshooting to procurement requires an organized approach. You need reliable data to defend your purchasing decisions and select the right vendor.
Do not buy fixtures based solely on price or lumen claims. Prioritize manufacturers who gladly provide photometric layouts. These IES files allow software to simulate the light pattern on your exact property. This proves the performance and coverage of the fixture before you spend a single dollar.
Evaluate the full financial picture. Buying an ultra-cheap replacement fixture might look appealing on day one. However, if that cheap fixture begins cycling in eighteen months, you will pay an electrician another massive fee to diagnose it. Weigh the maintenance labor saved by stopping the cycling issue permanently against the initial capital expenditure. Commercial-grade fixtures require a higher upfront investment, but they eliminate expensive, recurring bucket truck visits.
Stop guessing and start documenting. Walk outside and document your existing fixture’s wattage, physical mounting type, and exact cycling symptoms. Take clear photos of the pole and the housing. Next, consult a commercial lighting specialist. Provide them with your documentation so they can draft an accurate 1:1 replacement or repair plan.
An exterior light continuously cycling on and off is rarely a self-correcting issue; it demands immediate investigation.
While simple photocell reflection fixes are cheap, irregular thermal cycling usually signals definitive internal hardware degradation.
Do not repeatedly pay labor rates to swap components inside aging, non-modular housings.
Use this failure as a strategic opportunity to upgrade to a more resilient, thermally stable lighting solution featuring high-surge drivers and twist-lock sensors.
Address your blinking fixtures today. Isolate the fault using the steps provided, ensure your electrical supply is safe, and upgrade your hardware confidently when the time comes.
A: It depends heavily on the root cause. If the cycling stems from a faulty or confused photocell, it poses no immediate fire risk. However, if the issue arises from loose internal wiring, voltage drops, or a failing, overheating driver, it presents a significant electrical hazard. These conditions can cause arcing or thermal meltdowns, requiring immediate professional attention.
A: Moisture is likely penetrating compromised weather seals on your fixture housing. Water intrusion creates temporary micro-shorts across internal electrical contacts. When it dries out, the shorts stop. This indicates a severe IP-rating failure. The fixture needs immediate inspection, resealing, or replacement before the internal components corrode completely.
A: Yes, you can replace the driver if the external housing remains structurally sound and the manufacturer sells compatible replacement parts. However, this is often economically inefficient. The labor costs charged by an electrician to open the housing and splice internal components frequently rival the price of installing a completely new fixture carrying a fresh, multi-year warranty.

