


Views: 0 Author: Site Editor Publish Time: 2026-09-04 Origin: Site


Many property owners purchase wide-beam fixtures expecting instant nighttime security. They soon discover improper placement ruins the very effect they want to achieve. Buyers know they need broad illumination. However, they often struggle with exact placement positioning. Poor placement risks neighbor light pollution. It causes washed-out landscapes and creates ineffective security shadows.
Proper deployment balances lumen output, beam angle, and mounting height. We align these metrics against specific spatial site requirements. You cannot simply mount a powerful light and hope for the best. You must match the physical hardware to the architectural environment. This guide provides an evidence-based framework for evaluating where to place these fixtures. You will learn how to specify the right model for your location and avoid common installation risks. We will explore exact mounting heights, color temperatures, and sensor requirements to ensure your lighting design performs exactly as intended.
Placement dictates the required specifications: Security zones demand motion-activation and high lumens; landscape applications require warmer color temperatures and precise beam control.
Using an outdoor LED work light provides flexible, high-intensity illumination for temporary job sites without the permanent installation overhead.
Avoiding light trespass (neighbor glare) and correct mounting height are the two most critical implementation factors for residential and commercial deployments.
"Flood" refers to the beam angle (typically 45° to 120°), meaning they should exclusively be used where wide-area dispersion is structurally necessary.
Broad-spectrum lighting is inefficient and causes severe glare if you deploy it in narrow corridors. Identifying the exact application zone narrows down your product shortlist immediately. If you place a wide-angle beam in an enclosed alleyway, the light bounces erratically off the parallel walls. You waste energy and create visual discomfort. Therefore, we categorize placement into three primary zones. Each zone demands distinct hardware specifications and mounting strategies.
Zone 1: Security and Perimeter Defense
This zone includes driveways, long alleyways, and blind structural corners. Broad visibility here deters unauthorized access. You want overlapping cones of light that eliminate dark pockets. The hardware focus here leans heavily toward high brightness and rapid sensor response.
Zone 2: Landscape and Architectural Hitting
This zone focuses on illuminating broad multi-story facades, large tree canopies, or commercial signage. Using a spotlight's narrow beam here creates harsh, unappealing focal points. You need wide dispersion to gently wash surfaces with light. The priority shifts toward aesthetic enhancement rather than pure visibility.
Zone 3: Commercial and Industrial Utility
This active zone encompasses loading docks, sports courts, and busy construction sites. These areas require high-visibility, sustained illumination. The lighting must support continuous physical labor and heavy machinery operation. You need extreme durability and wide coverage to maintain safe working conditions.
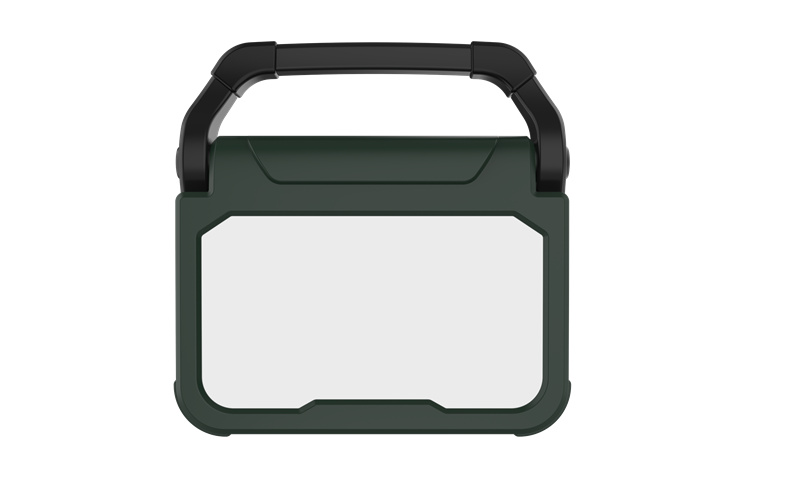
Your main success criteria for perimeter defense is eliminating shadows without blinding security cameras or passing pedestrians. The goal is detection and deterrence. Poor placement often compromises video surveillance or causes nuisance tripping from street traffic.
Above garage doors and rear entry points: We recommend a mounting height of 9 to 12 feet. This height achieves two things. First, it prevents unauthorized individuals from tampering with or breaking the fixture. Second, it allows the beam to spread optimally across the driveway or patio before hitting the ground.
Soffits and eaves overlooking side-yard pathways: Narrow, vulnerable pathways alongside houses or warehouses benefit greatly from overhead downward lighting. It traps intruders in light without spilling into adjacent properties.
You must evaluate sensors and brightness to ensure reliable operation. Prioritize PIR (Passive Infrared) motion sensors or dusk-to-dawn photocells over manual wall switches. PIR sensors detect heat signatures moving across their field of view. They ignore swaying branches, which reduces false alarms. Photocells automatically engage the light when ambient sunlight drops.
Lumen output dictates the reach of your visibility. For residential perimeters, 1,500 to 3,000 lumens is generally sufficient. It provides stark visibility without overwhelming the neighborhood. For commercial yards, you should push into the 5,000+ lumen range to penetrate deep site layouts.
Do not mount your fixtures directly adjacent to security camera lenses. Do not aim them at the cameras. High-intensity LEDs emit infrared light that completely washes out a camera's night vision sensor. You must mount the light above and behind the camera lens, aiming the beam in the same direction the camera is pointing.
Your success criteria here is enhancing aesthetic appeal and nighttime navigation. You absolutely must avoid creating a harsh "stadium lighting" effect. Proper landscape lighting feels organic and inviting. It highlights structural textures while keeping the light source visually discreet.
Ground-level uplighting: Mount fixtures near the ground and angle them upward. This technique beautifully accents multi-story residential homes or commercial brick facades. It emphasizes architectural depth and shadow lines.
Base of large trees: Place fixtures at the base of wide-canopy trees, like mature Oaks or Maples. The upward beam catches the foliage, turning the tree into a glowing backyard centerpiece.
Color temperature makes or breaks an architectural installation. You should strictly use 2700K to 3000K (Warm White) fixtures for these applications. Warm light complements red brick, natural wood, and green foliage. Avoid stark 5000K+ lights here. Cold, bluish daylight temperatures make homes look clinical and sterile.
You must also understand the relationship between beam angles and surface width. Use a Flood Light with a beam angle greater than 45 degrees only for wide, expansive surfaces. If you need to light a narrow structural column or a tall flagpole, switch to a spot light with a beam angle tighter than 25 degrees.
Fixed lighting installations are not viable for active construction, automotive repair, or temporary event logistics. The environment changes daily. You need illumination that adapts to moving hazards and shifting structures. Identifying the right portable fixture ensures site safety and operational efficiency.
You will frequently deploy these units on multi-tier scaffolding to illuminate exterior renovations safely. They also excel in unlit basement renovations where permanent electrical drops do not yet exist. Outdoor staging areas, material drop zones, and temporary vehicle repair bays also require flexible light positioning.
When selecting an Outdoor LED Work Light, focus on three primary hardware dimensions:
Portability and Mounting: Look for stable H-stand bases that resist tipping on uneven gravel. Seek tripod compatibility for elevating the light over waist-high obstacles. Magnetic mounts are incredibly useful for automotive bays or steel beam structures.
Durability: The job site is harsh. The fixture must feature robust housing, typically cast aluminum, to survive tool drops and heavy impacts. It requires a minimum IP65 rating to withstand fine drywall dust and sudden rain exposure.
Power Source: Evaluate battery-operated models versus corded options. Battery power grants total placement freedom but limits runtime. Corded power guarantees endless illumination but requires reliable site infrastructure and safe cord management.
We need a skeptic-friendly, measurable framework for shortlisting products based on physical location constraints. Marketing claims often mask inadequate hardware. You must scrutinize ingress protection, thermal management, and energy efficacy before purchasing.
Installation Environment | Recommended IP Rating | Justification and Expected Exposure |
|---|---|---|
Under eaves or deep soffits | IP44 to IP54 | The roof overhang blocks direct vertical rain. The fixture only encounters ambient moisture and light dust. |
Ground level or open walls | IP65 | The fixture faces direct, wind-blown rain and heavy dust from lawnmowers or street traffic. |
Coastal or marine proximity | IP66 | The fixture endures powerful water jets, torrential storms, and harsh atmospheric salt. |
Heat is the natural enemy of LED diodes. High-lumen fixtures generate substantial thermal loads. Aluminum heat sinks are non-negotiable for exterior fixtures. Proper heat dissipation ensures diode longevity and drastically reduces lumen depreciation over time. Cheap plastic housings trap heat, causing the LEDs to permanently dim within a few months of use.
You must shift your focus from wattage to lumens per watt. Wattage only measures how much electricity the fixture consumes. It does not measure light output. Efficacy measures how brilliantly the fixture converts electricity into visible light. A highly efficient fixture delivers massive lumen output while keeping electrical consumption low.
Even the best hardware fails if you install it poorly. Highlighting common failure points based on real-world installation errors helps you protect your investment. We see identical mistakes repeated across residential and commercial projects.
Light trespass occurs when your illumination spills over your property line and enters a neighbor's window. Angling fixtures too high causes this. It often violates local dark-sky ordinances designed to reduce urban light pollution. As a rule of thumb, you should aim your fixtures downward at least 22 degrees below the horizontal plane. This traps the beam on your property and protects the night sky.
Many buyers make the mistake of buying the highest lumen count possible for a small patio or narrow deck. This results in severe visual discomfort. When you step outside, the intense glare blinds you, making it impossible to see into the surrounding shadows. Match the lumen output precisely to your square footage. More light does not equal better visibility.
Failing to use silicone sealant around the baseplate and junction box during installation is a massive error. Water runs down exterior siding and seeps behind the fixture base. This leads to internal electrical shorts. It trips your breakers and corrodes the wiring. A fixture's IP rating only protects the light housing itself. It does not protect a poorly sealed wall connection.
Proper placement transforms raw hardware into effective lighting design. Base your final purchase decision first on your target location. Deciding between a security zone, a landscape highlight, or a temporary work site dictates your necessary beam angle, lumen count, and color temperature. Buying hardware before defining the physical zone always leads to poor performance.
Your next steps involve physical measurement. Grab a ladder and measure your intended mounting height. Calculate the required square footage coverage area of your driveway or facade. Use these measurements to select a specific wattage, sensor type, and mounting bracket. Take the time to aim your fixtures downward during installation. Seal the backplate thoroughly, and enjoy reliable, perfectly balanced exterior illumination.
A: You should mount the fixture between 9 and 12 feet above the ground. This height provides optimal beam spread across large areas like driveways. It also keeps the light out of reach, preventing vandals from tampering with the motion sensors or smashing the glass lens.
A: Standard exterior models generate too much heat and intense glare for permanent indoor use. However, using a portable outdoor LED work light is highly recommended for temporary indoor industrial tasks, unlit renovations, and basement construction where high visibility is crucial.
A: The difference relies entirely on beam spread. You use flood lighting for wide areas like driveways and broad facades because its beam angle exceeds 45 degrees. You use a spotlight for narrow targets like flagpoles or pillars because its focused beam remains under 25 degrees.
A: You must aim the fixture downward at least 22 degrees below the horizontal plane to trap the light on your property. Additionally, install physical glare shields on the housing, calibrate your motion sensor's range carefully, and consider stepping down to a lower lumen output.

