


Views: 0 Author: Site Editor Publish Time: 2026-09-10 Origin: Site


Equipment failure immediately stalls project progress. A sudden dark job site also introduces severe safety hazards for your crew. You need reliable illumination to keep operations running smoothly. Finding the root cause of an electrical or component failure saves valuable time. We need a systematic diagnostic process to locate the exact issue. Without clear steps, you risk wasting hours on inefficient guesswork. You will learn how to troubleshoot power sources and internal hardware effectively. We outline how to assess environmental damage accurately. Finally, we help you decide when you should repair or replace your fixture safely.
Always isolate the power source (GFCI, breaker, or battery) before dismantling any outdoor lighting equipment.
LED driver failure and compromised weatherproof seals (moisture ingress) are the most statistically common reasons an outdoor work light stops functioning.
DIY electrical repairs on outdoor fixtures often compromise their IP rating, making replacement the safer, more viable option for commercial or heavy-duty use.
When evaluating a replacement, prioritize verified IP65+ ratings, robust thermal management, and comprehensive warranties over peak lumen claims.
You should always begin your troubleshooting process at the power source. Users often mistake a localized power failure for a broken lighting fixture. By isolating the external power supply first, you prevent unnecessary dismantling of your equipment.
Outdoor outlets frequently experience moisture-induced Ground Fault Circuit Interrupter (GFCI) trips. Morning dew, heavy humidity, or direct rain can cause a temporary short. This triggers the safety mechanism inside the receptacle. The outlet cuts power entirely to protect users from electrocution. If your light refuses to turn on, the GFCI might be the culprit.
Follow these numbered steps to test the receptacle safely:
Unplug the lighting fixture from the outdoor outlet.
Press the "Reset" button firmly on the GFCI receptacle. You should hear a distinct click.
Plug a secondary device, such as a voltage tester or a power drill, into the outlet.
Verify if the secondary device powers on. If it works, the outlet is functional.
Reconnect the lighting fixture. If the GFCI trips immediately again, your fixture has an internal short circuit.
Common mistake: Do not assume a tripped breaker means a dead outlet. Always physically test the receptacle with a secondary device or a multimeter before discarding your lighting equipment.
Corded models face constant physical abuse on active job sites. Workers drag them across concrete, pinch them in doors, and roll heavy equipment over them. These actions compromise the cord's structural integrity.
Carefully examine the entire length of the cable. Look for frayed jackets, deep cuts, or exposed copper wiring. Pay special attention to the strain relief gland. This is the thick rubber collar where the cord enters the housing. Repeated tugging often severs the internal wiring right at this junction. If you find a pinched wire at the strain relief, the electrical connection is likely broken. The fixture will not receive power, even if the outlet functions perfectly.
Cordless models introduce a different set of power variables. When a battery-operated unit fails, you must isolate three specific components: the battery cell, the charging dock, and the contact terminals.
First, test the battery on a different tool to rule out a dead lithium-ion cell. Next, inspect the charging dock. If the indicator lights on the dock fail to illuminate, the charger itself is broken. Finally, examine the metal terminals on both the battery and the lighting fixture. Outdoor use invites dirt, moisture, and chemical exposure. This leads to terminal corrosion. A thin layer of oxidation prevents proper voltage transfer. You can clean these contacts using a brass wire brush and a specialized contact cleaner to restore functionality.
Once you verify the power source, shift your focus to the internal hardware. High-intensity lighting generates significant heat and relies on complex circuitry. Hardware degradation is a natural part of a fixture's lifecycle.
The LED driver acts as the engine of your lighting fixture. It converts high-voltage alternating current (AC) into low-voltage direct current (DC). It also regulates the electrical current flowing to the diodes. A quality Work Light relies on a robust LED driver to maintain consistent brightness and prevent overheating.
Voltage spikes on the job site easily destroy standard drivers. Poor heat dissipation also accelerates driver failure. When the driver overheats, its internal capacitors bulge and leak. The driver usually fails long before the actual LED diodes degrade. If your fixture receives power but remains completely dark, or if it flashes rapidly, you likely have a burnt-out driver.
Mechanical switches fail frequently in dusty, dirty environments. Fine particulate matter infiltrates the switch housing. This debris blocks the metal contacts from closing the circuit. If the button feels rigid or lacks a satisfying click, dust accumulation is the likely cause. You can sometimes flush the switch housing with compressed air to clear the debris.
Many modern units feature integrated photocells or motion sensors. These sensors tell the unit when to turn on. If a sensor fails, it acts as a permanent roadblock in the circuit. To test this, you must bypass the sensor. Disconnect the sensor wires and wire the main power directly to the driver. If the unit illuminates, the primary circuit remains viable, and only the sensor requires replacement.
LED arrays rarely fail all at once unless a massive power surge occurs. However, a single blown diode can disable the entire board if the manufacturer wired them in a series circuit. You can identify a blown diode through a simple visual inspection.
Look closely at the yellow or white LED chips.
Search for distinct brown burn marks on the circuit board.
Identify tiny, visible black spots in the center of individual chips.
Check for melted plastic around the diode casing.
If you spot these indicators, the LED array is compromised. The board cannot complete the electrical circuit, rendering the fixture useless.
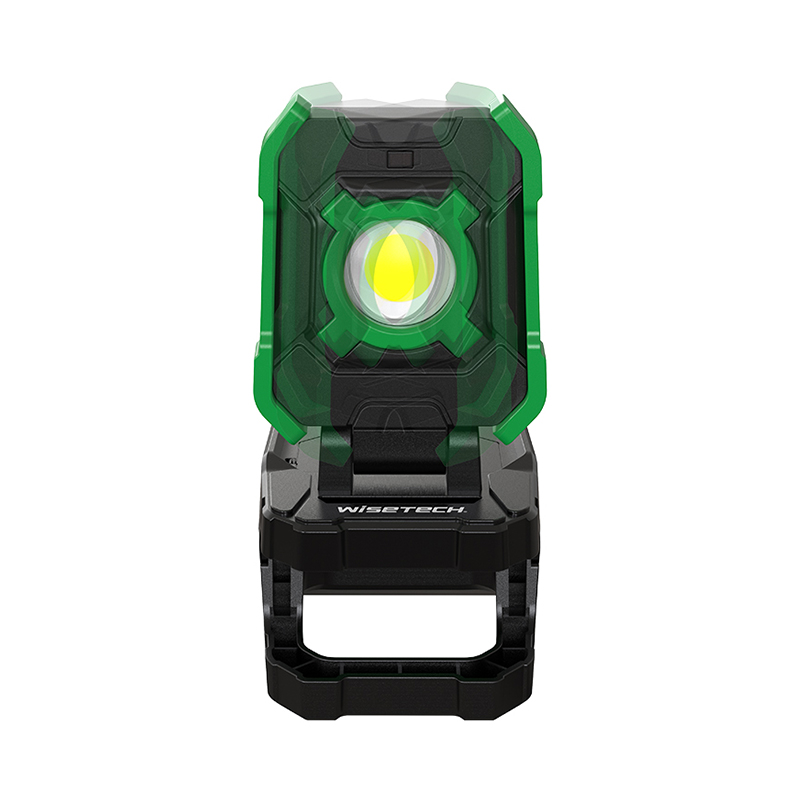
Outdoor lighting faces brutal environmental conditions. Manufacturers design these units to withstand weather, but materials inevitably degrade over time. Moisture and physical impacts destroy internal electronics rapidly.
Thermal cycling is the silent killer of outdoor electronics. When you turn the unit on, the internal components heat up. The air inside the housing expands and pushes outward. When you turn the unit off in cool outdoor air, it cools rapidly. This sudden temperature drop creates a strong internal vacuum.
This vacuum actively pulls surrounding air back into the housing. If it is raining or humid, it pulls moisture directly past aging rubber gaskets. Over time, UV exposure dries out these silicone and rubber seals. They lose their elasticity and fail to block water vapor. Once moisture breaches the seal, catastrophic failure is imminent.
You can usually spot moisture ingress easily. Look for condensation or water droplets fogging the inside of the polycarbonate lens. This trapped moisture wreaks havoc on bare electronics.
Water conducts electricity across the printed circuit board (PCB). This creates localized short circuits between components. Furthermore, prolonged exposure to moisture causes galvanic corrosion. The copper wiring and solder joints oxidize rapidly, turning green or white. This oxidation eats away at the connections until they snap. Once corrosion heavily coats the internal wiring, repairing the unit becomes nearly impossible.
Job sites are chaotic. Workers inevitably drop equipment or knock it over. While heavy-duty housings resist shattering, the internal components often suffer invisible damage.
A severe drop sends shockwaves through the rigid PCB. This causes microscopic fractures in the board itself. These hairline cracks sever the delicate copper traces that carry electricity. A unit might look perfectly intact on the outside, yet refuse to turn on. If your unit stopped working immediately after a fall, suspect a fractured PCB or a broken solder joint.
Knowing exactly what went wrong is only half the battle. You must now decide whether to fix the unit or throw it away. Making the wrong choice costs you time, money, and safety.
Patching outdoor electrical equipment introduces severe safety risks. Factory seals guarantee the Ingress Protection (IP) rating. When you open a sealed housing to replace a driver, you break that factory seal. Resealing the unit with standard silicone rarely restores its original water resistance.
Using improperly repaired equipment in wet commercial environments violates safety compliance standards. A patched unit exposes your crew to electrocution risks. It also creates fire hazards if internal components short out again. For commercial applications, maintaining a pristine, factory-sealed unit is paramount for workplace safety.
You must weigh the true cost of repair against purchasing a modern unit. Sourcing a proprietary LED driver or a specific battery pack is often difficult and expensive. Manufacturers frequently discontinue internal parts for older models.
Factor in your labor time. Spending three hours diagnosing, sourcing parts, and soldering a five-year-old fixture is highly inefficient. Modern lighting technology advances rapidly. A new unit likely offers better energy efficiency, brighter output, and superior heat management for roughly the same price as your combined repair costs.
Comparison Chart: Repair vs. Replacement Scenarios
Scenario | Recommended Action | Reasoning |
|---|---|---|
Tripped GFCI / Dirty battery terminals | Repair / Maintain | Simple, zero-cost fix. Does not require opening the sealed housing. |
Frayed power cord (external) | Repair | Easily fixed with a compliant waterproof splice or a plug replacement. |
Burnt LED driver | Replace | Sourcing matching drivers is costly. Opening the case voids the IP rating. |
Visible moisture inside the lens | Replace | Corrosion has likely already damaged the PCB. Seals are permanently compromised. |
Cracked housing or microscopic PCB fractures | Replace | Structural integrity is gone. Water will immediately enter the unit. |
Establish a strict operational threshold for your equipment. Adopt this general rule: if the main housing is breached, the driver is dead, or the repair costs exceed 50% of the unit's retail value, replacement is the optimal path. Do not gamble with safety or waste labor hours on severely degraded electronics.
If you decide to replace your broken equipment, you must purchase a unit built to survive. Selecting a durable Outdoor Work Light requires looking past basic brightness specifications. Focus on structural and protective features instead.
Ignore vague marketing terms like "weatherproof" or "water-resistant." You need products with verified Ingress Protection (IP) ratings. The IP rating system dictates exactly how much dust and water a unit can handle.
Set a strict baseline of IP65 for any standard outdoor equipment. An IP65 rating means the unit is completely dust-tight and protected against low-pressure water jets from any direction. If your crew works in extreme environments, prioritize IP67 ratings. IP67 ensures the equipment can survive temporary submersion in water without internal damage.
The materials dictate the lifespan of the equipment. Prioritize units constructed with die-cast aluminum housings. Aluminum provides excellent structural strength. More importantly, it acts as a massive heat sink. It draws heat away from the LED driver and diodes, preventing thermal burnout.
For the front cover, demand polycarbonate lenses. Polycarbonate offers extreme impact resistance. It will bounce or scratch upon impact rather than shattering like standard glass. Avoid any units relying heavily on brittle plastics for their main body, as UV rays will degrade and crack the plastic within a year.
Consider how the new unit fits into your current workflow. For battery-operated models, evaluate whether the replacement integrates seamlessly into your existing tool battery ecosystem. Using adapters or maintaining multiple charger types clutters the job site.
For corded models, assess their daisy-chain capabilities. High-quality units feature built-in receptacles. They allow you to link several units together on a single circuit. This scalability drastically reduces trip hazards by eliminating excess extension cords across the floor.
A manufacturer's warranty reveals their confidence in the product's durability. Instruct buyers to look for robust, multi-year warranties. Read the fine print carefully. Ensure the warranty explicitly covers the internal LED driver and protects against environmental degradation, such as moisture ingress. Avoid brands offering mere 90-day guarantees, as they typically use inferior seals and cheap internal components that fail quickly outdoors.
Troubleshooting lighting equipment requires a strict hierarchy: start at the power source, inspect the internal components, and evaluate environmental damage. You can easily resolve minor issues like a nuisance GFCI trip or dirty battery terminals. However, when you face internal hardware failures or breached seals, you must reconsider your next steps. Patching broken seals or swapping internal boards introduces serious safety risks on wet job sites. Severe internal failures on outdoor gear warrant a complete structural upgrade. Assess your current equipment against our evaluation criteria. If your unit is beyond safe repair, explore commercial-grade replacement options built with die-cast aluminum and verified IP65+ ratings to ensure uninterrupted illumination.
A: Flickering is a primary symptom of a failing LED driver. As the driver's internal capacitors degrade, they fail to supply a constant electrical current. Flickering can also indicate a loose, arcing internal connection caused by thermal expansion or physical impact.
A: No. Modern integrated LED fixtures do not use traditional replaceable bulbs. The diodes are permanently soldered onto a circuit board. If a diode fails, you must swap out the entire diode board or replace the entire fixture.
A: Not always. You must differentiate between a nuisance trip and a hard fault. External moisture entering the outlet often causes a nuisance trip. However, if the GFCI trips repeatedly every time you plug the unit in, your fixture has a severe internal short.
A: A quality commercial unit provides a baseline of 30,000 to 50,000 operational hours. This assumes the manufacturer utilized proper thermal management (like aluminum heat sinks) and that the weatherproof seals remain entirely intact over the years.

