


Views: 0 Author: Site Editor Publish Time: 2026-09-16 Origin: Site


Selecting the wrong cable for an outdoor lighting project isn't just a durability issue. It is a critical fire hazard and a severe code compliance failure. Whether illuminating a dark driveway or upgrading your property's security perimeters, outdoor environments relentlessly expose wiring to heavy moisture, UV radiation, and physical damage. Standard indoor wires simply cannot survive these harsh conditions. If exterior insulation degrades, you risk immediate electrical shorts and catastrophic system failure.
This guide breaks down the exact cable types, gauge requirements, and strict compliance standards you need to know. We will show you how to safely hardwire a Flood Light to withstand the worst elements. You will learn the crucial differences between direct burial and conduit systems. We will also cover how to perfectly match your wire gauge to your circuit breaker. Following these steps ensures long-term safety and highly reliable exterior illumination.
Cable Type Dictates Installation: Use UF-B cable for direct underground burial, or THWN wire if running inside a protective PVC or metal conduit.
Gauge Matches the Breaker: A 14 AWG wire is standard for 15-amp circuits, while 12 AWG is required for 20-amp circuits, regardless of the light fixture's low draw.
Compliance is Non-Negotiable: Outdoor electrical work must meet local standards (such as the NEC in North America or BS 7671 in the UK) to ensure weatherproof integrity and insurance compliance.
Safety Over Savings: Investing in properly rated weatherproof junction boxes and UV-resistant sheathing prevents premature system failure and electrical shorts.
Assessing the exposure level of your installation is your very first step. Cables placed outdoors face aggressive environmental risks every single day. They must withstand relentless water ingress from driving rain, melting snow, and even automated lawn sprinklers. They also face extreme temperature fluctuations, baking in summer heat and freezing in winter. Additionally, exterior wiring must resist potential physical impact from landscaping tools like shovels, aerators, or lawnmowers. Sunlight itself acts as an invisible destroyer. UV radiation causes standard wire jackets to become brittle, crack, and eventually flake away, leaving bare live copper dangerously exposed.
You cannot ignore local electrical code requirements, such as the National Electrical Code (NEC) in North America or BS 7671 in the UK. A common and highly dangerous mistake is using standard indoor non-metallic cable outside. This NM-B or "Romex" wire lacks the necessary protective sheathing and UV inhibitors. When exposed to outdoor elements, its internal paper wrapping absorbs moisture quickly. This capillary action pulls water deep into the cable, leading to rapid insulation breakdown and immediate shock hazards.
To build a truly safe exterior circuit, you must adopt a comprehensive system approach. The cable you select is only as safe as its weakest connection point. To establish a solid safety baseline, you must implement the following criteria:
Weatherproof Junction Boxes: Use heavy-duty metal or PVC boxes fitted with rubber gaskets to seal out moisture completely.
Proper Grounding: Ensure strict grounding protocols exist to give stray current a safe, immediate path to the earth.
GFCI Protection: Depending on local codes and your specific setup, you may need Ground Fault Circuit Interrupter protection at the breaker level to prevent fatal shocks.
When planning an outdoor lighting project, your installation method dictates your cable choice. You generally have two primary approaches: direct burial and running wires inside a protective conduit system. Understanding the nuances of each prevents costly rework later.
Approach 1 relies on UF-B (Underground Feeder) cable designed specifically for direct burial. This cable is ideal for long, uninterrupted runs through open soil. It works best where digging a clear, deep trench is highly feasible without hitting existing hardscaping. UF-B features a solid plastic sheathing. This thick vinyl jacket wraps each individual conductor separately, eliminating internal air gaps and offering exceptional moisture resistance. However, it does have distinct limitations. UF-B is notably harder to strip and route than standard indoor wire because the jacket clings tightly to the conductors. Additionally, local codes still require physical protection, such as a sturdy schedule 80 PVC conduit, wherever the cable emerges from the ground to meet the fixture or breaker box.
Approach 2 uses THWN or THWN-2 wire pulled inside a dedicated conduit. The "W" in the designation stands for "Water-resistant," making it perfect for wet locations. This method is best for installations requiring maximum physical protection against impact. It also works perfectly for surface-mounted exterior runs along brick, stucco, or siding where trenching is impossible. If you anticipate future scalability, conduit makes it incredibly easy to pull new wires later without digging up your yard. THWN features individual insulated conductors. They are not bundled together inside a heavy outer jacket. Instead, you pull them smoothly through watertight PVC or rigid metal conduit. The main limitation here involves cost and complexity. This approach demands higher upfront labor and more materials. You must carefully measure, cut, glue, and seal every conduit joint using specific weatherproof cement to ensure the entire pathway remains watertight.
Cable Type | Best Application | Key Features | Primary Limitations |
|---|---|---|---|
UF-B (Direct Burial) | Long, uninterrupted trenches through soil | Solid plastic sheathing wrapping each conductor | Harder to strip; requires conduit when above ground |
THWN / THWN-2 | Surface mounts and high-risk impact zones | Individual insulated wires pulled through conduit | Higher upfront labor and conduit material costs |
Selecting the correct wire gauge is crucial for safety and optimal fixture performance. You must match the American Wire Gauge (AWG) strictly to the circuit breaker protecting the line, not just the light fixture itself. Breakers trip to prevent wires from overheating and causing structural fires.
A 14 AWG wire is perfectly suitable for standard 15-amp circuits. It remains the ideal, cost-effective choice for modern, low-draw LED setups. Conversely, using a 12 AWG wire is absolutely mandatory if you plan to tap into an existing 20-amp circuit. You cannot safely use 14 AWG wire on a 20-amp breaker, even if the light itself draws very little power. If a fault occurs, the 20-amp breaker will allow too much current through the smaller 14 AWG wire, causing the insulation to melt long before the breaker safely trips.
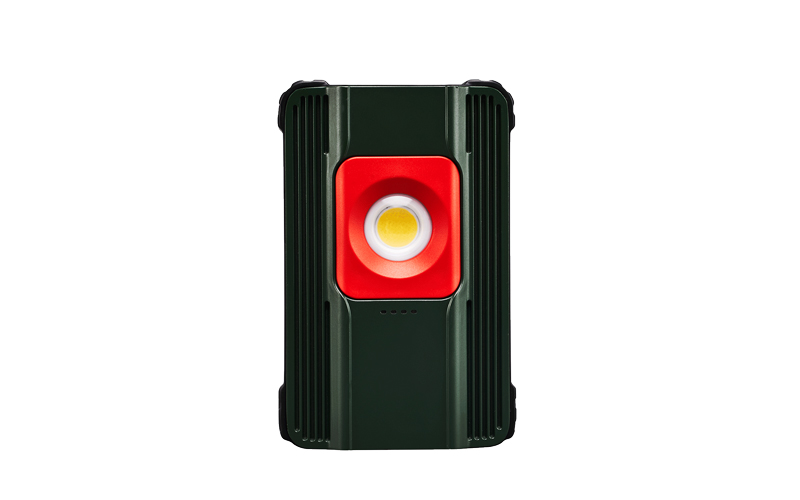
Calculating the total load on the circuit is your next vital step. Modern LED fixtures draw minimal amperage. A typical high-output unit might pull less than half an amp. However, consider what else the circuit might power now or in the future. If you plan to add exterior receptacles to run high-draw temporary fixtures like an Outdoor LED Work Light, your load changes drastically. Heavy-duty power tools, electric pressure washers, or leaf blowers demand significant starting current. In these multipurpose scenarios, we highly recommend up-sizing your installation to a dedicated 20-amp circuit paired with 12 AWG wire to handle occasional heavy loads safely.
Finally, you must account for voltage drop on exceptionally long wiring runs. When a cable run exceeds 100 feet (about 30 meters) from the breaker to the fixture, natural electrical resistance becomes a noticeable issue. The voltage reaching the light will be lower than the voltage at the panel. We recommend stepping up one wire size in these lengthy cases. For instance, upgrade from 14 AWG to 12 AWG for a 15-amp circuit running over 100 feet. This simple, proactive adjustment prevents annoying voltage drop, ensures stable power delivery, and eliminates fixture flickering or premature LED driver failure.
Standard security installations often evolve into more complex setups. Adding motion detection capabilities or connecting multiple light fixtures requires careful, deliberate electrical planning to maintain strict safety codes.
Integrating a Passive Infrared (PIR) motion sensor introduces new wiring variables into your junction box. A standard light fixture setup typically uses a basic 3-wire configuration: Live, Neutral, and Earth. However, if you mount the PIR sensor in a separate location from the main fixture to improve detection range, you often need a 4-wire setup. This specialized configuration requires an additional switched live wire, sometimes referred to as the load wire. The continuous live feeds power to the sensor, while the switched live carries power from the sensor to the light only when motion triggers the internal relay. Understanding this specific directional flow prevents wiring errors that leave your exterior lights staying on permanently.
Daisy-chaining multiple fixtures along a single exterior circuit is another common security upgrade. You must always wire these fixtures in parallel, never in series. Parallel wiring ensures each light receives full line voltage independently. If one bulb burns out or a driver fails, the other lights on the perimeter remain fully operational. During this expansion process, carefully evaluate your junction box capacity. The National Electrical Code strictly dictates "box fill" limits, defining exactly how many wires a specific box volume can safely hold. Crowding too many cable splices, wire nuts, and device leads into a small box creates dangerous heat buildup. Always use weatherproof wire nuts pre-filled with dielectric silicone sealant, and ensure your box's cubic-inch capacity comfortably supports all internal connections.
Regional color coding realities also demand strict, unwavering attention. Wiring colors differ significantly depending on your geographical location. Misinterpreting these colors leads to dangerous crossed connections, blown fuses, or electrified metal housings. Keep these standards in mind to prevent crossing live and neutral lines during installation:
United States (NEC): Black indicates Live (Hot), White indicates Neutral, and Green or bare copper indicates Earth (Ground).
Europe and UK (IEC): Brown indicates Live, Blue indicates Neutral, and Green with a Yellow stripe indicates Earth.
Older Installations: Always test legacy wires with a reliable multimeter, as older, non-standard color codes may vary unpredictably.
Deciding whether to tackle an outdoor wiring project yourself depends heavily on your practical experience level and the overall scope of the project. Electricity offers no margin for error, especially in wet outdoor conditions.
DIY is often acceptable for basic, straight-forward replacements. If you are simply swapping out an existing, faulty fixture on a pre-wired, code-compliant exterior junction box, you can likely complete the job yourself safely. This maintenance task usually involves turning off the correct breaker, verifying the power is completely dead with a non-contact voltage tester, disconnecting the old wires, and matching the new leads correctly using fresh wire nuts.
However, many scenarios strongly dictate when you must hire a professional. You should immediately call a certified electrician if your project requires running entirely new circuits directly from the main breaker panel. Working inside a live panel exposes you to lethal main busbars. Trenching and laying direct burial cable across property lines also introduces hidden hazards. You risk striking buried utility gas lines, municipal water mains, or fiber optic cables. Furthermore, navigating complex local permit rules and passing rigorous municipal inspection requirements can frustrate even highly experienced homeowners. A failed inspection will delay your project and force expensive, time-consuming rework.
Weighing the financial cost versus the physical risk makes the correct choice obvious. A licensed electrician provides guaranteed insurance compliance, ensuring your homeowner's policy remains valid if a fire occurs. They warranty their labor and materials against future failures. Most importantly, their deep expertise mitigates the severe, life-threatening risks associated with mixing unpredictable water exposure and electricity. Paying for professional, code-compliant labor is a relatively small price for total peace of mind and long-term system reliability.
The ultimate decision centers on analyzing your specific installation environment and matching the correct AWG to your breaker panel. Choosing UF-B cable for deep soil trenching or THWN wire for rigid conduit paths guarantees the crucial physical protection your electrical system demands.
To move forward successfully, first thoroughly audit your proposed installation route to identify potential obstacles like tree roots or buried concrete. Next, verify your breaker panel's current capacity to confirm it can handle any additional load without tripping. Finally, compile a standardized, comprehensive material list before beginning. Ensure you secure UV-resistant cables, silicone-filled waterproof wire nuts, and properly sealed metal junction boxes before breaking ground or requesting estimates from local professionals.
A: No. Even inside a watertight conduit, NM-B cable is not rated for wet or damp locations. Condensation naturally forms inside the conduit over time. This trapped moisture will quickly degrade the paper insulation surrounding the internal wires, leading to dangerous electrical shorts and a high risk of fire.
A: Typically, UF-B cable must be buried 24 inches deep according to the NEC. This depth prevents accidental strikes from landscaping tools. However, local codes may vary. Conduit installations can often be buried shallower, usually requiring an 18-inch trench for PVC pipes. Always verify exact depth requirements with your municipal building department.
A: UF-B features a solid, moisture-resistant vinyl jacket that securely encapsulates each wire individually. This prevents water ingress entirely. In contrast, standard NM (Romex) cable contains loose paper wrapping inside its outer jacket. If used outdoors, this paper acts like a sponge, absorbing moisture and destroying the cable's electrical integrity.
A: Generally, hardwired fixtures mounted securely above normal reach do not require GFCI protection. Their placement naturally isolates them from direct human contact. However, if you install outdoor receptacles on the same exterior circuit, those outlets absolutely require GFCI protection to prevent shocks. Always verify safety requirements with your local building codes.

