


Views: 0 Author: Site Editor Publish Time: 2026-09-08 Origin: Site


Installing a commercial area light goes beyond simple hardware replacement. It directly influences site safety, regulatory compliance, and overall project success. Retrofitting parking lots or exterior perimeters presents unique real-world challenges. You must often navigate legacy electrical wiring during these upgrades. You will also encounter varying pole structural conditions across different sites. Furthermore, local electrical codes demand strict adherence to prevent hazards. We created this comprehensive guide to simplify your installation process. It outlines standardized wiring steps and mounting procedures clearly. Facilities managers and electrical contractors can use this framework daily. You will learn to accurately scope required labor. We will show you how to mitigate physical deployment risks effectively. Finally, this knowledge helps you confidently select the right fixture for any exterior application. Read on to master these critical installation techniques.
Safety First: Strict adherence to National Electrical Code (NEC) standards and proper lockout/tagout procedures is non-negotiable.
Mounting Dictates Labor: Choosing between slip-fitter, direct arm, or trunnion mounts directly impacts installation time and pole compatibility.
Wiring Modernization: Upgrading to an LED Area Light requires bypassing legacy HID ballasts and correctly terminating 0-10V dimming lines.
Before you purchase any new fixtures, you must audit your existing infrastructure meticulously. This baseline assessment prevents dangerous mistakes during deployment. We strongly recommend evaluating three main infrastructure categories.
You must establish a clear understanding of your current hardware. Electricians frequently discover hidden structural issues during retrofits. Documenting the existing pole heights and base conditions saves significant time later. This audit helps you match new fixtures to legacy mounts accurately.
You must confirm the exact site voltage before ordering fixtures. Standard commercial sites typically run on 120-277V systems. Industrial complexes and large municipal grids often utilize high-voltage 347-480V systems. Connecting a standard fixture to high voltage causes catastrophic failure instantly. You will destroy the driver and void the warranty. Always test the line voltage at the pole base using a reliable multimeter. Do not rely solely on old electrical panel labels. Labels often contain outdated or incorrect circuit information.
Never mount new heavy fixtures on compromised infrastructure. You should inspect existing poles for rust and structural decay. Pay special attention to the base weld where moisture accumulates. Always measure the correct tenon sizes at the pole top. You must also calculate the EPA rating accurately. EPA stands for Effective Projected Area. This rating ensures your new fixture complies with local wind load requirements. Heavy fixtures acting as sails will compromise pole stability during severe weather. High winds create a massive lever effect on older pole tops.
Your installation must meet regional regulatory standards. Dark Sky compliance dictates specific BUG ratings. BUG stands for Backlight, Uplight, and Glare. Selecting compliant fixtures minimizes light pollution in surrounding neighborhoods. Many municipalities strictly enforce these optics. Local energy codes mandate specific controls. Title 24 often requires you to integrate motion sensors or dimming capabilities. Failing to meet these codes delays project sign-off significantly. You might face fines or mandatory rework.
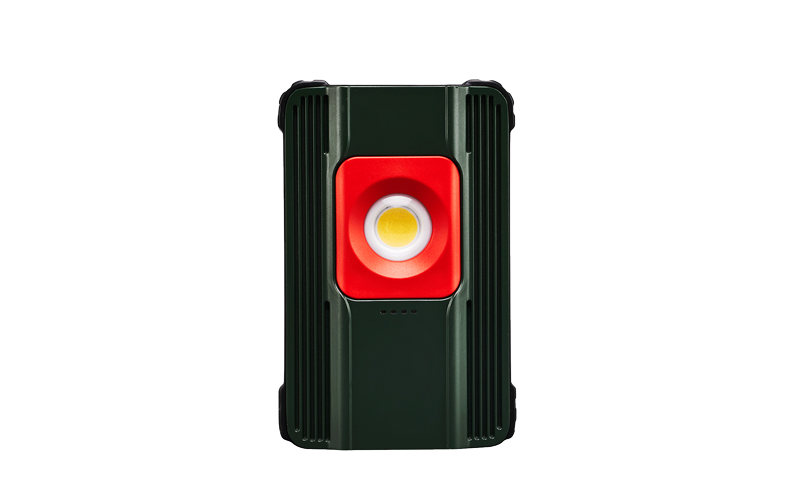
Selecting the correct mount dictates your labor requirements heavily. Mismatched mounting hardware causes massive installation delays. It also derails deployment budgets on retrofit projects. Field modifications to poles weaken their structural integrity. We categorize mounts into three primary solutions. You must match the mount to your existing pole configuration precisely.
This remains the most versatile option for round tenons. It requires a standard 2-3/8 inch round tenon at the pole top. You can easily adjust the angle of the light distribution. This flexibility helps you target illumination precisely across uneven terrain. Electricians appreciate this mount because wiring passes safely through the hollow knuckle joint.
Use this approach for square or round poles. It provides a flush, fixed aesthetic. The installation often requires specific backing plates inside the pole. These plates prevent the pole walls from crushing when you tighten the bolts. You might also need custom drilling templates. This mount offers supreme stability for a heavy Area Light.
You will use this mount for flat surfaces. It works perfectly on walls or specialized architectural applications. The U-shaped bracket allows for robust vertical tilting. You typically secure this mount using heavy-duty lag bolts or concrete anchors.
Mount Type | Ideal Application | Typical Hardware Needed | Labor Impact |
|---|---|---|---|
Slip-Fitter | Round Tenons (2-3/8") | Allen wrenches, wire snake | Low - Fast angle adjustment |
Direct Arm | Square/Round Poles | Backing plates, drill bits | Medium - Requires precise drilling |
Trunnion / Yoke | Flat Walls/Surfaces | Concrete anchors, lag bolts | High - Masonry work often required |
Wiring an LED Area Light requires intense precision. We assume a licensed electrician performs this complex work. Follow these sequential steps for a completely safe installation.
Preparation & Safety: You must mandate strict lockout/tagout procedures at the breaker panel. Verify zero voltage at the pole before touching any wires. Use a non-contact voltage tester first. Follow up with a digital multimeter for absolute certainty. Secure the work area below the pole using safety cones.
Bypassing the Ballast: This step is absolutely critical during retrofits. You must remove or bypass existing HID ballasts completely. Old Metal Halide ballasts cannot drive modern fixtures. You must wire the new fixture directly to line voltage. Leaving the ballast inline pushes modified voltage to the new driver. This mistake destroys the internal electronics instantly.
Standard 3-Wire Connection: Strip your wires cleanly to the manufacturer's specified length. Connect the black wire to the Line (Hot) source securely. Connect the white wire to the Neutral line. Finally, secure the green or yellow wire to the Ground. Use wet-location rated wire nuts for every single connection. Push the connected wires neatly into the pole compartment.
0-10V Dimming Lines: You will notice secondary wires on modern fixtures. These are typically purple and pink (or gray in older models). They control 0-10V dimming functions. If you do not use smart controls, you must cap these wires. Cap them independently using small wire nuts. Do not tie them together. Tying them together forces the fixture into a permanently dimmed state.
Photocell Integration: Many fixtures use modular twist-lock photocells. You will install these into standard NEMA receptacles on the fixture top. Align the sensor window toward the North carefully. North-facing sensors provide accurate dusk-to-dawn operation. They avoid false triggering from direct morning or evening sunlight.
Proper physical securing prevents dangerous site accidents. You must treat the mechanical installation as rigorously as the electrical wiring. Gravity and wind shear test every installation constantly.
Commercial exterior fixtures are extremely heavy. You face a serious logistical reality when lifting them 20 feet up. You should utilize a bucket truck or an articulated scissor lift. Never attempt to carry heavy commercial fixtures up an extension ladder. Tie off the fixture using a safety lanyard during the hoisting process.
You must use a calibrated torque wrench. Tighten all bolts to the exact specifications provided by the manual. Under-tightening risks sudden wind-shear failure during storms. Over-tightening can crack cast-aluminum fixture housings. A cracked housing lets moisture enter the driver compartment. Either mistake compromises the installation integrity completely.
Moisture ruins electrical connections very quickly. You must ensure all silicone gaskets seat properly against the housing. Utilize wet-location rated terminal blocks inside the pole base. Fill any exposed external conduits using electrical-grade silicone sealant. Check the optical lenses for factory seals before concluding the mechanical work.
Always perform a standardized testing sequence before leaving the site. First, restore power at the breaker cautiously. Step back from the pole during initial power-up. Second, test any manual overrides on your control systems. Finally, cover the photocell using thick black tape. This simulates darkness and triggers the fixture. Remove the cover once you verify full illumination.
Smart procurement directly improves your installation efficiency. You should evaluate fixtures based on their physical deployment ease. Paying slightly more for smart design saves thousands in labor.
Buyers should prioritize fixtures featuring tool-less entry compartments. Look for heavy-duty spring clips instead of tiny screws. You also want pre-installed wiring pigtails. These features reduce hourly labor significantly. Electricians spend less time wrestling with small parts on a windy lift.
Compare factory-installed motion sensors against field-installed modular components. Factory integration guarantees perfect weatherproofing out of the box. It also eliminates secondary wiring steps on-site. Conversely, field-installed modular sensors offer easier maintenance later. Choose the option matching your long-term facility capabilities.
Tier-one warranties demand strict installation compliance. They require irrefutable proof of professional installation. You must follow all NEC standards meticulously throughout the project. Sloppy wiring voids your manufacturer protection immediately. Document your torque settings and wiring tests using photographs.
Select lighting vendors very carefully. Look for companies providing clear photometric layouts upfront. Demand dedicated technical support channels available during your installation hours. Comprehensive mounting brackets also streamline the project immensely. Good vendors make contractor jobs much easier.
Successful area lighting upgrades depend equally on hardware quality and execution rigor.
Bypassing legacy ballasts remains your most critical electrical risk-mitigation step.
Verifying pole structural integrity prevents catastrophic physical failures over time.
Always cap unused dimming wires independently to ensure continuous stable light output.
Consult a commercial lighting specialist today. Review your site plan and verify pole compatibility thoroughly. Request a detailed quote for contractor-friendly fixtures to jumpstart your next upgrade safely.
A: Yes. You absolutely must bypass the legacy HID ballast. Modern LED fixtures require direct line voltage. Leaving the ballast in the circuit pushes incorrect voltage to the new driver. This instantly destroys the new fixture and voids your warranty. Always wire directly from the breaker line to the new fixture.
A: Yes, you can reuse existing poles if they remain structurally sound. You must match the mounting hardware to the existing tenon size. Additionally, you must verify the pole can handle the weight and EPA wind load of the new fixture. Inspect the pole base for severe rust before proceeding.
A: These secondary wires control the 0-10V dimming functionality. If you use a compatible dimming switch, connect them accordingly. If you do not use dimming, you must cap each wire independently using wire nuts. Do not tie them together. Leaving them exposed or connected causes electrical shorts and forces a dimmed state.
A: Mounting height typically ranges between 15 and 30 feet. The exact height depends on your required lumen output and desired foot-candle spread. Lower heights provide focused task lighting. Higher mounts cast broader illumination but require higher lumen packages. Always consult a photometric layout to determine the optimal height.

