


Views: 0 Author: Site Editor Publish Time: 2026-09-18 Origin: Site


Improper job site lighting compromises worker safety immediately. It delays project timelines, reduces work quality, and significantly increases your liability risk. A wobbly or poorly positioned fixture acts as both a functional bottleneck and a severe physical hazard on busy construction sites. You need a highly reliable setup to ensure maximum visibility without endangering the crew operating nearby. We provide a definitive, step-by-step framework for assembling and positioning your equipment correctly. You will learn how to guarantee optimal illumination, strict electrical safety, and superior mechanical stability. Site managers, contractors, and serious DIYers will gain practical, actionable insights. You can use these proven principles for evaluating new equipment or deploying newly purchased units safely. Following this comprehensive guide ensures your job site remains bright, fully compliant, and hazard-free.
Proper setup relies on maximizing the tripod’s footprint-to-height ratio to prevent tip-overs.
Routing power cords properly is as critical as the lighting itself to maintain site compliance and prevent electrical hazards.
Not all stand work lights are rated for outdoor setup; verifying IP (Ingress Protection) ratings before deployment is mandatory.
High-quality units feature quick-release locking mechanisms and die-cast aluminum housings to streamline setup and heat dissipation.
Before you begin assembly, always verify your equipment matches the environmental demands of your job site. Deploying the wrong fixture can lead to catastrophic electrical failures. We highly recommend conducting a brief hardware audit before every major project phase.
Differentiate between indoor-only units and site-ready outdoor models. You must check the IP (Ingress Protection) rating carefully. Models rated IP20 only belong indoors. For outdoor jobs exposed to rain or heavy dust, mandate an IP65 or higher rating. An IP65 rating ensures dust cannot enter the housing. It also means low-pressure water jets will not damage the internal electronics. This distinction prevents dangerous short circuits during sudden weather changes.
High-lumen LED models require significantly less cooling clearance than legacy halogen fixtures. This impacts where you can safely position them near walls or finished ceilings. However, LED chips still generate heat at the rear heat sink. They require proper ventilation to maintain their lifespan. Always read the manufacturer specifications regarding maximum ambient operating temperatures.
Evaluate your tripod materials carefully before you set up. Heavy-duty steel or industrial-grade aluminum bases are strictly required for uneven terrain. Lightweight plastics are only suitable for controlled, flat indoor environments. If your site features debris or unpaved ground, you must rely on rigid metal construction. A high-quality Stand Work Light provides the structural integrity needed for demanding commercial spaces.
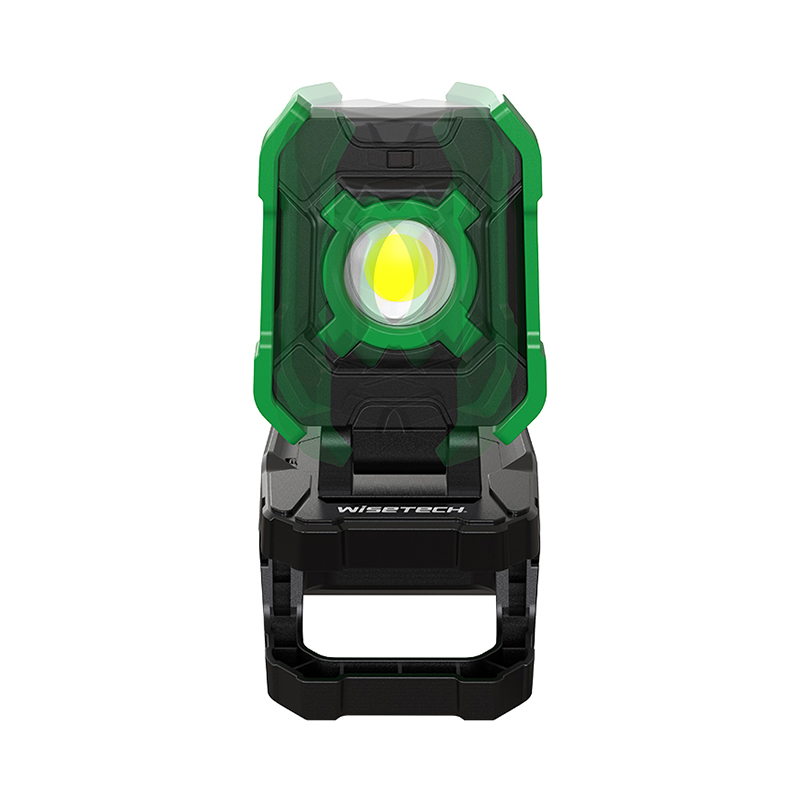
Define the anatomy of a reliable unit. This knowledge helps you identify quality during the evaluation or unboxing phase. Recognizing subpar materials early prevents equipment failure mid-project.
A sturdy center column, folding legs, and slip-resistant rubberized feet form the foundation. Rubber feet prevent scratching on finished floors. They also provide crucial grip on slick concrete surfaces.
Contrast friction knobs against quick-release cam latches. Friction knobs often strip over time. Workers tend to overtighten them, ruining the threads permanently. Quick-release latches offer faster setup and better securement. They snap firmly into place, requiring no twisting force.
Look for robust U-brackets offering omnidirectional tilt. This design allows you to aim the beam exactly where you need it. Quality units feature robust heat sinks and tempered glass or polycarbonate lenses. These durable lenses protect the fragile LED arrays from accidental tool strikes.
Professional models use heavy-gauge grounded cables. Expect 14 AWG or thicker wires for heavy-duty applications. Integrated cord wraps prevent tripping hazards during transport. Proper cable management protects the internal wiring from getting yanked out of the housing.
Component Quality Comparison Chart
Component | Consumer-Grade Specs | Commercial-Grade Specs |
|---|---|---|
Tripod Base | Thin plastic or hollow aluminum | Heavy-duty steel or die-cast aluminum |
Locking Mechanisms | Threaded friction knobs | Quick-release cam latches |
Lenses | Standard thin glass | Impact-resistant polycarbonate or tempered glass |
Cabling | 18 AWG ungrounded | 14 AWG or thicker, grounded (SJTW) |
Follow a methodical approach to ensure stability and safety. Haphazard assembly usually results in a top-heavy fixture. This creates an immediate tipping hazard that endangers everyone nearby.
Establishing the Base: Place the unit on the flattest available surface. Extend the tripod legs to their maximum outward capacity. Do this before extending the vertical mast. Maximum leg extension ensures the widest possible footprint.
Securing the Mast Height: Raise the lowest telescoping section first. Keep the heaviest part of the assembly as low as possible. This maintains a low center of gravity. Lock all collars securely before raising the next section.
Mounting the Light Heads: If your heads are detachable, mount them onto the T-bar or top bracket next. Ensure you use locking washers. They prevent the heads from drooping due to site vibration. Hand-tighten all securing bolts firmly.
Adjusting the Angles: Angle the heads before plugging the unit in. Point them 45 degrees downward for floor tasks. Alternatively, bounce them off a ceiling for diffused ambient room lighting. This technique reduces harsh glare for workers in the area.
Every reliable Work Light requires this exact deployment sequence to guarantee safety on site.
Maintaining electrical safety is just as critical as preventing physical tip-overs. Poor cable management causes severe accidents on busy sites.
Never suspend power cords mid-air. Run cords flat along the edges of your room. Secure them using high-visibility tape or robust cable ramps. This eliminates dangerous trip hazards. Suspended cables can catch on passing machinery, pulling the entire fixture down onto workers.
Cable length, gauge, and amperage drop share a direct relationship. Using undersized cords causes voltage drops over long distances. This starves the internal components of power and damages LED drivers. Emphasize using outdoor-rated SJTW extension cords for job site resilience. These cables resist moisture, abrasion, and prolonged UV exposure.
Even LED units generate concentrated heat at the heat sink. Establish a minimum clearance rule. Keep the fixture at least three feet away from combustible materials, poly sheeting, or fresh paint. Paint fumes and plastic sheeting can ignite or melt if placed directly against a hot aluminum housing.
Even premium equipment encounters occasional deployment challenges. Knowing how to troubleshoot these problems keeps your project moving smoothly without unnecessary downtime.
Handling setup on stairs or graded dirt requires specific tactics. Use leg-leveling features if your model includes them. These adjustable legs compensate for steep inclines. For standard tripods, securely sandbag the center column. Place heavy sandbags directly over the central base junction to anchor it firmly against gravity.
Diagnose power issues systematically. Check for a loose job-site generator connection first. Vibrations often shake plugs loose. Next, look for a pinched cord inside the tripod folding mechanism. Crushing the internal wires causes intermittent shorts. Finally, rule out internal LED driver failure. If the driver fails, you will likely need to replace the entire light head.
Address height adjustment collars failing to hold weight immediately. Slipping masts pose a serious safety risk. A sudden drop can shatter the lenses or crush a worker's hand. If tightening the cam latches no longer holds the mast, the locking mechanism is compromised. This symptom often indicates it is time to upgrade your equipment to a commercial-grade unit.
Setting up your lighting correctly relies heavily on physics and safety protocols. You must maximize your base width, minimize top-heavy extensions, and manage electrical lines carefully. A well-placed fixture dramatically improves site efficiency and protects your crew.
Consider these essential next steps to improve your site illumination:
Audit your current site lighting setups immediately.
Check your existing inventory for stripped knobs, wobbly bases, or poor weather resistance.
Train your crew on proper cable routing and heat clearance protocols.
Evaluate commercial-grade LED upgrades designed for rapid, secure deployment if your current gear falls short.
A: The legs should be fully extended until the support braces are perfectly horizontal to ensure the widest possible footprint and maximum tip resistance.
A: Only if the specific model carries an IP65 or higher rating. Check the manufacturer's plate; if it is IP44 or unrated, it must be protected from direct water exposure.
A: This usually indicates a compromised power cord (often pinched in the folding mechanism), moisture in the plug housing, or too many high-draw devices daisy-chained on a single circuit.
A: Angle the light head toward a light-colored wall or ceiling to create diffused, bounced light, or select a work light model with a frosted polycarbonate diffuser rather than clear glass.

