


Views: 0 Author: Site Editor Publish Time: 2026-09-23 Origin: Site


A misconfigured Flood Light compromises your site safety instantly. It creates critical blind spots by failing to activate when intruders approach. Alternatively, it causes constant nuisance tripping by turning on for every passing breeze or small animal. Setting the sensor correctly matters just as much as installing the hardware itself. Poor calibration routinely leads to severe light pollution and frustrating neighbor disputes. It also accelerates battery and bulb fatigue, leaving you unprotected when you need it most. We provide an objective, step-by-step methodology here to fix these common issues. You will learn exactly how to tune complex sensor dials for optimal performance. We will help you identify hidden placement flaws currently defeating your security system. Finally, you will thoroughly evaluate whether your current hardware truly meets your specific operational requirements or demands an immediate upgrade. Following these guidelines ensures consistent, reliable illumination around your property every single night.
Three Core Variables: Precise calibration relies on balancing Sensitivity (Range), Time (Duration), and Lux (Ambient Light).
Placement Supersedes Settings: No configuration can fix a sensor aimed at an HVAC exhaust or reflective surface.
Hardware Limitations: Older units may lack micro-adjustments; consistent false triggers often indicate a need for hardware evaluation rather than recalibration.
Validation: Walk-testing under realistic nighttime thermal conditions is mandatory for baseline security compliance.
Modern security lighting relies on precise passive infrared (PIR) technology. These systems detect moving thermal signatures against background temperatures. You control this complex behavior using three primary adjustment dials. Understanding how each dial influences the final outcome prevents endless trial and error.
Function: This control adjusts the passive infrared thermal detection range. It determines how far the lens "looks" for heat variations.
Outcome: It dictates whether the light catches a large vehicle at 50 feet or ignores it to focus on a person at 15 feet. Accurate range control keeps the activation zone strictly on your property.
Settings Strategy: Always start low and dial up gradually. Many users mistakenly maximize this setting immediately. High sensitivity in compact residential zones inevitably causes false triggers from distant street traffic or swaying trees.
Best Practice: Mark the boundary where you want detection to stop. Stand there while an assistant increases the sensitivity until the fixture triggers.
Function: This setting controls the illumination length post-trigger. It dictates how long the bulbs remain active after motion ceases.
Outcome: It balances active security deterrence with long-term energy efficiency. Longer times provide sustained visibility. Shorter times save electricity and reduce neighborhood annoyance.
Settings Strategy: We recommend 30 to 60 seconds for transient areas like side alleys or driveways. Active work zones, such as outdoor loading docks or tool sheds, require 2 to 5 minutes to prevent sudden darkness during tasks.
Common Mistake: Setting the timer to maximum creates a nuisance. If a cat triggers the system, it leaves the area illuminated unnecessarily for ten minutes.
Function: This dial determines the exact darkness threshold required for activation. It reads the surrounding environmental light levels.
Outcome: It prevents daytime activation. This conserves significant energy and extends the lifespan of the fixture components.
Settings Strategy: You must test this setting exactly at dusk. The dial frequently uses simple sun and moon icons. It requires careful micro-tuning to avoid early evening misfires. If you set it too close to the sun icon, the system triggers during late afternoon shadows.
Chart: Sensor Dial Functional Overview
Dial Name | Primary Function | Operational Outcome | Standard Baseline Setting |
|---|---|---|---|
SENS (Sensitivity) | Adjusts thermal detection range | Defines the outer perimeter limit | 30% to 50% capacity |
TIME (Duration) | Sets active illumination time | Balances visibility and energy use | 60 seconds |
LUX (Ambient Light) | Sets minimum darkness requirement | Prevents wasteful daytime burning | Midpoint between Sun/Moon |
Randomly twisting dials rarely yields reliable results. You need a structured, sequential approach. This five-step methodology isolates each variable. It ensures you configure the detection zone perfectly according to your specific environment.
Step 1: The Initial Reset & Aim. First, power down the unit completely. Turn all three dials to their dead-center positions. Angle the PIR sensor head downward approximately 10 to 15 degrees. This angle prevents the lens from scanning the distant horizon for irrelevant thermal activity. It focuses the detection energy squarely on the ground beneath.
Step 2: The Daylight Walk Test. Set the LUX dial entirely to daylight (the sun icon). Set the TIME dial to its absolute minimum. Walk across the intended detection field. You must walk perpendicular to the sensor face. Do not walk straight toward it. Verify the general coverage area functions properly during daylight hours.
Step 3: Range Calibration. Walk to the exact perimeter where you want detection to begin. Have a partner adjust the SENS dial incrementally upward. Stop adjusting the moment the system triggers. This locks the boundary. It stops the fixture from reacting to activity beyond your property line.
Step 4: Duration Lock-in. Now adjust the TIME dial to your desired operational length. Turn it up slightly for an initial 60-second test. Trigger the system once more. Time the duration with a stopwatch. Adjust further if your security protocol requires longer sustained visibility.
Step 5: Dusk Calibration. Return to the installation site precisely at twilight. Turn the LUX dial completely toward the dark (moon) setting. Slowly rotate it backward toward the sun setting until the light activates. This sets the perfect ambient darkness level for nightly operation.
Even perfect dial calibration fails if you install the hardware in a compromised location. PIR technology reacts to environmental stimuli. You must understand how physical surroundings influence thermal detection patterns. Fixing poor placement often solves erratic behavior instantly.
PIR sensors detect rapid heat changes. They do not perceive actual physical objects. Proximity to dryer vents creates massive problems. A sudden blast of warm air from a laundry exhaust mimics human movement perfectly. Air conditioning units also exhaust significant heat. They trigger unwanted activations repeatedly throughout the night. Relocate sensors away from these thermal exhaust zones.
Infrared heat signatures bounce off reflective materials. Swimming pools, large glass windows, and stark white vinyl fences reflect thermal energy. A car passing down the street might cast a thermal reflection off a window directly into your sensor lens. This causes highly unpredictable activations. Angle the sensor head away from major reflective bodies to mitigate this risk.
Sensors struggle significantly with movement coming straight at them. The internal PIR lens uses faceted zones. Movement triggers the system when a heat signature crosses horizontally from one zone to another. A person walking directly toward the lens might cross very few zones. Always outline requirements for angling sensors across entry paths. Position the unit so intruders must walk across its field of view laterally.
Mounting height severely impacts thermal resolution. The ideal height typically ranges from 8 to 10 feet. Higher mounts dilute thermal reading accuracy. The sensor loses the ability to distinguish between a small animal and a human at extreme distances. Conversely, lower mounts create immediate tampering risks. Intruders can easily reach up and mask the lens with tape or spray paint.
Sometimes, calibration cannot save a failing system. Hardware components degrade over time. You must learn to recognize when adjusting dials becomes a waste of time. Identifying a failing unit allows you to upgrade your security posture effectively.
You should expect stable performance after executing the configuration steps above. Adjustments must stabilize behavior once you rule out placement risks. If the system still false-triggers wildly, the internal PIR logic may be permanently degraded. Sunlight UV exposure breaks down the plastic fresnel lens over the years. This scatters incoming thermal signals and destroys accuracy.
When shortlisting new fixtures, look for advanced capabilities. Key features include dual-zone detection fields. These systems use overlapping PIR sensors to eliminate blind spots entirely. Demand adjustable head gimbals. They allow you to point the lamps independently from the sensor body. Integrated LED panels offer superior lumen output compared to outdated halogen bulbs. They also run significantly cooler.
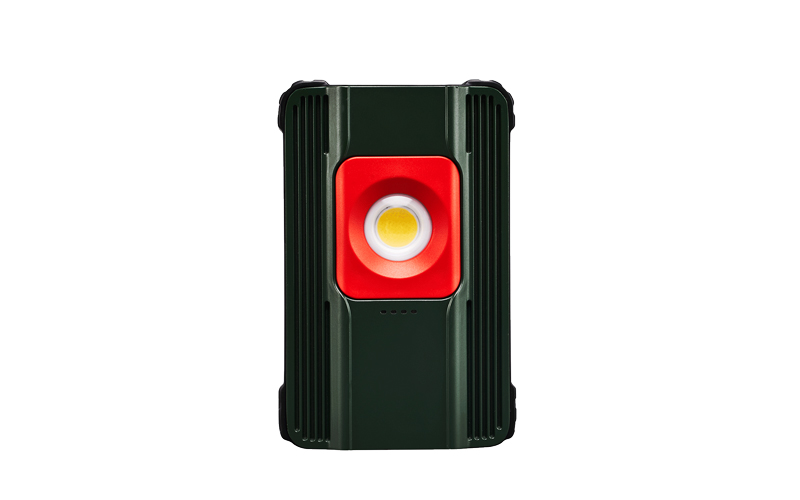
Permanent fixtures sometimes fail in highly dynamic environments. Construction sites or seasonal storage yards change layout frequently. If fixed lighting fails due to changing physical obstacles, evaluate adding a Motion Sensor Work Light. This provides flexible, localized, high-lumen security during specific projects. You can move them easily to cover new temporary site changes without wiring new permanent fixtures.
Modern smart sensors offer app-controlled calibration. They provide digital zonal masking. You can draw boxes on a screen to tell the sensor where to ignore motion. They also offer schedule-based sensitivity. You can program lower sensitivity during early evening hours and higher sensitivity after midnight. However, assess the ROI carefully. Traditional analog dials often provide superior long-term reliability in harsh weather conditions without requiring Wi-Fi connectivity.
Effective security lighting respects community boundaries. Over-illuminating your property creates friction with neighbors. It can also violate municipal codes. You must implement strategies to keep your security footprint strictly localized.
You must ensure high-lumen outputs do not violate local light pollution ordinances. Wide sensor arcs often trigger lamps unnecessarily. Bright beams crossing property lines irritate neighbors. This constitutes light trespass. Point fixture heads sharply downward. Use shielding to direct photons exactly where you need them. Respecting dark sky principles improves community relations.
Sometimes dial calibration cannot narrow the detection field enough. You must resort to physical masking. Use dark electrical tape to cover the extreme edges of the PIR lens. This physically blocks unwanted detection zones like nearby street traffic or a neighbor's driveway. Many premium units include factory-provided visors. Snap these plastic covers over the lens to narrow the detection angle mechanically.
Security systems require maintenance. Document your final settings in a maintenance log. Schedule a bi-annual lens cleaning. Dirt and pollen build up on the sensor face, drastically reducing sensitivity. Additionally, perform a seasonal recalibration check. Seasonal temperature changes drastically affect PIR sensitivity. A setting that works perfectly in hot summers may become hyper-sensitive during freezing winter nights.
Proper configuration shifts your exterior lighting from an unpredictable nuisance to a reliable security asset. Mastering the SENS, TIME, and LUX dials allows you to control exact operational parameters. Recognizing placement risks like thermal interference prevents endless frustration. Knowing when to upgrade failing hardware ensures your perimeter remains secure year-round.
Your actionable next step is immediate. Conduct a baseline walk-test tonight using the five-step process outlined above. Assess your detection boundaries critically. If false triggers persist despite strict tuning and optimal placement, the internal sensor is likely degraded. In that scenario, review our buyer's guide to begin shortlisting modern, dual-sensor security fixtures to restore your site safety.
A: Several common issues cause continuous illumination. First, check if the manual override mode is accidentally engaged. Double-flicking the wall switch quickly often locks the unit "on." Second, extreme temperature fluctuations can temporarily freeze the internal PIR logic. Finally, a faulty internal relay switch may be stuck. Turn off the breaker for ten minutes to reset the system. If it remains stuck upon powering up, replace the unit.
A: No, standard PIR sensors cannot work through glass. Glass acts as an insulator against infrared radiation. It effectively blocks the thermal heat signatures that the sensor needs to detect movement. If you place a sensor indoors pointing out through a window, it will only detect reflections or movement inside the room. Outdoor monitoring requires exterior hardware placement.
A: Seasonal weather heavily impacts PIR technology through the "delta-T" effect. Sensors measure the contrast between human body heat and ambient air temperature. Winter makes sensors hyper-sensitive because the contrast between a warm person and freezing air is massive. Summer makes them sluggish. When ambient air approaches 98 degrees, the sensor struggles to differentiate a human from the background heat.
A: Face the sensor head slightly downward, typically between 10 to 15 degrees. It should intersect the primary walkway laterally. Do not point it straight down the path. You achieve maximum trigger reliability when a subject walks perpendicularly across the faceted detection zones rather than moving directly toward the lens face.

