


Views: 0 Author: Site Editor Publish Time: 2026-10-11 Origin: Site


A poorly calibrated security light often stays on all night. It creates severe nuisance glare for you and your neighbors. Alternatively, it fails to activate when it actually matters most. Proper configuration requires much more than turning dials randomly. You must understand local environmental variables completely. You must also grasp specific hardware capabilities to achieve success. Furthermore, understanding Passive Infrared (PIR) limitations remains absolutely essential. Setting up your lighting correctly prevents unnecessary daily energy waste. It also ensures maximum safety for your residential or commercial property. This guide will cover the exact steps to calibrate any standard unit. We will help you identify when a sensor is permanently failing. Finally, you will learn what to look for if an upgrade is required. You can then configure your entire system with absolute confidence.
Calibration relies on three pillars: Range (Sensitivity), Time (Duration), and Lux (Ambient Light Level).
False triggers are often environmental: Improper angling toward heat sources (HVAC exhausts, reflective driveways) is the leading cause of setup failure.
Troubleshooting has limits: If a hard reset doesn’t fix a light stuck in the "on" position, the internal relay has likely failed, necessitating hardware replacement.
Application dictates the hardware: Permanent security installations require different sensor thresholds than temporary, high-activity setups like a motion sensor work light.
Setting a light blindly wastes valuable electricity. It also creates critical security gaps around your perimeter. Intruders can easily exploit these unlit blind spots. High-quality fixtures separate these controls for granular accuracy. Every standard Flood Light features dedicated control dials. You need to understand each dial thoroughly before beginning. This technical knowledge forms the foundation of reliable illumination. Let us examine the specific parameters you must adjust.
Passive Infrared (PIR) technology drives most modern security fixtures. It does not actually see optical changes. Instead, it detects moving heat signatures across specific zones. The sensor dome contains multiple segmented detection fields. When a warm object crosses from one zone into another, the sensor triggers. It looks for a sudden temperature differential. This explains why stationary warm objects do not activate the system constantly.
The Range dial controls the exact distance of this detection. It dictates how far the sensor reaches into your yard. Setting this dial too high causes massive frustration. It catches passing cars on the street easily. It might even detect pedestrians walking on public sidewalks. Setting it too low creates an entirely different problem. It completely misses intruders until they reach your door. You must dial this in precisely for optimal security.
The Lux dial acts as an environmental gatekeeper. It dictates how dark it must be before activation occurs. It strictly governs the motion sensor behavior based on sunlight. Prevents daytime energy waste efficiently and automatically. You do not want brilliant illumination during sunny afternoons.
It provides zero security benefit during daylight hours. You should find the exact twilight moment you prefer. Summer evenings differ greatly from winter afternoons. You might need seasonal adjustments for perfect operation. Proper Lux calibration saves bulb lifespan significantly over time. It guarantees your system only works when darkness falls.
The Time parameter manages the cooldown phase. It determines how long the light remains illuminated after motion ceases. You might feel tempted to set this to maximum duration. However, extremely long durations often annoy neighbors unnecessarily. The ideal security baseline is typically one to three minutes.
This provides enough time to deter a trespasser. It also gives homeowners enough light to unlock a front door safely. Once the heat signature leaves the detection zone, the countdown begins. If new motion occurs, the internal timer resets automatically. Shorter times preserve LED driver health efficiently.
Implementation requires careful planning and execution. We must emphasize physical safety above all else. You will likely need a ladder for this process. Always ensure maximum ladder stability on flat ground. Follow established safety guidelines for elevated work. Avoid any live wire adjustments during this calibration phase. Do not touch electrical connections unless you disconnect main power first. Proper preparation makes the actual calibration incredibly straightforward.
Physical orientation dictates the baseline success of your hardware. You must physically tilt the sensor head slightly downward. We recommend a precise angle between fifteen and thirty degrees. This specific tilt limits the horizon view effectively. It focuses the infrared detection on your immediate target zone.
Pointing it straight ahead captures too much background noise. It will see distant trees moving in the wind. Pointing it too far down restricts the range severely. You must find the optimal geometric balance. Adjust the separate LED lamp heads outward to flood the zone. Keep the actual sensor dome aimed squarely at the anticipated entry path.
You must establish the true physical perimeter through testing. Turn the Lux dial completely to the "Daylight" or "Sun" symbol. Turn the Time dial fully to "Test" or the absolute minimum seconds. This configuration forces the unit to trigger even in bright daylight. It also turns off quickly to allow rapid repeat testing.
Walk laterally across the intended detection field at a normal pace.
Do not walk directly toward the sensor dome itself.
Mark the exact spot where the illumination triggers.
Adjust the Range dial up or down based on this activation point.
Repeat the walking process until the boundary aligns perfectly with your property line.
Walking laterally is extremely important for PIR technology. The sensor detects heat moving across its segmented zones. Walking straight at it minimizes zone-crossing events. This causes delayed activation and poor distance estimates.
Once you lock the physical range, wait until dusk approaches. Return to the fixture when ambient light reaches your preferred darkness level. Turn the Lux dial slowly away from the daylight setting. Stop turning it the exact moment the bulb illuminates. You have now calibrated the perfect twilight threshold.
Finally, set the Time dial to your final desired duration. Rotate it to the two-minute mark for standard residential security. Switch the system back to its normal operating mode. Your fixture is now completely customized for your specific environment. It will operate flawlessly going forward.
We present an actionable, error-prevention framework here. Industry professionals developed these guidelines from real-world installation failures. Following these rules prevents ninety percent of common operational headaches. They ensure maximum efficiency and extended hardware longevity.
Do: Mount the fixture eight to ten feet off the ground. This height guarantees optimal PIR spread across the yard.
Do: Aim the sensor across the expected path of foot traffic. Sensors detect lateral movement much better than straight-on movement.
Do: Keep the sensor lens clean from dust and spider webs regularly.
Don't: Aim the sensor at heat-reflective surfaces like swimming pools or bright concrete.
Don't: Point the dome anywhere near HVAC exhaust vents or dryer vents.
Don't: Overlap the sensor's field of view with an adjacent streetlamp. The streetlamp glare will override your carefully tuned Lux settings.
Practice Category | Specific Action Requirement | Technical Rationale |
|---|---|---|
Mounting Height | Install at 8 to 10 feet. | Maximizes PIR zone geometry. Prevents easy physical tampering by intruders. |
Angle Adjustment | Tilt downward by 15-30 degrees. | Cuts off horizon interference. Focuses heat detection on the immediate property line. |
Heat Avoidance | Keep away from HVAC and pools. | Sudden thermal drafts cause phantom triggers. Reflective heat confuses the infrared logic. |
Light Interference | Avoid streetlamp overlap. | External artificial light prevents the Lux threshold from activating at dusk. |
You must bridge the gap between simple configuration errors and total hardware failure. Sometimes, persistent issues have absolutely nothing to do with your dials. Components degrade over time due to weather exposure. We want to help you evaluate if your current solution is inadequate. Recognizing terminal failure saves you hours of frustrating calibration attempts.
Software glitches occasionally cause fixtures to lock up. A hard reset is the industry-standard first response. Go to the interior wall switch controlling the fixture. Turn off the power completely at the switch or the main breaker. Leave it powered down for thirty to sixty seconds. Turn the power back on to clear the volatile memory. The system will usually enter a brief warm-up phase. Afterward, it should resume normal automated operations. If this fails, you face a more serious mechanical issue.
You must recognize the symptoms of physical degradation quickly. The most common failure mode involves a light staying on permanently. If it remains illuminated despite a hard reset, suspect internal damage. This points directly to a fused internal relay. Cheap consumer-grade models suffer from this frequently due to voltage spikes. The electrical contacts weld themselves shut permanently.
Water ingress inside the PIR dome represents another terminal condition. Look closely at the plastic sensor cover during daylight. Condensation or visible water droplets indicate a compromised IP rating. The internal circuitry will corrode rapidly in these conditions. No amount of dial turning can fix water damage. You must replace the entire unit immediately for safety.
If upgrading becomes necessary, shop carefully for professional features. Look strictly for commercial-grade IP65 ratings to prevent future water damage. Ensure the new unit features adjustable LED heads. These heads must articulate independently of the stationary sensor dome. This allows you to aim light into corners while pointing the sensor elsewhere. Finally, check for robust warranty terms indicating manufacturer confidence.
We must differentiate clearly between fixed security needs and active task lighting. They serve entirely different purposes around a property. Using the wrong tool for the job guarantees poor results. You should match the specific hardware category to your actual application.
These units are best for permanent perimeter defense. They excel at monitoring driveways, side alleys, and backyard gates. They provide excellent long-term surveillance deterrence. You need them to deliver "set and forget" precision constantly. Once calibrated properly, they guard the property silently for years. They prioritize sudden, startling bursts of intense illumination. This sudden flash frightens intruders effectively. It also alerts you immediately to unexpected nighttime visitors.
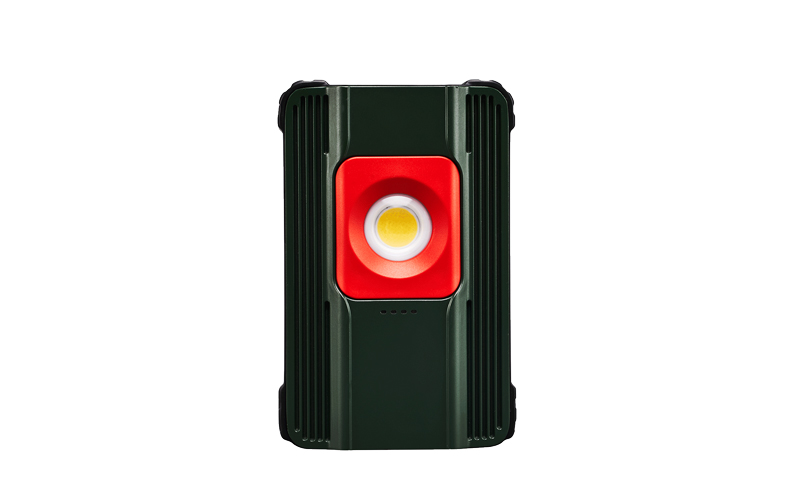
Temporary job sites require a completely different approach. Garages, workshops, and active construction areas demand utility over surveillance. You do not want a light shutting off while you carry heavy tools. Consider using a dedicated Motion Sensor Work Light for these dynamic environments. It functions as a distinct solution tailored for active human presence.
When shortlisting this type of utility gear, look for different specifications. Prioritize high impact resistance for accidental drops. Seek maximum portability for moving between different job sites. They feature wider, closer-range motion detection algorithms. This logic prioritizes continuous workspace illumination over sudden security flashes. They keep the work area safely lit as long as you remain active nearby.
Proper setup requires a highly systematic approach every single time. You must balance Range, Lux, and Time carefully. You must combine these settings with a deep understanding of the local environment. Test your perimeter boundaries meticulously using the daylight testing method. Angle the hardware downward to avoid horizon interference.
Keep in mind that hardware limitations are very real. No amount of dial-turning will fix a poorly placed unit. It also cannot fix an internally broken, water-damaged sensor. Encourage yourself to audit your current hardware honestly. If you deal with persistent failures, stop tweaking broken equipment. Consider evaluating professional-grade or task-specific lighting solutions instead. Upgrading to the right tool permanently resolves nighttime visibility issues.
A: You can usually activate a manual override using the connected wall switch. Flick the light switch off and then back on within one to two seconds. This rapid toggle bypasses the sensor logic. The light will stay on continuously. To reset it back to automatic mode, turn the switch off for one minute, then turn it back on.
A: PIR sensors detect heat moving across segmented zones. They do not detect the wind itself. However, wind blows warm tree branches into the detection field. Heavy gusts also displace ambient warm air suddenly from nearby vents. These shifting thermal patterns cause false triggers. We strongly suggest lowering the sensitivity dial slightly.
A: The standard recommended height is eight to ten feet above the ground. Higher installations dilute sensor effectiveness and reduce detection range drastically. Lower installations are highly prone to physical tampering. Lower mounting also increases false triggers from neighborhood pets or small

