


Views: 0 Author: Site Editor Publish Time: 2026-09-08 Origin: Site


Homeowners usually replace exterior lighting when a fixture fails completely, sustains severe weather damage, or simply becomes hopelessly outdated. Upgrading from inefficient, heat-heavy halogen bulbs to modern LEDs instantly revitalizes your property's exterior. Working around exterior electrical wiring is never just a casual weekend chore. You must adhere to strict safety protocols. You also need to apply correct weatherproofing techniques. A poorly sealed connection easily invites moisture. This inevitably leads to dangerous short circuits or rapid hardware degradation. Fortunately, replacing your setup is highly manageable when you follow the right steps. This guide provides a clear, code-compliant framework for safely removing an old unit. We will help you select a high-performance replacement suited to your specific space. Finally, you will learn exactly how to execute a weatherproof installation built to withstand the elements over time.
Safety first: Never rely solely on a wall switch; always shut off power at the main breaker and verify with a non-contact voltage tester before touching wires.
Upgrade strategically: Replacing older fixtures with an integrated LED Flood Light reduces energy draw, lowers heat output, and eliminates the risk of bulbs rusting into the socket.
Task vs. Security: Match the fixture to the zone—use motion-sensor security lights for broad coverage, or an Outdoor LED Work Light for focused illumination in driveways and shop exteriors.
Weatherproofing is non-negotiable: Failing to properly install the mounting gasket and apply silicone caulk is the leading cause of premature exterior fixture failure.
You must clearly define the threshold between a simple fixture swap and a complex electrical repair. A fixture swap utilizes healthy, existing wiring. You simply remove old hardware and attach new hardware. A complex repair addresses unsafe underlying electrical conditions. Knowing the difference protects your home and your personal safety.
You can confidently tackle this DIY project under specific conditions. First, check your existing junction box. It must feel completely secure against the siding or masonry. Next, examine the house wires. Modern electrical systems include a dedicated ground wire. Finally, ensure you have a clearly labeled breaker panel. You must know exactly which switch controls your exterior circuits.
Sometimes, calling a licensed electrician becomes absolutely necessary. Watch out for brittle, cracked, or frayed wire insulation. Older homes built before 1970 frequently lack a ground wire. You should never install modern metal fixtures on ungrounded circuits. You should also hire a professional if the junction box appears loose, heavily rusted, or completely missing. Relocating a light requires pulling new conduit through exterior walls. This specific task firmly crosses into professional territory.
Improper outdoor wiring carries immense liability. Rainwater easily penetrates bad seals. This causes instant short circuits. Unsecured wiring creates significant fire hazards. Hiring a professional costs more upfront. However, this investment entirely mitigates the severe risks of faulty outdoor electrical work.
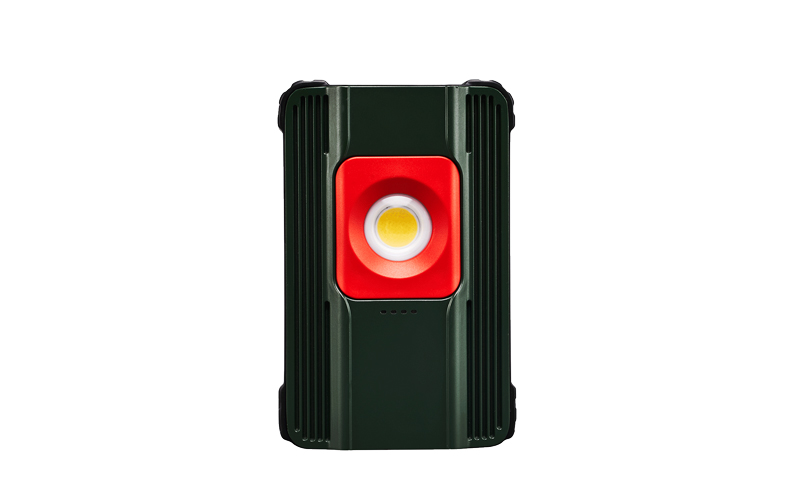
Homeowners face several options for exterior lighting upgrades. You must compare these solutions based on daily utility and long-term lifespan. Making the right choice ensures lasting performance.
The industry has heavily shifted toward integrated LED fixtures. These modern units permanently mount the light-emitting diodes directly to the internal circuit board. You cannot unscrew or replace the individual bulbs. Many buyers initially hesitate here. However, an integrated diode typically boasts a 50,000-hour lifespan. This translates to decades of normal nightly usage. The plastic or metal housing of a traditional fixture usually degrades long before an integrated LED fails. Furthermore, integrated units eliminate the common headache of traditional glass bulbs rusting and fusing into the metal socket.
You must match the fixture style to the specific zone.
Motion Sensor and Dusk-to-Dawn: These fixtures serve primarily as security deterrents. They work best for wide backyard coverage. You must carefully evaluate the sensor's horizontal detection range. Adjust the sensitivity settings accurately. Too much sensitivity triggers false alarms from passing animals.
Area and Task Lighting: Driveways, loading zones, or outdoor project spaces require continuous illumination. Consider installing an Outdoor LED Work Light. These models deliver incredible lumen density. They also feature adjustable heads. You can point the intense beams exactly where you need them most.
Understand lumens and color temperature before buying. Lumens measure absolute brightness. Color temperature, measured in Kelvin (K), dictates the visual warmth or coolness of the beam. A higher Kelvin number appears bluer and more clinical. A lower Kelvin number appears yellow and warm.
Table 1: Optimal Lumen and Color Temperature Guidelines
Application Zone | Suggested Lumen Output | Recommended Color Temperature |
|---|---|---|
Standard Patios & Decks | 1,500 – 2,500 lumens | 3000K (Warm White) |
Large Driveways & Garages | 3,000+ lumens | 4000K (Neutral White) |
Workshop Exteriors & Barns | 4,000+ lumens | 4000K – 5000K (Cool White) |
Gathering your tools beforehand streamlines the installation process. It also guarantees compliance with standard safety protocols. Never substitute incorrect materials during exterior electrical work.
Non-contact voltage tester: This essential tool senses electrical current through wire insulation. It actively saves lives.
Safety glasses: Falling debris, dust, and old caulk frequently drop into your eyes during ceiling or high-wall removals.
Sturdy A-frame ladder: Ensure you maintain three points of contact while working at heights.
Wire strippers and cutters: You need these to expose fresh copper if the old wire ends look heavily oxidized.
Phillips and flathead screwdrivers: Keep both options handy. Old mounting brackets often use slotted screws.
Exterior-rated wire nuts: Standard wire nuts allow moisture to enter over time. You must buy silicone-filled wire nuts. The internal gel surrounds the copper twist. It actively prevents oxidation and corrosion.
Exterior-grade silicone caulk: You need 100% silicone caulk. It resists UV rays and temperature extremes. You use this to seal the canopy to the wall.
Replacement mounting bracket: Most modern fixtures include a universal crossbar bracket. Always use the new bracket. Old brackets rarely align perfectly.
Follow these progressive steps to ensure a compliant and durable installation. Rushing through the wiring phase leads to inevitable hardware failure.
This represents the most critical safety phase. Never assume the wall switch provides adequate safety. Someone could accidentally flip the switch while you work. Walk directly to your main electrical panel. Turn off the specific breaker controlling the circuit. Return to the fixture. Use your non-contact voltage tester on the exterior wires before you untwist any wire nuts. Touch the tester pen to every visible wire. It should remain silent and unlit.
Unscrew the old canopy from the wall. You will likely encounter rusted mounting screws. Apply a few drops of penetrating oil. Wait ten minutes before attempting to turn them again. Once removed, inspect the junction box carefully. Look for signs of severe water intrusion. Clear out any old spider webs or insect nests. Verify the box remains firmly attached to the wall structure. It must safely support the entire weight of the new fixture.
Strip about half an inch of insulation from the fixture wires. First, connect the ground wire. This wire usually features green insulation or bare copper. Connect it directly to the grounding screw on the bracket or the house ground wire. The National Electrical Code makes this mandatory for all outdoor metal fixtures. Next, connect the neutral wires. Join the white fixture wire to the white house wire. Finally, connect the hot wires. Join the black fixture wire to the black house wire. Secure every single connection using your silicone-filled wire nuts. Tug gently on each nut. Ensure the wires hold firmly together.
Push the bundled wires neatly into the junction box. Secure the new fixture to the mounting bracket. Your new fixture includes a rubber or foam EVA gasket. Ensure this gasket seats completely flush against the wall surface. Next, grab your caulk gun. Apply a continuous bead of exterior silicone caulk around the top and both sides of the fixture base. Stop caulking at the bottom. You must leave the bottom edge completely uncaulked. This creates a weep hole. It allows any trapped internal condensation to drain out safely. Finally, restore power at the breaker panel. Test the functionality of your new setup.
Even perfect installations sometimes require slight operational adjustments. Address these common quirks quickly to maximize your lighting performance.
Re-verify the breaker status first. If the breaker remains on, check your sensor settings. Modern units often feature daylight sensors. They will not activate during sunny hours. Place a piece of dark electrical tape over the sensor to simulate nighttime. Test the lights again.
This issue usually stems from an incompatible dimmer switch left on the circuit. Most standard exterior LEDs do not support traditional incandescent dimmers. Remove the dimmer switch and install a standard single-pole switch. Alternatively, flickering indicates a loose neutral wire connection inside the junction box.
Constant false alarms frustrate homeowners immensely. Adjust the lux and distance settings carefully. Decrease the distance range if the light catches street traffic. Angle the sensor head downward. Point it deliberately away from exhaust vents, AC units, or heavily trafficked sidewalks. Heat signatures from passing cars easily trick infrared sensors.
Sometimes you only want to replace a dead bulb in an existing housing. Outdoor bulbs frequently rust and stick in their sockets. Do not force them using bare hands. Tear off a strip of duct tape. Roll it into a sticky loop. Press it against the glass face of the bulb. Use the tape loop as a handle to gain extra leverage. You can also purchase a dedicated broken-bulb extractor tool from a local hardware store. Always wear thick leather gloves when handling stuck glass components.
Replacing your exterior lighting vastly improves property safety and visual appeal. You must first verify your electrical safety conditions at the panel. Choose a purpose-built LED fixture tailored to your specific zone. Finally, strictly adhere to every weatherproofing step. Properly applied gaskets and silicone caulk guarantee longevity and prevent dangerous shorts.
Replacing an outdoor light remains a highly accessible DIY project. You simply need sound underlying house wiring and basic tools. However, you must maintain zero tolerance for skipping essential safety protocols. Electricity demands immense respect at all times.
Take action today. Evaluate your current outdoor lighting setup tonight. Measure the required lumen output for your driveway or patio space. Shortlist appropriate LED replacement models, gather your tools, and schedule your upcoming weekend upgrade.
A: Yes. You must use a weatherproof, exterior-rated electrical box. Standard indoor boxes cannot keep moisture out. Rain infiltration leads to rapid corrosion and dangerous electrical shorts. Ensure your box has an intact waterproof gasket securely fitted behind it.
A: No. The National Electrical Code requires outdoor metal fixtures to be grounded. Ungrounded fixtures pose severe shock hazards during rainstorms. If your older home lacks a ground wire, hire a licensed electrician to update the circuit safely.
A: The optimal mounting height falls between 8 and 15 feet. This specific range allows the motion sensor to detect movement accurately. Mounting it too low creates blinding glare. Mounting it too high drastically reduces the sensor's overall detection sensitivity.
A: A Flood Light produces a wide beam spread. It illuminates broad areas like driveways or backyards. A spotlight casts a narrow, highly focused beam. Spotlights work best for highlighting specific architectural details or individual landscape elements.

