


Views: 0 Author: Site Editor Publish Time: 2026-09-20 Origin: Site


Homeowners often ignore aging exterior lighting until a bulb shatters or a motion sensor entirely fails. Harsh weather conditions quickly degrade basic outdoor fixtures. Ultraviolet rays make plastic components brittle over time. Moisture damage and faulty PIR sensors eventually demand complete hardware replacements. Transitioning from high-heat halogen bulbs to modern alternatives requires more than simply twisting in a new globe. Working around active mains voltage always demands strict adherence to foundational electrical safety protocols. You will learn how to properly evaluate modern lighting setups to suit your property. This comprehensive guide provides a clear, code-compliant framework for removing old hardware and executing a secure installation. We show you exactly how to achieve a genuinely weatherproof, reliable upgrade today. Professional-grade results rely on proper sealing techniques and methodical wire handling.
Safety Absolute: Never rely solely on a wall switch; always cut power at the main breaker and verify with a non-contact voltage tester.
Modern Replacements: Upgrading to an integrated LED fixture eliminates future bulb replacements and reduces energy draw by up to 80%.
Weatherproofing is Critical: Properly sealing the mounting canopy with a foam gasket and silicone caulk prevents premature fixture failure.
Basic Wiring Logic: Standard residential installations require matching three core wires: hot (black), neutral (white), and ground (green/bare copper).
Diagnosing your existing exterior hardware prevents unnecessary spending. Differentiate between a simple burned-out bulb and a total hardware failure. Look closely at the metal contacts inside the socket. Corroded contacts often cause intermittent flickering. Cracked plastic housings allow water ingress. A faulty PIR (Passive Infrared) sensor might keep the area dark despite functional wiring. These physical defects indicate you need a full replacement rather than a quick fix.
You face several choices when selecting new exterior hardware. Bulb-based models offer initial affordability. However, they demand ongoing maintenance. Upgrading to an integrated model eliminates the hassle of climbing ladders annually. You also must decide how the system should operate. Constant security applications benefit from dusk-to-dawn sensors. Event-triggered illumination relies on sensitive motion detection. Your primary use case dictates this choice.
Several key evaluation dimensions determine long-term durability. Ingress Protection (IP) ratings tell you how well the unit resists dust and water. Fully exposed outdoor installations require an IP65 rating or higher. This rating ensures heavy rain cannot penetrate the internal circuitry. Brightness also plays a crucial role. Driveways require substantial illumination to deter intruders. Aim for 2000 or more lumens in high-traffic zones. Finally, select a color temperature suited for security. Crisp security lighting typically falls between 4000K and 5000K. This range mimics natural daylight and enhances camera visibility.
Feature | Bulb-Based Fixtures | Integrated LED Fixtures |
|---|---|---|
Upfront Cost | Generally lower initial purchase price. | Slightly higher initial investment. |
Maintenance | Requires frequent bulb changes over time. | Zero bulb changes; lasts 10-20 years. |
Energy Draw | High (if using traditional halogen bulbs). | Extremely low; highly efficient. |
Weather Resistance | Sockets are prone to moisture damage. | Fully sealed housing prevents water ingress. |
Working outdoors introduces unique implementation risks. Older properties often feature brittle, aged wires. Ultraviolet degradation ruins wire insulation. Compromised junction boxes may house hidden insect nests or moisture. These environmental factors complicate standard wiring procedures. Proper preparation mitigates these outdoor hazards entirely.
Gathering the required hardware before starting saves immense frustration. You need a reliable non-contact voltage tester. This tool remains critical for verifying dead circuits. Standard hand tools include wire strippers, needle-nose pliers, and insulated screwdrivers. Most new kits provide basic wire nuts. Keep high-quality spare nuts available just in case. Exterior-grade silicone weatherproofing sealant represents another non-negotiable supply. Never attempt this project without proper sealing materials.
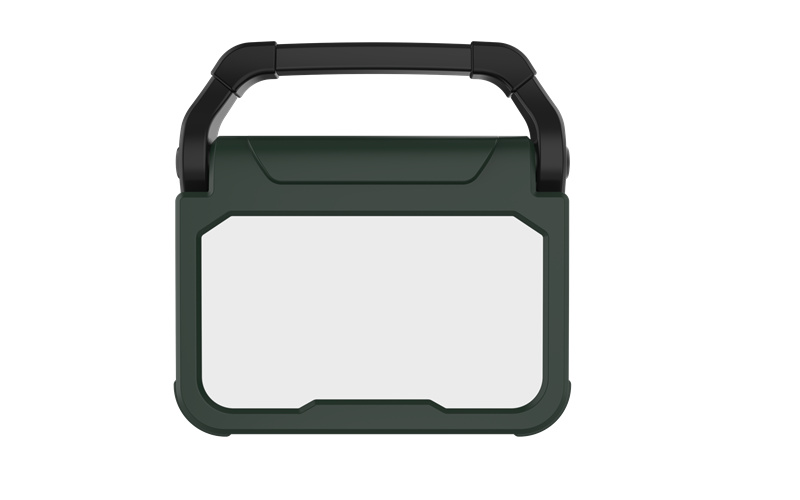
Adequate visibility ensures precise wire handling. You must turn off the circuit breaker supplying the outdoor area. The resulting darkness makes handling small wires dangerous. Position a battery-powered LED Work Light near the junction box. This tool provides safe, hands-free illumination right where you need it most. Good lighting prevents accidental shorts caused by mismatched connections.
Strict pre-install safety protocols keep you alive. Identify the correct breaker in your main electrical panel. Switch it to the off position immediately. Tag the breaker panel to prevent family members from flipping it back on. Return to the outdoor area. Probe the existing exterior housing using your non-contact tester. Confirm absolute zero voltage before touching any exposed metal or wires. Never trust a wall switch alone. Switches often control only the hot wire, leaving the circuit potentially dangerous if wired incorrectly.
Dismantling old hardware requires patience to avoid property damage. Previous installers likely sealed the canopy to the wall. Pulling forcefully will rip exterior paint or damage vinyl siding.
Breaking the Seal: Take a sharp utility knife. Carefully score the old silicone caulk bonding the canopy to the exterior wall. Cut entirely through the rubbery material.
Dismounting the Canopy: Locate the central mounting screw or cap nuts holding the unit to the crossbar. Loosen these fasteners slowly. Support the heavy metal body while removing the final screw.
Documenting the Setup: Do not disconnect anything yet. Note the current wiring configuration. Take a clear photo using your smartphone. This reference image proves invaluable later.
Disconnecting the Wires: Twist off the old wire nuts. Separate the copper connections gently. Inspect your house wiring thoroughly. Look closely for frayed insulation, scorch marks, or signs of arcing.
Junction Box Inspection: Examine the exposed metal or plastic box inside the wall. Ensure it remains structurally sound. Verify it is securely fastened to a wooden stud or fascia board. Confirm it carries an appropriate outdoor rating.
Damaged wires require immediate trimming. Use your wire strippers to expose fresh copper if the old ends look oxidized. Oxidized copper appears dull and green. Fresh copper guarantees a strong, safe electrical bond. A loose junction box must be re-secured before proceeding. A heavy unit will eventually pull a loose box straight out of the wall.
Wiring your new Flood Light correctly requires patience and precise connections. Start by preparing the mounting bracket. Install the new crossbar directly into the junction box. Manufacturers usually supply fresh machine screws for this purpose. Ensure the green ground screw remains easily accessible. Level the bracket if your new canopy requires a strict horizontal orientation.
Making electrical connections follows basic residential coding logic. Handle the ground system first. Electrical safety relies heavily on a solid ground path.
Connect the bare copper house ground wire to the green fixture ground wire.
Loop this ground connection around the bracket's green screw if applicable.
Twist the white neutral house wire together with the white fixture wire.
Twist the black hot house wire together with the black fixture wire.
Twist the exposed copper ends clockwise. Cap every connection securely using properly sized wire nuts. Give each nut a firm tug. Ensure no bare copper remains exposed below the plastic cap (other than the ground). Gently pack the bundled cables deep into the junction box. Avoid pinching any insulation against the sharp metal edges.
Mounting and weatherproofing complete the physical installation. Align the new canopy over the threaded bracket post. Ensure the EVA foam gasket sits completely flat against your exterior wall. Tighten the central mounting hardware until snug. Do not overtighten the nut. Excessive force will crack the plastic housing or warp the metal backplate.
Grab your exterior-grade silicone sealant. Apply a smooth, continuous bead around the top and side edges of the canopy base. Leave the bottom edge completely unsealed. This open bottom gap allows any trapped internal moisture to weep out safely. Sealing the entire perimeter traps condensation, which ultimately destroys the internal electronics.
Restoring power marks the final critical phase. Return to your electrical panel and flip the breaker back on. Walk outside and verify the unit triggers correctly. Modern systems should turn on immediately upon receiving power. Watch closely for rapid flickering. Flickering indicates a loose neutral connection. If the illumination remains steady, your wiring process was successful.
Most modern sensor-equipped models feature three adjustment dials. You must calibrate these settings to match your specific environmental needs.
Time: This dial dictates duration. Set how long the illumination remains active after detecting motion. Standard security settings range from one to five minutes.
Lux (Sensitivity): This adjusts the ambient light sensor. Proper calibration ensures the unit does not activate uselessly during broad daylight. Turn it towards the "moon" icon for strict nighttime operation.
Range: Angle the physical PIR sensor carefully. You want to cover your desired zone completely. Avoid catching street traffic, passing pedestrians, or a neighbor's yard. False triggers waste energy and annoy neighbors.
Troubleshooting common issues requires minor adjustments. Occasionally, newly installed systems act erratically. Some units stay illuminated constantly after the initial power-up. This issue typically stems from a confused internal relay. Explain this simple fix to anyone testing the system: you can usually reset the internal relay by flipping the indoor wall switch off and on rapidly. Do this two or three times. This action breaks the manual override mode and restores normal motion-sensing behavior.
Symptom | Likely Cause | Calibration Solution |
|---|---|---|
Stays on during the day | Lux setting is too high. | Turn Lux dial toward the "Moon" (darkness) symbol. |
Activates from cars passing | PIR range is overextended. | Tilt the sensor down; reduce Range/Distance dial. |
Flashes on and off randomly | Reflective glare or loose wire. | Angle away from windows; check wire nuts for secure fit. |
Stays on constantly at night | Manual override engaged. | Rapidly flip the wall switch off and on to reset the relay. |
A successful exterior lighting upgrade delivers immediate, tangible benefits to your property. You vastly improve perimeter security by eliminating dark blind spots. High-quality integrated hardware enhances long-term durability against severe weather. Furthermore, ditching halogen technology significantly lowers your household energy consumption. Modern lighting simply performs better while costing less to operate.
Executing this DIY project remains highly accessible for most homeowners. However, proceeding with absolute confidence requires strict adherence to mandatory safety checks. Never skip the non-contact voltage test. Proper weatherproofing techniques ensure your investment survives upcoming storm seasons.
Take a walk around your property tonight. Review your landscape layout carefully. Identify any remaining dark zones near side doors, garages, or shed perimeters. You might find that additional areas require secondary installations to achieve comprehensive nighttime security.
A: Standard 1-to-1 replacements are generally accessible DIY projects for homeowners. You must verify local building codes first. Some jurisdictions require licensed electricians for exterior hardwiring. If your junction box is damaged, or you lack a ground wire, hire a professional immediately.
A: No. Electrical codes mandate a weatherproof junction box for all exterior hardwired connections. The box safely contains sparks if a short circuit occurs. It also provides a secure structural anchor for the heavy hardware.
A: The internal relay might be stuck in manual override mode. Try resetting the fixture by flipping your indoor wall switch off and on rapidly three times. Alternatively, check if the lux setting is configured too low.
A: Security cameras and human eyes perform best under crisp, clear illumination. Aim for a color temperature between 4000K and 5000K. This range mimics daylight without causing harsh blue glare.

