


Views: 0 Author: Site Editor Publish Time: 2026-09-21 Origin: Site


Taking down an outdated, broken, or inefficient exterior lighting fixture requires strict safety practices. Removing this old unit correctly ensures you avoid damaging your exterior walls. However, mishandling outdoor electrical components carries severe risks. You could face dangerous electrocution if power remains active. Furthermore, improper removal might leave your home deeply vulnerable to long-term moisture damage. Removing the old fixture carefully is the critical first step before capping the circuit. It paves the way for upgrading to a modern, energy-efficient replacement. In this guide, we will walk you through safe uninstallation protocols. You will learn practical troubleshooting tips for rusted screws and brittle wires. Finally, you will discover exactly how to prepare your junction box for a fresh installation. We designed this guide to protect both you and your property. You can tackle this project confidently by following these expert steps.
Safety first: Never rely on the wall switch; always disconnect power at the main breaker and verify with a non-contact voltage tester.
Weatherproofing matters: Removing an exterior fixture requires breaking the old silicone or caulking seal carefully to prevent damaging the siding.
Troubleshooting is normal: Expect rusted screws or brittle wiring on older fixtures; preparation prevents stripped threads and broken wires.
Strategic upgrading: Assessing the junction box condition dictates whether you can safely install a new Flood Light or heavy-duty Outdoor LED Work Light immediately.
Electrical work requires absolute certainty before physical labor begins. You must establish strict safety standards to protect yourself from severe injury. We always recommend treating every wire as live until proven otherwise. Relying on assumptions causes accidents. Proper preparation prevents frustrating delays and dangerous electrical hazards.
You need specific tools to execute this job safely and efficiently. Gathering these items beforehand ensures you do not leave live wires exposed while searching for equipment. Here is your essential tool checklist:
Non-contact voltage tester (crucial for verifying zero power).
Phillips and flathead screwdrivers (insulated preferred).
Utility knife or stiff putty scraper (for breaking weather seals).
Wire strippers, wire cutters, and appropriately sized wire nuts.
Rust penetrant spray (e.g., WD-40) for weather-seized screws.
A sturdy, appropriately sized ladder.
Many homeowners make a critical safety mistake. They simply flip the indoor wall switch to the "off" position. This action leaves live wiring inside the junction box. Faulty wiring or shared neutrals can still deliver a lethal shock. You must cut power directly at the main circuit breaker. Once you switch the breaker off, place a physical warning tag on it. This prevents family members from accidentally turning the power back on.
Ladder placement matters just as much as electrical safety. You should place your ladder on solid, level ground. Never attempt outdoor electrical work during rain or heavy humidity. Dry working conditions prevent dangerous arcs and ensure your grip remains secure.
Following a chronological uninstallation process protects both the electrical components and your home exterior. We structured this guide to help you remove the fixture without causing unnecessary damage.
Take your non-contact voltage tester and turn it on. Test it first on a known live outlet to ensure it works correctly. Next, climb your ladder and place the tester tip against the exterior fixture base. Move it around the edges and any exposed wire housing. If the tester remains silent and unlit, you can proceed safely. Do not touch any metal components until you confirm zero voltage.
Most exterior fixtures feature a silicone or caulking bead around the base. This seal prevents water from entering the junction box. Pulling the fixture away without breaking this seal will tear your exterior paint or siding. Take your utility knife and gently score the caulking around the entire perimeter. You may need to run the blade around the base two or three times. This action separates the fixture canopy from the wall cleanly.
Locate the mounting screws holding the fixture against the wall. Use your insulated screwdriver to loosen them carefully. As you remove the final screw, support the full weight of the fixture with your free hand. Never let the heavy unit hang freely by its delicate electrical wires. Hanging weight can easily snap old copper lines deep inside the wall.
Pull the fixture away slightly to expose the wire connections. You will see several wires joined by plastic wire nuts. Hold the fixture securely while you twist off these caps. Standard residential systems follow strict color codes. You should untwist the wires in a specific sequence for maximum safety.
Common Mistakes: Do not pull the wires forcefully. Old copper can become extremely brittle. Gently untwist the connections to preserve the wire length for your replacement fixture.
Wire Color | Standard Function | Disconnection Priority |
|---|---|---|
Black or Red | Hot (Carries live voltage) | First |
White | Neutral (Completes the circuit) | Second |
Green or Bare Copper | Ground (Safety pathway) | Third |
Once you disconnect all wires, inspect the exposed ends carefully. Look for signs of fraying, severe oxidation, or melted insulation. Damaged ends require trimming and re-stripping before any new installation.
Textbook guides rarely prepare you for real-world realities. Outdoor fixtures face years of harsh sun, freezing rain, and extreme temperature shifts. You will likely encounter stubborn physical obstacles during the removal process. Applying professional field techniques saves time and prevents structural damage.
Dealing with seized or rusted screws requires patience. Exterior metal screws frequently fuse to the junction box threads. If your screwdriver slips, stop immediately. Stripping the screw head makes removal significantly harder. Apply a generous spray of rust penetrant directly to the screw threads. Wait ten to fifteen minutes. If the head is already slightly stripped, place a wide rubber band flat over the screw. Press your screwdriver firmly into the rubber band for extra grip. For completely ruined screws, you must use a dedicated screw extractor bit.
Managing brittle or short wires requires a delicate touch. Decades of heat cycling cause copper wires to stiffen. If you bend them back and forth aggressively, they will snap. A snapped wire inside the junction box creates a major problem. You might have to break into the wall to run fresh cable. Always pull wires out slowly. Keep them as straight as possible. If the insulation crumbles upon touch, wrap the intact sections carefully with high-quality electrical tape.
Stuck weatherproofing often traps older fixtures. Previous homeowners might have painted over the caulking multiple times. Some even use permanent construction adhesive instead of silicone. If scoring with a utility knife fails, use a heat gun on a low setting. Warm the edges gently to soften the paint and adhesive. Tap the side of the fixture base lightly with the rubber handle of your screwdriver. This vibration helps break stubborn chemical bonds without cracking your stucco or brick.
Once the old fixture is completely off the wall, you face an immediate decision. You must either terminate the connections for permanent removal or prepare the site for an immediate upgrade. Leaving bare wires exposed outdoors violates all electrical safety codes.
If you do not plan to install a replacement fixture, you must terminate the circuit safely. Code-compliant termination requires capping every individual wire separately. Do not twist the black and white wires together. Place a fresh, properly sized wire nut over the end of each bare wire. Twist it tightly until secure. Wrap a tight layer of electrical tape around the base of the wire nut and the wire itself. Push these capped wires deeply into the junction box.
You cannot leave the junction box open. Moisture, insects, and nesting birds will destroy the interior. Purchase a weatherproof blank cover plate. This plate must include a rubber or foam gasket. Secure the blank plate tightly over the exterior box to ensure a watertight seal.
If you plan to install a new fixture immediately, you must evaluate the existing junction box. Older homes often feature brittle plastic boxes. Upgrading to a heavier lighting system requires a sturdy metal box. Check the weight-bearing capacity stamped inside the housing. A cracked or loose box cannot support a modern fixture safely.
Best Practices: Take time to clean out the junction box interior. Use a small wire brush or shop vacuum to remove old debris, dead insects, and cobwebs. Scrape away all residual caulking from your exterior siding. A flush, clean surface guarantees your new weather seal will remain watertight.
Choosing the right replacement fixture transforms your outdoor space. Homeowners often struggle to select the best lighting style for their specific needs. You must frame your decision based on your daily activities, desired security levels, and location.
You should first evaluate your primary use case. General security applications demand broad, sweeping illumination. A standard, motion-sensor Flood Light works perfectly for driveways, dark alleyways, and quiet backyards. They deter intruders and guide you safely to your door at night.
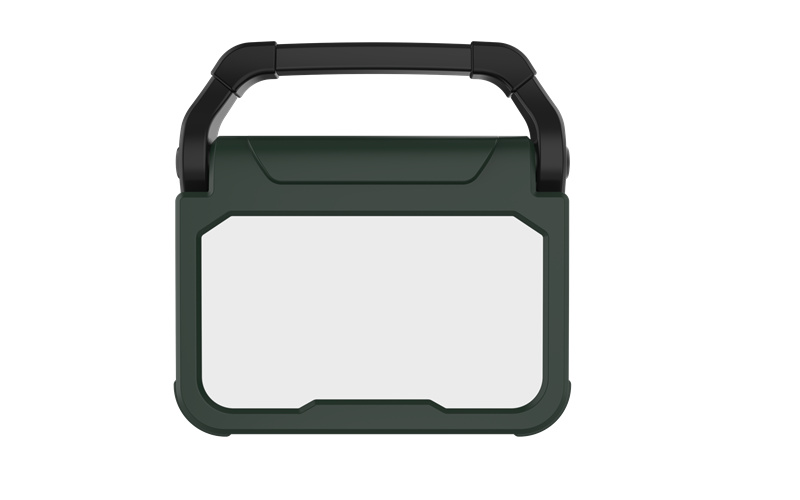
However, active outdoor spaces require a different approach. If you spend time woodworking, repairing vehicles, or hosting late-night patio events, standard motion sensors become frustrating. They shut off when you stop moving. For task-heavy environments, installing a heavy-duty Outdoor LED Work Light provides a vastly superior experience. These units offer sustained brightness, directional focus, and rugged durability suited for active workspaces.
When selecting your new fixture, evaluate these key selection criteria:
IP Rating (Ingress Protection): Outdoor environments expose fixtures to extreme weather. You must choose a unit with a minimum IP65 rating. This rating ensures total protection against dust ingress and low-pressure water jets.
Lumen Output and Color Temperature: Match the brightness to your specific zone. A 3000K warm light feels welcoming for patios. A 5000K daylight temperature works best for security or detailed mechanical tasks. Angle the heads carefully to prevent blinding your neighbors.
Ease of Retrofitting: Check the mounting bracket provided with your new fixture. Ensure it aligns cleanly with standard round or octagonal exterior junction boxes. A universal mounting plate saves hours of installation frustration.
Removing an old outdoor light fixture demands patience, preparation, and strict adherence to safety protocols. Verifying the power is off at the breaker remains your most critical step. Handling weathered screws and brittle wiring gently preserves your junction box for future use. Scrape old caulking away cleanly to protect your siding.
Upgrading an inefficient fixture to modern LED technology instantly boosts your property's safety and utility. Whether you choose broad security illumination or focused task lighting, the right choice transforms how you use your exterior spaces after dark.
Review the specifications of modern replacement fixtures to find your perfect match. Take detailed measurements of your exterior junction box before purchasing. Finally, if you discover severely degraded or damaged wiring during removal, stop immediately and consult a licensed electrician.
A: No. Relying solely on a wall switch is highly dangerous. Switches only break the hot connection. Faulty wiring, shared neutrals, or phantom voltage can still deliver a lethal shock. Always turn off the main circuit breaker and verify with a non-contact voltage tester before touching any wires.
A: Inspect the extent of the damage. If only the exposed tips are frayed or oxidized, you can carefully trim them and strip half an inch of fresh insulation. If the insulation is crumbling deeply inside the junction box, you must call a licensed professional to run new wiring.
A: Yes, weight matters significantly. Older plastic junction boxes often lack the structural integrity for heavy modern fixtures. You should inspect the interior of your box for a stamped weight rating. If you are upgrading to a heavy-duty metal fixture, install a securely braced metal junction box.
A: Never pull the fixture forcefully. Use a sharp utility knife to deeply score the edge where the fixture meets the wall. Apply low heat with a heat gun to soften dried paint or construction adhesive. Tap the fixture base gently with a rubber-handled tool to break the seal cleanly.

