


Views: 0 Author: Site Editor Publish Time: 2026-09-17 Origin: Site


Exterior lighting installation demands absolute precision. Poor mounting inevitably leads to water ingress, dangerous electrical hazards, voided product warranties, and severely compromised property security. You cannot afford to cut corners when dealing professionals install high-voltage exterior fixtures. Executing this task properly means balancing structural integrity against strict environmental demands. Many installers severely underestimate the sheer importance of proper weather sealing or rigorous load-bearing evaluations. Moisture destroys unprotected circuits rapidly. High wind loads easily tear weak brackets from aging siding. This definitive guide delivers actionable steps for evaluating site readiness, selecting the appropriate hardware, and safely executing the mounting process. We assume you possess basic familiarity with essential electrical safety protocols. You will discover how to evaluate permanent hardware solutions alongside dynamic temporary alternatives. Read on to master the technical specifications and code-compliant techniques required to illuminate your space securely and reliably.
Compliance is mandatory: All exterior mounting must utilize correctly rated weatherproof junction boxes and adhere to local electrical codes (e.g., NEC).
Placement dictates hardware: Eave-mounting, surface-mounting, and post-mounting each require distinct brackets, sealing protocols, and load-bearing evaluations.
Permanent vs. Temporary: Assess whether a hardwired fixture is necessary or if a high-lumen Portable Work Light better serves short-term construction or dynamic site needs.
Weatherproofing ensures longevity: Proper silicone sealing and gasket alignment are critical failure points during installation that must be verified before activation.
Before drilling holes or cutting wires, you must define the core objective of the lighting zone. This initial planning phase dictates placement height, optimal angles, and the necessary lumen output. Installers must differentiate between security illumination and task lighting setups.
Security setups require broad, overlapping coverage to deter intruders. They usually demand higher mounting placements on walls or eaves. Task lighting focuses intense, narrow beams on specific work areas. You must match the physical fixture design to these distinct operational goals.
Next, evaluate your existing power availability. Assess the current electrical infrastructure thoroughly. Determine if you are replacing an old fixture. Leveraging current wiring saves immense time and labor. Pulling entirely new wire represents a much larger project. You will need exterior-grade conduit and structural drilling tools.
Finally, perform a rigorous structural integrity assessment. Contractors frequently discover rotted fascia boards behind old fixtures. You must verify the mounting surface before proceeding.
Examine the base material of your chosen mounting surface carefully.
Verify the total load-bearing capacity of the selected location.
Select appropriate mechanical fasteners tailored specifically to the base material.
Wood fascia, solid brick, vinyl siding, and metal poles all require highly specific anchors. Heavy exterior fixtures will rip out of weak vinyl siding easily. Always secure heavy brackets directly to solid wood studs or dense masonry blocks.
Installers must decide between permanent hardwired installations and temporary lighting solutions. Each category serves vastly distinct operational needs. Your specific environment dictates the correct choice.
Choose permanent hardwiring when you need continuous, automated perimeter security. Hardwired fixtures integrate beautifully into modern architectural designs. They are ideal for motion-activated surveillance zones spanning large driveways or commercial backyards. Once mounted correctly, they provide reliable illumination without any manual intervention.
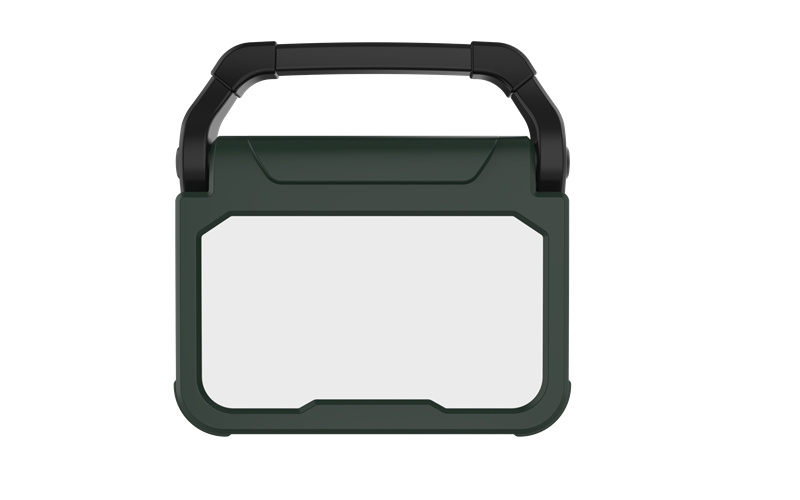
However, permanent wiring is not always practical or cost-effective. Evaluate your site carefully to see when to deploy a temporary alternative. Active job sites, unpowered outbuildings, or localized mechanical tasks often require dynamic solutions. Pulling permanent wire through these complex areas can be overly expensive or entirely non-compliant. In these specific scenarios, you should rely on a high-lumen Portable Work Light. These robust units deliver massive lumen output exactly where you need it most. They completely eliminate the need for costly trenching or complex conduit installation.
We can evaluate the practical feature-to-outcome benefits of both approaches. Consider the heavy upfront labor effort of permanent mounting versus the rapid scalability of portable high-output solutions. This comparison ensures you deploy the right tool for the job.
Lighting Solutions Comparison Chart
Feature Category | Permanent Hardwired Fixture | Portable Temporary Unit |
|---|---|---|
Deployment Speed | Requires hours of labor and planning | Immediate plug-and-play operation |
Placement Flexibility | Fixed location post-installation | Highly dynamic and easily relocated |
Primary Use Case | Perimeter security and architecture | Construction sites and localized tasks |
Infrastructure Needs | Requires junction boxes and conduit | Requires standard outlet or battery |
Exterior lighting demands exceptionally rugged components. Standard indoor hardware will fail rapidly when exposed to heavy rain, freezing snow, or intense UV radiation. Selecting proper hardware prevents catastrophic electrical failures.
First, focus entirely on junction box selection. You must differentiate between surface-mount pancake boxes and recessed weatherproof enclosures. Standard indoor boxes are completely unacceptable for exterior applications. They lack the necessary rubberized seals to prevent water intrusion. Always specify a specialized exterior-rated box. Surface-mount boxes work exceptionally well on solid masonry walls. Recessed boxes offer a much cleaner visual profile on residential siding.
Next, verify strict Ingress Protection (IP) requirements. The lighting industry uses IP ratings to measure dust and water resistance accurately. Define the baseline IP ratings required for both the fixture enclosure and the accompanying mounting gaskets. Look for explicit IP65 or IP67 certifications. An IP65 rating ensures adequate protection against low-pressure water jets from any direction. IP67 protects against temporary total immersion. You must ensure your chosen Flood Light meets these strict environmental criteria before installation.
Finally, utilize proper mounting plates and universal crossbars. Heavy exterior fixtures exert significant physical leverage on vertical mounting surfaces. Detail the absolute necessity of universal metal crossbars. They distribute the physical weight evenly across the entire junction box rim. This vital stabilizing effect protects the heavy fixture against intense high wind loads. Never attach a heavy exterior light using only basic drywall anchors or flimsy plastic clips.
Proper execution actively prevents severe accidents. You must prioritize personal safety and meticulous sealing techniques during the actual installation process. Rushing these steps invites disaster.
Begin every project implementing strict electrical safety protocols. Never work on live electrical circuits. Implement robust lockout/tagout procedures directly at the main breaker panel. Do not simply flip a wall switch off. Someone could walk by and accidentally turn it back on. Switch off the dedicated circuit breaker. Next, use a high-quality non-contact voltage tester. Conduct reliable voltage verification testing prior to exposing any bare wires. This single crucial step saves lives daily.
Follow widely established wiring best practices carefully. Always connect the standard ground wire first. This essential wire is usually bare copper or green. Next, connect the neutral wire, typically covered in white insulation. Finally, attach the hot wire, usually covered in black insulation. Secure every single connection using appropriately sized outdoor-rated wire nuts. Standard interior wire nuts will corrode quickly outdoors. Outdoor-rated versions contain special silicone sealant inside the plastic cap. This thick gel prevents destructive moisture from ever reaching the bare copper splices.
The most critical physical step remains the final sealing protocol. This active barrier prevents severe water ingress behind the fixture canopy.
Inspect the foam gasket provided by the original manufacturer for tears.
Align the gasket carefully between the metal mounting plate and the junction box.
Apply a thick, continuous bead of exterior-grade silicone caulk.
Run the caulk specifically around the top arch and sides of the mounting canopy.
Purposefully leave the bottom edge completely uncaulked.
Leaving the bottom edge open represents a crucial professional technique. It allows internally trapped condensation to weep out safely. Sealing the entire perimeter traps hidden moisture inside. This pooled water eventually saturates the wire nuts and creates a dangerous dead short.
Standard flat wall installations cover most common residential scenarios. However, complex property perimeters often require specialized mounting strategies. You must adapt your approach for freestanding structures.
Pole and post mounting offer excellent visual scalability for large open areas. Mounting a heavy fixture to a standalone pole or landscape post requires highly specific hardware. You cannot simply drive a standard wall bracket into a round metal pole. Address the specific hardware needs immediately. Utilize heavy-duty tenon brackets and steel bullhorn adapters. These engineered mounts securely grip cylindrical surfaces. They actively prevent the fixture from slipping down or twisting sideways during severe thunderstorms.
Motion sensor calibration presents another incredibly common field challenge. Implementation considerations dictate precise angle adjustments. You must position the sensor head carefully to maximize effectiveness. A poorly aimed sensor triggers constantly and annoys neighbors. Prevent frustrating false triggers from swaying tree foliage, neighborhood pets, or passing street traffic. Angle the sensor head slightly downward. Test the detection zone thoroughly by walking across the property boundaries. Limit the sensitivity range dial to cover only your immediate designated property lines.
Long distance installations introduce complex electrical complications. Managing voltage drop becomes critical for distant post-mounting projects. As copper wire length increases, electrical voltage decreases due to natural resistance. Outline the necessity of calculating this specific voltage drop accurately. If you run long conduit out to a distant driveway gate, standard 14-gauge wire might be grossly insufficient. You must utilize appropriately gauged wire for these extended conduit runs. Upgrading the circuit to 12-gauge or 10-gauge wire ensures the distant fixture receives adequate electrical power to operate efficiently.
Physical installation does not end when you tighten the final canopy screw. Rigorous post-installation evaluation ensures long-term reliability and code compliance.
Perform comprehensive system testing immediately after restoring power. Verify secure physical mounting by gently shaking the fixture. It should not wobble or flex the siding. Test any integrated motion triggers by walking deliberately through the target zone. Do this initial test during daylight hours using the dedicated "test" mode on the sensor. Later, validate the actual lumen coverage area at night. Adjust the individual light heads manually to eliminate dangerous dark blind spots. Ensure you are not blinding your neighbors inadvertently. Proper physical aiming keeps the intense lumens focused exactly where you need them.
Finally, establish clear personal guidelines for tackling future projects. Evaluate your technical capabilities when deciding whether to proceed with a DIY installation. Simple, direct swap-outs of existing fixtures on ground-level siding are generally safe for experienced homeowners. However, site complexity changes the safety equation rapidly. Pulling new breaker circuits, mounting fixtures on a steep second-story eave, or navigating intricate commercial compliance rules requires deep professional expertise. Hire a licensed electrician immediately when dealing with new conduit runs or complex load calculations. Their professional expertise maintains strict safety standards and guarantees total code compliance.
Proper exterior illumination demands meticulous planning and deliberate execution. The entire process hinges on rigorous site evaluations and selecting appropriate weatherproof hardware. Your success relies entirely on following established electrical safety protocols during every installation phase. You must prioritize load-bearing structural checks before drilling any holes.
Take immediate action by auditing your current exterior lighting zones today. Identify vulnerable areas suffering from inadequate visual coverage or severely outdated hardware. Next, review the technical specification sheets for any permanent fixtures you plan to install. Check their IP ratings and housing materials carefully. If your specific environment requires dynamic, temporary flexibility, evaluate high-output portable units instead. Make your final selection, gather the necessary code-compliant materials, and secure your property effectively.
A: No. Electrical codes rigidly mandate using an approved junction box for all permanent hardwired fixtures. Mounting any fixture without one exposes bare electrical wiring to environmental elements and combustible structural materials. This creates severe fire safety risks and highly dangerous electrical hazards. A properly grounded, weatherproof enclosure is legally required to contain stray sparks, support the physical weight of the fixture securely, and protect vulnerable wire splices from damaging moisture.
A: The optimal mounting height typically ranges from 9 to 12 feet above the ground. This specific height precisely maximizes the overall coverage area while simultaneously minimizing severe visual glare. Placing the heavy fixture below 9 feet makes it highly vulnerable to physical tampering or intentional vandalism. Mounting it significantly higher than 12 feet severely dilutes the lumen intensity reaching the ground and heavily complicates routine maintenance or sensor adjustments.
A: Both locations work well, but eave-mounting offers distinct weather-shielding benefits. The deep roof overhang naturally protects the sensitive fixture and the motion sensor from direct rain, heavy snow, and severe daily sun exposure. This heavily extends the overall lifespan of the rubber seals. Conversely, wall-mounting provides broader directional aiming flexibility. Wall placement allows you to aim the individual light heads across a much wider horizontal arc without structural interference from the roofline.
A: Yes, but you must perform strict capacity checks first. You must calculate the current electrical load on the indoor circuit to ensure the new exterior fixture will not overload the primary breaker. More importantly, any electrical circuit extending to the exterior of a building legally requires Ground Fault Circuit Interrupter (GFCI) protection. You must install a GFCI receptacle or a dedicated GFCI breaker to protect against potentially fatal outdoor moisture faults.

