


Views: 0 Author: Site Editor Publish Time: 2026-09-08 Origin: Site


Installing exterior security lighting is not merely a weekend DIY endeavor. It represents a critical facility or home security upgrade requiring strict electrical safety protocols. Many property owners underestimate the complexities involved in outdoor wiring. You face primary challenges like robust weatherproofing, strict electrical code compliance, and proper positioning. Navigating these factors ensures maximum area coverage while actively preventing neighbor-annoying light trespass.
This guide offers a rigorous, step-by-step installation framework. We designed it to help you carefully evaluate your current setup and electrical competency. You will learn how to safely execute a hardwired DIY installation using best practices. Furthermore, we will help you determine if you should opt for reliable plug-and-play alternatives or ultimately hire a certified electrician to complete the job safely.
**Safety First:** Hardwiring requires verifying zero voltage at the junction box; never rely solely on a wall switch to cut power.
**Prerequisites:** A successful installation depends on a pre-existing, weather-rated outdoor junction box capable of supporting the fixture's weight.
**Wiring Standards:** Modern fixtures follow strict color-coding (Black to Line/Hot, White to Neutral, Green/Copper to Ground).
**Alternatives:** Properties lacking external wiring infrastructure may achieve faster time-to-value using an Outdoor LED Work Light or solar-powered equivalents.
**Weatherproofing:** Applying an exterior-grade silicone sealant is a non-negotiable step to prevent moisture-induced electrical failure.
Before purchasing hardware or climbing a ladder, you must thoroughly evaluate your existing electrical infrastructure. A successful project begins by understanding the scope of your installation.
You must differentiate between replacing an existing fixture and establishing an entirely new mounting location. A straightforward swap utilizes pre-existing wiring and an anchored junction box. This process is generally manageable for cautious DIYers. Conversely, installing a new location requires routing new NM-B wire through exterior walls. It also demands installing a new junction box, which often requires pulling electrical permits.
You must define strict success criteria for your existing junction box. The box must remain tightly secured to the structural framing. It should be entirely free of structural rust. Most importantly, it must carry a specific rating for wet locations. If the box wobbles or shows heavy corrosion, you must replace it before proceeding.
Property owners must compare hardwired fixtures against temporary or plug-in solutions. Hardwired units provide permanence, high lumen output, and unwavering reliability. They remain the gold standard for dedicated security perimeters.
However, running new wire is not always feasible. If immediate illumination is required without pulling new electrical lines, deploying an Outdoor LED Work Light provides a rapid, high-visibility alternative for targeted areas. These robust units bypass complex wiring requirements. They allow you to establish immediate site security or project illumination safely.
Lighting Infrastructure Comparison
Feature | Hardwired Fixture | Plug-and-Play Alternative |
|---|---|---|
Setup Time | 1 to 3 hours | Under 10 minutes |
Permanence | Permanent structural addition | Temporary or easily relocatable |
Code Requirements | Strict NEC and local compliance | Minimal, standard extension cord safety |
Flexibility | Fixed lighting angles | Highly adjustable placement |
Exterior fixtures endure brutal environmental elements. You must carefully verify the IP (Ingress Protection) ratings of your chosen hardware. We strongly recommend IP65 or higher for any unsheltered exterior fixture. This rating ensures the unit remains dust-tight while resisting low-pressure water jets from heavy rainstorms.
Additionally, you should highlight local HOA restrictions or municipal codes regarding light pollution. Many jurisdictions enforce strict lumen limits. They may also mandate "dark sky" compliant shields. These shields direct illumination downward to prevent unwanted glare from spilling into neighboring properties.
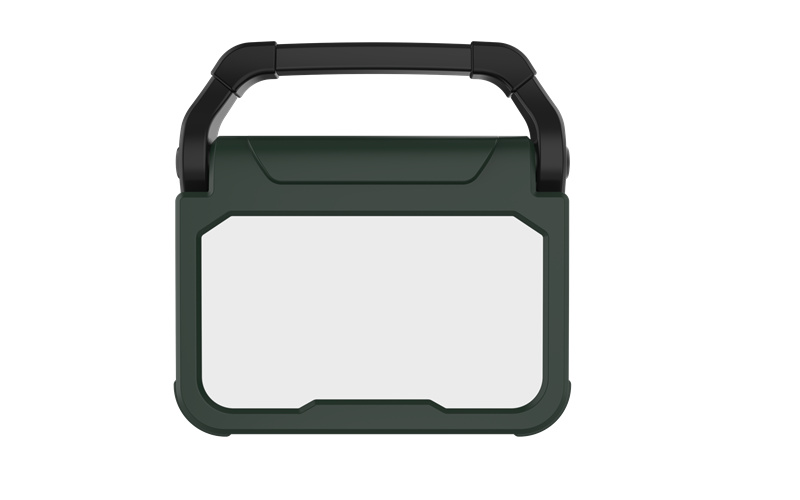
Executing an electrical installation requires precise tools. Professional-grade preparation minimizes safety risks and streamlines the assembly process.
Gather the following items before shutting off the power:
Non-contact voltage tester (critical for absolute verification).
Wire strippers and sturdy lineman’s pliers.
Appropriately sized wire nuts (usually yellow or orange for residential fixtures).
Exterior-grade silicone caulk and a reliable caulking gun.
Standard screwdrivers (Philips and flathead).
A sturdy fiberglass ladder (fiberglass prevents electrical conductivity).
Electrical safety demands absolute certainty. You must detail the protocol for shutting off power at the main breaker panel. Locate the correct breaker and switch it to the "off" position. Do not rely on a standard wall switch. Someone could accidentally flip it while you work.
Next, explain the necessity of using the non-contact voltage tester. You must test all wires inside the box before proceeding. Residential wiring often harbors hidden complexities. Accounting for potential shared neutrals or mislabeled breakers prevents severe injury. If your tester beeps or flashes red near any wire, stop immediately. Double-check your panel or call an electrician.
Follow this standard operating procedure meticulously. Skipping steps can result in hardware failure or hazardous electrical conditions.
First, verify the power is completely dead. Carefully disconnect the existing wire nuts. Unmount the old hardware and set it aside.
Next, grab your flashlight. Inspect the junction box thoroughly. Look for signs of water damage, rust flaking, or aggressive insect nests. Examine the house wire insulation closely. If the insulation appears brittle or frayed, you must trim it back to expose healthy wire.
Finally, install the new mounting bracket (often called a crossbar) provided in the box. Secure it tightly. Ensure it sits perfectly flush and level against the junction box housing.
Electrical connections demand secure, unambiguous pairings. We will walk through standard wiring pairs clearly.
When connecting your new Flood Light, start with the grounding system. Connect the house ground wire (which is usually bare copper or green) to the fixture’s ground wire. Secure both under the green grounding screw located on the mounting bracket.
Next, connect the neutral wire (white) from the house to the neutral wire on the fixture. Finally, connect the hot wire (black) from the house to the hot wire on the fixture.
Apply best practices for twisting these wires. Align the stripped ends evenly. Twist them firmly clockwise before threading on the wire nuts. Tug gently on each wire to ensure they will not slip out. Afterward, wrap each connection in high-quality electrical tape. This wrapping provides secondary strain relief and prevents accidental shorts.
Carefully tuck the wired connections back into the tight junction box. You must maneuver them gently, ensuring no wires are pinched between the metal bracket and the fixture base.
Align the fixture base over the mounting bracket. Secure it using the provided weatherproof gasket and the central mounting screw. Tighten it until the gasket compresses slightly, forming a solid physical barrier against the wall.
Crucial Step: You must apply a smooth bead of silicone sealant around the perimeter of the base where it meets the wall. Seal the top and both sides completely. However, strictly leave the bottom edge unsealed. This open bottom acts as a critical weep hole. It allows any trapped condensation or ambient moisture to weep out harmlessly.
Modern security perimeters rely heavily on automated triggers. Understanding sensor mechanics guarantees reliable operation while minimizing nuisance alerts.
You should understand the mechanics of PIR (Passive Infrared) sensors. They do not merely detect movement. Instead, they detect rapid changes in infrared heat across their field of view. When a warm body crosses the detection zones, it triggers the circuit.
Use a systematic framework for setting your sensor dials. The "Lux" dial controls daylight sensitivity. Set it to trigger only when ambient light drops below your desired threshold. The "Time" dial dictates the duration of illumination after a trigger event. Fine-tuning these settings prevents false triggers from passing cars, neighborhood pets, or wind-blown branches.
Complex wiring scenarios occasionally arise. For example, integrating a fixture with an indoor override switch and an outdoor motion sensor requires a three-wire setup. This configuration allows you to manually bypass the sensor by toggling the indoor switch quickly.
If you prefer digital control, outline the evaluation criteria for upgrading to smart, Wi-Fi-enabled fixtures. These units require stable internet connectivity. Check the 2.4GHz bandwidth requirements at the exterior of the property. Use your smartphone to test signal strength near the junction box before permanently mounting the smart hardware.
Following industry best practices prevents ongoing maintenance headaches. Review these guidelines to optimize your new installation.
Do: Angle the light heads at roughly 45 degrees downward. This specific angle maximizes ground coverage and deliberately minimizes blinding glare for pedestrians.
Don't: Point motion sensors directly at heat sources. Avoid aiming them at HVAC exhaust vents, dryer vents, or highly reflective surfaces. Sudden heat drafts cause erratic, frustrating triggering.
Do: Perform a full functional test of the fixture and sensor range at night. Walk through the desired detection zones before putting away your ladders and tools.
Don't: Overload an existing circuit by daisy-chaining multiple high-wattage halogen fixtures. Instead, advocate for low-draw LED alternatives. LED technology provides superior brightness while keeping circuit amperage exceptionally low.
Successfully installing exterior illumination requires systematic execution. You must evaluate your existing infrastructure honestly. Always isolate power safely at the breaker panel. Wire the connections correctly using standard color codes, and weatherproof the housing meticulously to prevent moisture damage.
Reiterate that while replacing an existing fixture is a highly manageable DIY task, advanced electrical work changes the equation. Pulling entirely new wire through exterior walls or upgrading a main breaker panel strictly mandates hiring a licensed electrical contractor. Doing so ensures fire safety and legal code compliance.
Take action today. Direct your attention outward and evaluate your current junction box setup. Finalize your fixture selection based on the IP ratings and infrastructure criteria outlined above. Gather the necessary safety tools, especially your non-contact voltage tester, before beginning your project.
A: Continuous flashing usually indicates a sensor feedback loop. If the light heads point too closely at an adjacent wall or eaves, the intense reflected light tricks the photocell into thinking it is daytime. The sensor shuts the light off, realizes it is dark, and turns it back on. Alternatively, you might be using incompatible dimmer switches with non-dimmable LEDs.
A: No. Electrical code compliance and strict fire safety regulations require an exterior-rated junction box. The box contains potential sparks and protects vital wire splices from weather. Surface-mounting bare wire directly to siding without a proper box is a major, illegal fire hazard.
A: Older homes (pre-1960s) often lack dedicated ground wires. Do not ignore this safely hazard. You can safely install GFCI (Ground Fault Circuit Interrupter) protection at the breaker or upstream receptacle to mitigate shock risks. However, consulting a certified electrician remains the safest next step to ensure proper grounding solutions.
A: Industry-standard recommendations suggest mounting the fixture typically 8 to 10 feet off the ground. This specific height ensures optimal PIR sensor range and excellent light dispersion. Furthermore, it keeps the fixture just high enough to prevent easy physical tampering by intruders.

