


Views: 0 Author: Site Editor Publish Time: 2026-09-07 Origin: Site


Upgrading your property's exterior lighting is an highly effective way to deter intruders and improve nighttime navigation. A well-placed luminaire instantly transforms dark driveways and blind spots into safe, highly visible zones. Dealing with exterior electrical components requires strict adherence to strict safety protocols. You face harsh weather conditions and potentially dangerous high voltage. Poor wiring or inadequate weather sealing often leads to immediate short circuits. Missing a critical waterproofing step can quickly ruin your investment or create a severe fire hazard.
This comprehensive guide will walk you through the entire installation process. You will learn how to evaluate your current wiring setup safely. We explain how to master essential weatherproofing techniques to ensure longevity. We cover everything from removing your old fixture to troubleshooting common post-installation issues. You will gain the confidence to complete the project while knowing exactly when to call a professional.
Safety Precedes Execution: Never rely solely on a wall switch; always shut off power at the main breaker and verify with a non-contact voltage tester before touching any wires.
DIY vs. Professional Scope: Replacing a fixture on an existing junction box is a viable DIY project. Running new wiring or installing a new dedicated circuit requires a licensed electrician.
Standard Wiring Protocol: Modern installations follow a universal color code: Black to Black (Hot), White to White (Neutral), and Green/Bare to Ground.
Weatherproofing is Non-Negotiable: Failing to use the proper gaskets and silicone sealant will lead to water ingress, short circuits, and premature fixture failure.
Before purchasing materials, you must evaluate the technical and compliance requirements of your specific installation scenario. Many homeowners underestimate the complexity of exterior electrical work. You should carefully inspect your current infrastructure.
Existing Wiring vs. New Installations: Replacing an old luminaire on a pre-existing, properly grounded junction box usually takes 30 to 60 minutes. This straightforward swap makes a great weekend DIY project. Installing a new fixture where no electrical box exists requires opening walls. You must run outdoor-rated cable, typically UF-B, and calculate circuit loads. This scope of work pushes the project firmly into professional territory.
Code Compliance and Permits: You must verify local electrical codes. Most local municipalities follow the National Electrical Code (NEC). Many jurisdictions require permits for running new exterior circuits. Even a simple swap might require a basic inspection in some highly regulated areas. Skipping this step often causes headaches during future home appraisals or sales.
Liability and Risk Management: Improperly installed exterior lighting poses serious fire hazards and liability risks. You must visually inspect your current wiring once exposed. If the existing wiring appears frayed, uses older aluminum wire, or lacks a dedicated ground wire, halt the project immediately. Aluminum wiring oxidizes easily and requires special AlumiConn connectors. Lacking a ground wire leaves you vulnerable to electric shock. Consult a licensed electrician to bring your home up to modern safety standards.
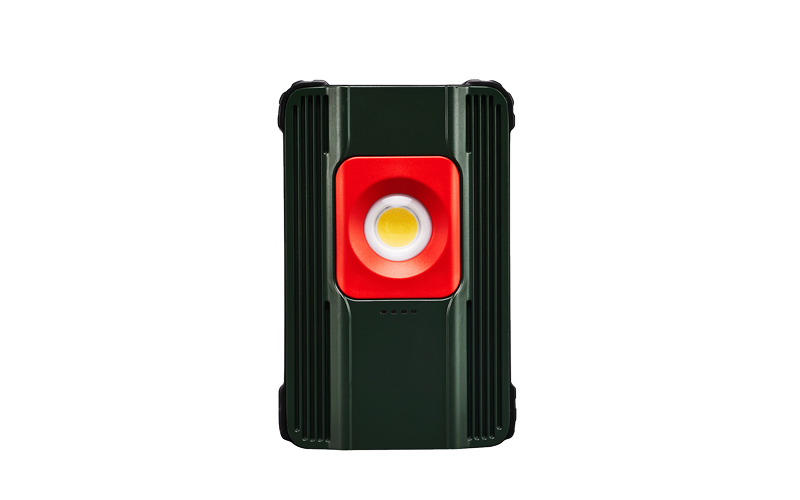
A compliant installation requires precise tools to manage voltage risks and environmental exposure. Using improper equipment often compromises the waterproof seal or leaves wire connections loose. Gather all necessary supplies before you climb your ladder.
Required Diagnostic Tools: You need a reliable non-contact voltage tester. This device beeps or flashes when placed near live electrical currents. A multimeter is optional but highly recommended. It helps verify continuity and exact voltage levels.
Hand Tools:
Wire strippers and cutters designed for 12 AWG and 14 AWG wire.
Phillips and flathead screwdrivers (insulated preferred).
A sturdy, ANSI-rated fiberglass step ladder to prevent electrical conduction.
Materials for Weather-Sealing: Purchase exterior-grade silicone caulk. Standard interior caulk degrades quickly under UV exposure. Use waterproof wire nuts pre-filled with dielectric grease. Have standard electrical tape ready for wrapping connections.
Lockout/Tagout Protocol: Locate the specific breaker for the exterior light circuit. Switch it off completely. Alert all household members that electrical work is in progress. Place a piece of tape over the breaker panel door to prevent accidental reactivation.
Load Verification: You must ensure the new Outdoor LED Work Light does not exceed the maximum wattage rating of the existing junction box and circuit. Most modern LED units consume far less power than old halogen bulbs. However, checking the circuit load remains a standard best practice.
Table 1: Essential Installation Materials Checklist
Category | Item | Purpose |
|---|---|---|
Diagnostics | Non-Contact Voltage Tester | Detects live AC voltage without physical wire contact. |
Tools | Wire Strippers | Removes insulation safely without damaging internal copper. |
Sealing | Exterior Silicone Caulk | Prevents water ingress behind the fixture canopy. |
Connectors | Silicone-Filled Wire Nuts | Protects outdoor wire splices from moisture and corrosion. |
Follow this sequence exactly. Proper methodology ensures a mechanically secure and electrically safe connection. Rushing these steps often leads to frustrating do-overs or dangerous electrical faults.
Never assume the power is off just because the wall switch is flipped. The wiring might be improperly routed.
Verify the power is dead using the voltage tester on the exterior housing before unscrewing anything. Move the tester around the seam of the fixture.
Remove the mounting bracket screws using your screwdriver.
Carefully pull the fixture away from the wall. Do not yank the unit, as old brittle wires might snap.
Test the internal wires again using the voltage tester. Insert the tip near the black wires inside the box.
Disconnect the wire nuts. Untwist the copper wires.
Inspect the existing junction box for rust, moisture, or structural damage. You must replace heavily corroded boxes before proceeding.
Modern residential wiring universally relies on a standard color code. You must match the colors precisely. Standard LED units typically feature stranded wire, while your home uses solid copper wire.
Prep the Wires: Strip approximately 1/2-inch to 5/8-inch of insulation from the fixture wires if they are not pre-stripped. Make sure the exposed copper strands remain clean and unfrayed.
Ground Connection First: Always connect the ground wire first. Connect the green or bare copper wire from the house to the green grounding screw on the mounting bracket. Alternatively, connect it directly to the fixture's green ground wire. Grounding provides a safe path for stray electrical currents.
Neutral Connection: Twist the white wire from the house together with the white wire from the fixture. When joining stranded wire to solid wire, let the stranded wire lead slightly ahead of the solid wire. Twist them clockwise. Cap securely using a waterproof wire nut.
Hot Connection: Twist the black wire from the house with the black wire from the fixture. Cap using a wire nut. Give all nuts a gentle "tug test" to ensure a tight mechanical bite. If a wire slips out, you must redo the connection.
Mechanical stability and moisture protection determine how long your unit will survive outdoors. A poorly sealed fixture allows rain to enter the junction box.
Tuck the wires neatly into the junction box. Fold them like an accordion. Ensure no wires are pinched against the metal mounting bracket. Pinched wires strip insulation and cause immediate short circuits upon power-up.
Install the rubber EVA gasket against the wall plate. This gasket usually comes included in the box. It forms the primary barrier against driving rain and humidity. Secure the fixture to the mounting crossbar using the provided hardware. Do not overtighten, as you might crack the plastic or metal housing.
Critical Sealing Step: Apply a continuous bead of exterior silicone caulk around the top and sides of the fixture canopy. Seal exactly where it meets the wall. You must leave the bottom edge uncaulked. This unsealed bottom section acts as a weep hole. It allows any internal condensation caused by temperature swings to drain out safely.
Strategic placement maximizes your return on investment. Poor positioning severely limits security coverage and often creates neighborhood disputes. You must plan the physical orientation carefully.
Do Optimize Height: Mount the fixture between 8 to 10 feet off the ground. This height prevents physical tampering. It also allows built-in motion sensors (Passive Infrared or PIR) to capture an optimal 180-degree or 270-degree detection zone. Placing it too high reduces sensor sensitivity.
Don't Cause Light Trespass: Angle the LED heads downward at roughly 45 degrees. Avoid aiming a powerful Flood Light directly into street traffic. Keep the beams out of neighboring bedroom windows. Improper aiming causes severe glare complaints and contributes to urban light pollution.
Do Calibrate Sensors Strategically: If you use a motion-activated model, position the sensor carefully. PIR sensors detect heat signatures moving across their field of view much better than heat moving directly toward them. Direct expected cross-traffic walks across the sensor zone to trigger the light more reliably.
Don't Overlook Overhangs: Avoid mounting lights directly under low, reflective eaves or light-colored soffits. The intense light reflection bounces back into the unit. This reflection easily confuses the built-in photocell (dusk-to-dawn sensor). The unit thinks daylight has arrived, shutting off the light, only to turn back on seconds later. This creates a frustrating strobe effect all night.
Chart 1: Placement Strategy Summary
Placement Factor | Ideal Execution (Do) | Poor Execution (Don't) |
|---|---|---|
Height | 8 to 10 feet above ground level. | Below 7 feet (tamper risk) or above 15 feet. |
Beam Angle | Pointed downward at a 45-degree angle. | Pointed horizontally into neighboring yards. |
Sensor Direction | Aimed across paths of expected lateral movement. | Aimed directly at a street or moving tree branches. |
Proximity to Eaves | Mounted on open walls or far below reflective soffits. | Tucked tightly under white, reflective overhangs. |
Sometimes, the unit behaves erratically right after installation. Address these common operational issues systematically before assuming the brand-new fixture is defective. Most problems originate from simple configuration errors or minor wiring mistakes.
Light Stays on Constantly: Check your interior wall switch. Did someone toggle it rapidly? Rapid toggling triggers a "manual override" mode on many smart or motion-sensing models. This mode bypasses the sensor, keeping the light on indefinitely. Reset the system by turning the main breaker off for 1 full minute, then turning it back on.
Light Refuses to Turn On: First, re-verify the breaker position. It might have tripped immediately due to a pinched wire. If power flows correctly, check the photocell. If you are installing the unit during daylight hours, the dusk-to-dawn sensor prevents activation. Cover the small sensor entirely using black electrical tape to simulate nighttime. Test the functionality again.
Flickering Operation: Flickering LEDs usually indicate a loose connection. Check your neutral (white wire) connection inside the wire nut. Re-tighten it if necessary. Alternatively, ensure no dimmer switch controls the circuit. Most LED exterior fixtures are strictly incompatible with standard wall dimmers. Dimmer switches alter the electrical sine wave, causing severe flickering and eventual driver failure.
Proper installation dictates the lifespan, performance, and safety of your exterior lighting system. By verifying existing circuit conditions and strictly following standard NEC wiring protocols, you protect your home from electrical hazards. Executing proper weather-sealing techniques ensures your new unit withstands heavy rain and seasonal temperature shifts.
Remember to angle the luminaire correctly and calibrate the sensors for optimal security coverage. Give your connections a final tug test before sealing the canopy. If your property lacks the necessary grounded infrastructure or junction boxes, stop the project. Establishing a relationship with a licensed electrical contractor remains the safest next step to upgrade your exterior lighting matrix effectively.
A: If you are replacing an existing fixture on a functional, grounded junction box, you can typically perform the installation yourself following safety guidelines. If you need a new junction box, new wiring, or a new breaker circuit, local codes almost always require a licensed electrician to ensure code compliance and fire safety.
A: Yes. National Electrical Code (NEC) standards dictate all wire splices must be contained within an approved, weather-rated junction box. This essential enclosure prevents severe fire hazards, contains sparks, and protects the delicate wire connections from rain, snow, and pest interference.
A: No. Exterior metal fixtures carry a high risk of electric shock if a short circuit occurs. If your existing electrical box does not have a ground wire, which is common in homes built before the 1960s, you must have an electrician retrofit a proper ground path before installing the fixture.

