


Views: 0 Author: Site Editor Publish Time: 2026-09-25 Origin: Site


Installing exterior lighting serves a vital dual purpose for any homeowner. It enhances your property's security while significantly improving nighttime visibility. Well-placed lights keep shadows at bay and welcome you home safely after dark. However, working around household voltage carries inherent risks you cannot ignore. Proper preparation and strict compliance with local electrical codes are absolutely non-negotiable for anyone attempting this upgrade. A simple wiring error can lead to fixture failure, moisture damage, or serious safety hazards. This guide provides a structured, practical framework to help you navigate the entire process safely. You will learn how to evaluate whether to DIY or hire a pro, select the ideal fixture, and execute a secure, weatherproof installation. Read on to master the essential steps for reliable, long-lasting exterior illumination.
Safety is the absolute priority: Never bypass shutting off power at the main breaker and verifying with a non-contact voltage tester.
Scope of work dictates the approach: Replacing an existing fixture is a manageable DIY project; running new electrical wire typically requires a licensed electrician.
Fixture selection matters: Hardwired LED security lights offer permanent reliability, while an outdoor LED work light serves as a better alternative for temporary or highly mobile illumination needs.
Weatherproofing is critical: Proper grounding and silicone sealing prevent moisture ingress, which is the leading cause of exterior fixture failure.
Homeowners often wonder if they can tackle electrical projects themselves. The answer depends heavily on the project's current state. The "like-for-like" rule is a standard industry benchmark. Swapping an old light for a new one on an existing, correctly wired junction box is a standard DIY task. You already have the necessary infrastructure in place. You only need to safely disconnect the old unit and attach the new one. This approach minimizes risk and avoids complex wire routing.
However, certain red flags demand professional intervention. Stop immediately if you open the fixture and find no junction box. Wall cavities cannot safely contain electrical splices. You must also call an electrician if you discover aluminum wiring. Connecting modern copper wires to older aluminum wiring requires special connectors and techniques. Doing this incorrectly creates a severe fire hazard. Outdated knob-and-tube systems also require professional upgrades before you install modern fixtures. Finally, hire a pro if you need to add a completely new circuit to your breaker panel. Running new lines inside walls goes beyond basic DIY skills.
You must also consider local regulations. Modifying house wiring often requires local permits. Municipalities enforce these rules to guarantee household safety. A simple fixture swap rarely requires a permit. Running new wires almost always does. Always check your local building codes before starting any major modifications. Compliance protects your home and ensures your insurance remains valid.
Selecting the correct fixture prevents future frustration. You have three primary categories to consider: hardwired, plug-in, and solar. Hardwired fixtures offer unmatched reliability. They draw constant power from your home. Solar models provide easy installation but often fall short. They frequently lack sufficient lumen output for true security applications. They also struggle during long periods of overcast weather. Plug-in models bridge the gap. They offer high power but rely on exposed exterior outlets.
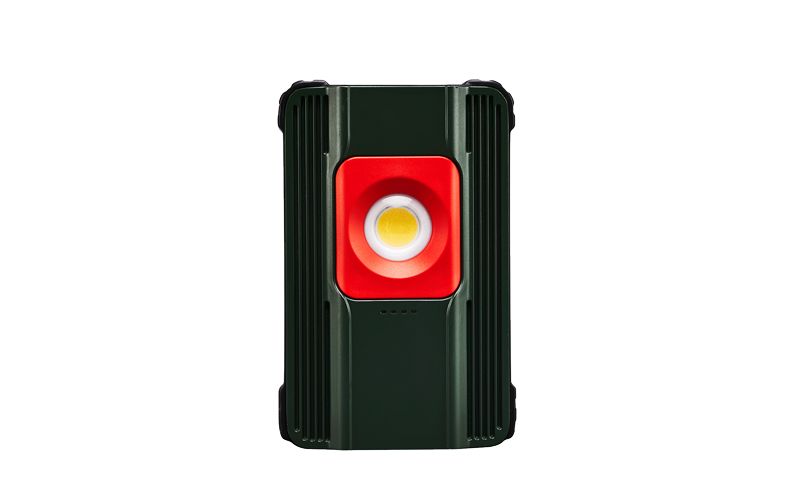
You must clearly define your lighting goals. Permanent security requires dedicated installations. You want automated, weather-resistant fixtures guarding your perimeter. Conversely, temporary needs call for mobility. If the goal is illuminating a specific, temporary backyard project or construction space, an Outdoor LED Work Light is often a more practical, plug-and-play investment than hardwiring a new fixture. You can easily move these units as your project shifts. For permanent, wide-area coverage, a hardwired Flood Light remains the industry standard.
Always evaluate key performance features before purchasing permanent fixtures. Look closely at lumen output. Most driveways and yards require between 1000 and 2500 lumens. Color temperature also matters greatly. Security applications typically use 4000K to 5000K bulbs. This range provides a crisp, daylight-like beam. It enhances contrast and helps cameras capture clearer footage. Finally, verify the IP weather-resistance rating. An IP65 rating is the minimum requirement for exposed outdoor environments. It ensures the unit resists dust and low-pressure water jets.
Lighting Solution Comparison Chart
Lighting Type | Power Source | Best Use Case | Reliability Level |
|---|---|---|---|
Hardwired | Home Electrical System | Permanent perimeter security | Highest |
Solar | Sunlight / Internal Battery | Remote areas lacking wiring | Moderate (Weather dependent) |
Plug-in / Portable | Exterior GFCI Outlet | Temporary projects, event lighting | High (Requires cord management) |
Proper preparation prevents accidents and mid-project delays. You must gather the right equipment before touching any wires. Safety gear forms your first line of defense. Never compromise on these items.
Non-Negotiable Safety Gear: You need a reliable non-contact voltage tester. It detects electrical current without touching bare wires. You also need insulated gloves to protect against accidental shocks. Wear safety glasses to shield your eyes from falling debris.
Required Hand Tools: Gather a pair of high-quality wire strippers. You will need both Philips and flathead screwdrivers. Keep an adjustable wrench nearby for tightening mounting hardware. Finally, secure a stable A-frame ladder. Never use a wobbly or damaged ladder for overhead work.
Installation Materials: Ensure you have the complete light kit. This includes the fixture, mounting bracket, and rubber gasket. Buy appropriately sized wire nuts if the kit lacks them. Keep electrical tape on hand for securing connections. Purchase exterior-grade silicone caulk for the final weatherproofing step.
Always perform a pre-flight check before climbing the ladder. Unbox the new fixture on a flat surface. Inspect it closely to ensure all hardware is present. Missing screws can halt your project entirely. Next, inspect the exterior location. Verify the existing junction box is properly anchored to the structure. A loose box cannot safely support a heavy modern fixture.
Executing the installation requires patience and attention to detail. Follow these steps in exact order to ensure a secure result. Rushing the process often leads to poor connections or compromised weatherproofing.
Safety begins at the breaker box. Locate your main breaker panel. Find the specific circuit supplying the outdoor light and switch it off. Never rely on the indoor wall switch alone. Someone could accidentally flip it while you work. Return to the outdoor fixture. Use the non-contact voltage tester on the existing wires. Hold it close to the connections. Guarantee zero electrical current before proceeding. If the tester beeps or flashes, stop immediately. Double-check your breaker panel.
Once you verify the power is off, unscrew the base of the old light. Support the heavy fixture so it does not pull aggressively on the wiring. Carefully untwist the existing wire nuts. Separate the connections gently. Do not yank the wires. Inspect the exposed junction box thoroughly. Look for signs of rust or moisture damage. Check the house wires for brittle or cracked insulation. Damaged house wiring requires professional repair before moving forward.
Most kits include a specific mounting strap or bracket. Attach this supplied bracket directly to the junction box. Use the screws provided in your kit. Ensure the bracket sits flush against the box edges. You must also align the center hole correctly. This hole accommodates the main mounting screw or threaded post. Proper alignment here makes the final mounting step much easier.
Wiring requires secure, tight connections. Follow standard color-coding rules.
Ground (Green/Bare Copper): Connect the house ground wire to the fixture's ground wire. Wrap them around the green grounding screw on the bracket. Tighten the screw securely. Proper grounding prevents electrical shocks during power surges.
Neutral (White to White): Check the exposed wire ends. Strip 1/2 inch of insulation if necessary. Twist the white house wire and the white fixture wire together. Cap them securely tightly using a wire nut.
Hot (Black to Black): Connect the black house wire to the black fixture wire. Twist them firmly and cap tightly. Give every capped connection a gentle tug. They should not slip apart. Loose connections cause flickering lights or total failure.
Carefully push all connected wires neatly into the junction box. Do not pinch them against the metal edges. Slide the fixture over the mounting post. Alternatively, align it carefully with the bracket holes. Install the rubber gasket if your kit provided one. Tighten the main mounting screw until the fixture sits snugly against the wall. Finally, apply a bead of exterior silicone sealant. Run it around the top and sides of the base plate. Leave the bottom edge open. This acts as a weeping hole so any internal condensation can drain safely.
Positioning your new fixture correctly maximizes its effectiveness. Physical placement heavily influences both security and neighborhood relations. We recommend mounting the unit between 9 and 10 feet off the ground. This specific height provides optimal beam spread across your yard. It also keeps the fixture safely out of reach, preventing vandalism or tampering. Mounting it too high reduces the intensity of the light reaching the ground.
You must also actively avoid creating glare. Angle the light heads downward. A 45-degree angle typically works best. This illuminates the yard effectively without blinding your neighbors. It also prevents glare from hitting passing drivers on nearby streets. Light trespass is a common nuisance. Pointing the heads straight outward wastes energy and causes unnecessary friction in your community.
Motion sensor calibration is your final crucial step. Take time to adjust the settings. The "Time" dial dictates how long the light stays on after detecting movement. Set it between one and three minutes. The "Sensitivity" or "Distance" dial controls the sensor's range. Advise adjusting this carefully through trial and error. Walk across your yard to test the trigger points. Warn against aiming sensors directly at busy streets. Passing cars will trigger it endlessly. Also, keep the sensor away from HVAC exhaust vents. Sudden blasts of warm air easily cause false triggers.
Taking the time to install exterior lighting is a high-reward project. It dramatically improves your perimeter security and everyday convenience. Success requires strict adherence to safety protocols. You must respect household voltage and double-check your tools at every step. Weatherproofing is just as critical as wiring. Taking a few extra minutes to seal the canopy ensures years of reliable operation.
Maintenance does not end after installation. Clean the sensor lens every few months to maintain optimal sensitivity. Check the silicone seal annually for cracks or peeling. Small preventative actions keep your property well-lit year-round. Review your specific situation today. You can confidently proceed with a DIY upgrade using these outlined steps. However, always consult a local electrician if your home's wiring status remains uncertain.
A: Yes, most modern smart fixtures and motion-sensor lights require a neutral (white) wire to maintain constant power to the sensor or Wi-Fi module, even when the light heads are off.
A: This is typically caused by a high sensitivity setting, the sensor being aimed at a heat source (like an AC unit or dryer vent), or the fixture being stuck in "manual override" mode (often reset by turning the wall switch off and on rapidly).
A: No. National Electrical Code (NEC) requires all wire connections to be enclosed in an approved electrical junction box to contain potential sparks and support the weight of the fixture.
A: A security flood light is hardwired to a structure for permanent, automated perimeter lighting. An outdoor work light is typically a portable, plug-in fixture with a stand, designed for temporary, high-intensity task lighting during projects.

