


Views: 0 Author: Site Editor Publish Time: 2026-10-04 Origin: Site


A malfunctioning exterior light creates immediate security vulnerabilities and daily frustrations. Whether your fixture stays stuck on, refuses to activate, or continuously flashes, these faults compromise your home's safety. When your perimeter lighting fails, you lose a critical deterrent against intruders. Fortunately, you do not always need a licensed electrician to restore outdoor visibility. Industry data reveals 80% of sensor issues stem from minor, resolvable glitches. Basic resets or simple lens cleaning will often fix the problem without specialized electrical expertise.
This guide provides an evidence-based troubleshooting path. We will help you evaluate your outdoor lighting systematically. You will walk through actionable diagnostic steps to determine if you can save your current unit. By following these methods, you will isolate common variables safely. Furthermore, we provide a clear framework for deciding your next steps. You will learn exactly when investing in a replacement makes the most practical and economic sense.
Rapid Resets Solve Most Issues: A simple 30-second breaker power cycle resets the internal auto-override feature causing most "stuck on" faults.
Isolate Variables First: Rule out dead bulbs, dirty lenses, and improper sensitivity settings before dismantling the fixture.
Safety is Non-Negotiable: Any hardwiring checks require confirming zero voltage at the breaker level.
The 5-Year Rule: If a halogen or early-gen LED unit is over five years old with failing sensors, full fixture replacement is statistically more reliable than sourcing proprietary sensor parts.
Effective troubleshooting starts with accurate observation. You must categorize the exact behavior of your faulty light. Jumping straight into repairs without isolating the specific symptom often wastes time. Let us break down the three most common failures. Identifying your specific issue dictates the correct diagnostic path.
A light refusing to turn off wastes energy and annoys neighbors. The root cause usually involves a manual override glitch. Many fixtures enter this mode automatically after brief power outages. Sudden voltage drops trick the internal relay. Alternatively, the sensor might face severe environmental interference. HVAC exhaust vents blow hot air across the sensor field. This mimics human body heat. Nearby streetlights can also confuse the internal logic. They trick the unit into an endless active loop.
A completely unresponsive unit defeats its primary security purpose. Root causes here range from simple to fatal. You might just have a burned-out bulb. The circuit breaker could have tripped during a recent storm. On a more serious level, you might have a dead photo-cell. The Passive Infrared (PIR) sensor itself may have failed. PIR sensors detect temperature changes against background heat. When they die, the fixture loses its triggering mechanism entirely.
Strobing creates a distracting disco effect in your yard. The root cause frequently involves incompatible LED bulbs installed in older fixtures. Older units require a minimum wattage load to operate the sensor relay properly. Low-wattage LEDs fail to meet this threshold. The relay rapidly clicks on and off as a result. In modern integrated units, flashing usually indicates a failing internal LED driver. The driver can no longer regulate incoming voltage correctly.
Table: Common Diagnostic Symptoms and Root Causes
Symptom | Primary Root Cause | Secondary Root Cause |
|---|---|---|
Stays on continuously | Stuck in manual override mode | HVAC/Streetlight interference |
Fails to trigger | Burned-out bulb or tripped breaker | Dead photo-cell or PIR sensor |
Strobing or flashing | Incompatible LED bulbs | Failing internal voltage driver |
How do you know you fixed the problem? A successful repair must meet strict functional requirements. First, the unit consistently triggers at your desired range. It should reliably detect motion at 30 feet if rated for that distance. Second, it respects daylight. The photo-cell functions correctly, keeping the light off during sunny hours. Finally, it reliably shuts off after your set duration. It should not linger indefinitely once motion stops.
Do not immediately rush to buy a replacement. Work through these four distinct approaches. They progress from the easiest fixes to more involved mechanical checks. You can resolve most issues within the first two steps.
Modern sensors contain small microprocessors. Like any computer, they occasionally freeze. Power surges and rapid grid fluctuations often lock them in a default factory override state. This makes them stay on constantly.
Locate the dedicated wall switch controlling the fixture.
If no wall switch exists, locate the corresponding circuit breaker in your main panel.
Turn off the switch or flip the breaker to the "Off" position.
Wait a full 1 to 2 minutes. This drains residual power from the internal capacitors.
Restore power and wait for the brief warm-up cycle to complete.
This simple power cycle forces the internal relay to reset. It clears the false memory state causing the override fault.
Misconfigured settings account for many reported "failures." Most units feature three adjustable dials located under the sensor head.
Time: Controls how long illumination lasts after detecting motion. Adjust this dial to its absolute minimum setting for daytime testing.
Sens (Sensitivity/Range): Controls the infrared detection distance. Turn this to maximum during your testing phase to ensure the PIR functions.
Lux (Ambient Light): Controls the daylight restriction. Re-calibrate this dial so the sensor does not trigger during the day. Turn it towards the "moon" icon to prevent daylight activation.
Sensors require a clear line of sight. They monitor infrared heat signatures across specific zones. Physical blockages prevent them from seeing temperature changes.
Clean the PIR sensor lens thoroughly. Use a soft microfiber cloth slightly dampened with water. Remove heavy dust layers, pollen, and thick spiderwebs. These natural elements block infrared signatures easily. Next, check the physical alignment. Re-aim the sensor head downwards by a few degrees. A horizontal sensor catches heat from passing cars. It might also detect movement in neighboring properties. Angling it toward your yard prevents these false triggers.
If resets and cleaning fail, you must test physical components. Start with the easiest variable: the bulbs.
Swap out existing bulbs with known-working replacements. Use basic, non-smart, dimmable LEDs. Smart bulbs contain their own microchips. These chips often conflict with the fixture's internal relay. Next, check the wiring harness. Turn off the main breaker before proceeding. Remove the fixture canopy and inspect the wire nuts. Verify the Load, Neutral, and Ground connections remain secure. Use a non-contact voltage tester to confirm zero power before touching any exposed copper. Loose weather-beaten wires cause intermittent power drops.
Sometimes a repair simply takes too much time or money. You must objectively evaluate the condition of your current unit. Patching a degraded fixture often leads to repeated failures down the road. Use these criteria to make a rational decision.
Replacing an isolated PIR sensor seems economical initially. A standalone replacement sensor often costs between $20 and $30. However, this repair requires dismantling the housing and re-wiring internal connections. You must weigh this effort against buying new equipment. A modern, fully integrated LED Flood Light usually starts around $40 to $60. The time spent splicing tiny wires rarely justifies the small financial savings. A new fixture provides a fresh warranty and guaranteed compatibility.
Outdoor fixtures face brutal environmental conditions. Ultraviolet rays destroy plastic over time. Inspect your current housing carefully.
Look for brittle or chalky plastic on the sensor head.
Check for visible water condensation trapped inside the motion lens.
Inspect the bulb sockets for rusted metal contacts or severe corrosion.
These signs indicate structural failure. A patch repair will not hold up to upcoming weather changes. Moisture will inevitably short circuit the board again.
Consider the fixture's primary role. If the light acts as a crucial security deterrent, you cannot tolerate intermittent failures. A unit overlooking a dark driveway must work flawlessly every night. If your current unit fails randomly despite thorough troubleshooting, replace it immediately. Holding onto unreliable hardware creates an unnecessary vulnerability for your property.
If you decide to replace the unit, choose your upgrade carefully. The market offers thousands of options. Selecting standard industry features ensures long-term reliability.
Prioritize fixtures boasting strong weather resistance. Look for units carrying an IP65 or higher rating. This rating guarantees protection against low-pressure water jets and heavy dust. Next, seek dual-head or triple-head articulation. Articulating heads allow you to push light into blind spots without moving the base plate. Finally, consider models offering adjustable color temperatures. Being able to switch between 3000K (warm) and 5000K (daylight) helps match your home's aesthetic.
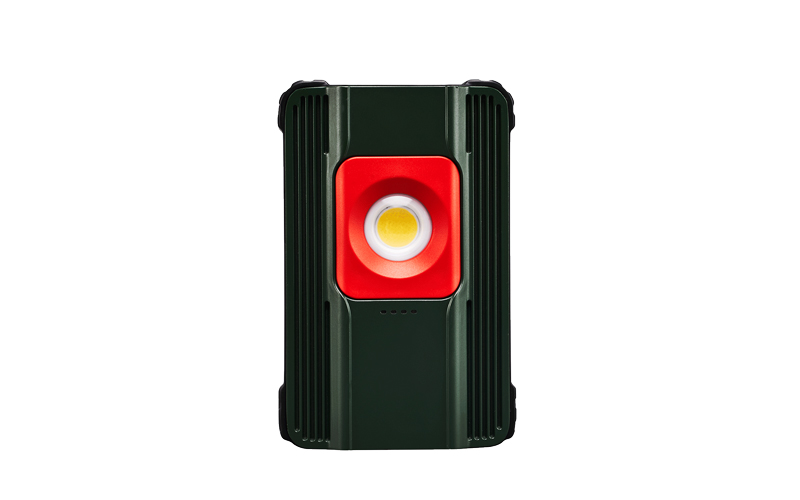
Sometimes hardwiring a new fixture proves too difficult immediately. You might discover the old location no longer works well. Perhaps a new patio roof or growing tree now blocks the ideal sensor path. In these scenarios, you need flexible alternatives. Consider supplementing the dark area with a battery-powered or plug-in Motion Sensor Work Light. These devices offer immediate illumination exactly where you need it. They provide temporary security while you evaluate long-term hardwiring routes.
You must weigh the benefits of smart technology against traditional reliability. Traditional PIR sensors boast an incredibly low failure rate. They offer zero latency, triggering instantly upon detecting heat. Conversely, WiFi-enabled cameras and smart lights provide mobile alerts and footage. However, they require a highly stable 2.4GHz network reaching outside your exterior walls. They are also subject to forced firmware updates. If your router goes down, your smart security light might fail to trigger.
Handling electrical components demands immense respect. Complacency leads to severe injuries and property damage. Observe standard safety protocols when modifying any outdoor fixture.
Never assume a wall switch completely kills power to an outdoor box. Switches sometimes break or get wired backward. Someone else in the house might casually flip the switch back on while you work. Always lock out the corresponding breaker at the main electrical panel. Verify the circuit is dead using a reliable non-contact voltage tester. Wave the tester near all internal wires before unscrewing any wire nuts.
Improper reassembly guarantees future water damage. Rainwater naturally flows down exterior walls and behind poorly sealed backplates. Failure to re-caulk the canopy plate leads to rapid water ingress. Always apply a fresh bead of exterior-grade silicone around the top and sides of the mounting bracket. Leave the bottom edge un-caulked to allow accidental moisture to weep out. Ensure you apply the manufacturer-provided weatherproof gasket during reassembly. Skipping the gasket inevitably causes short circuits.
Safety certifications matter. Never install cheap, unbranded components lacking standard testing marks. Ensure any replacement parts or entirely new units carry standard safety certifications. Look for UL (Underwriters Laboratories) or ETL listed badges on the packaging. These marks confirm the device meets stringent fire and electrical safety standards. Complying with these standards satisfies local housing codes. Furthermore, it protects your homeowner's insurance policy in case of fire.
Fixing outdoor security lighting does not have to be a frustrating ordeal. By following a structured diagnostic flow, you can pinpoint the exact failure. Always begin with a hard reset to clear software glitches. Clean the lens and calibrate the dials before assuming components have died. Inspect your bulbs and wiring only after ruling out environmental factors. This logical approach saves substantial time.
While DIY troubleshooting saves money initially, you must recognize the threshold for total replacement. Severe hardware degradation and intermittent security gaps demand permanent solutions. Hanging onto a water-damaged unit compromises your property's safety. Making a clean upgrade guarantees reliable, long-term illumination.
Do not leave your perimeter vulnerable tonight. Evaluate top-rated replacement Flood Light models if your current fixture proves beyond repair. If you need time to plan a hardwired installation, browse temporary Motion Sensor Work Light options to secure your property immediately.
A: The unit likely suffers from misaligned Lux (ambient light) settings or a burned-out internal photocell. The Lux dial tells the sensor when it is dark enough to operate. If set too high, it triggers in broad daylight. Alternatively, a dead photocell cannot detect sunlight at all, forcing the light to trigger continuously.
A: Yes. Most manufacturers build in a quick switch-flick override method. Flipping the connected wall switch off and back on within two seconds usually bypasses the sensor. This forces the light to remain on constantly. To disable this override, turn the switch off for one full minute.
A: Not always. Old halogen sensors require a minimum wattage load passing through the internal relay to function properly. Highly efficient LED bulbs often fail to pull enough current to keep the relay engaged. This mismatch causes LEDs to flicker, strobe, or remain dimly lit when they should be off.
A: You can expect a realistic lifespan of 5 to 10 years. Longevity depends heavily on climate and placement. Intense daily UV exposure degrades the plastic PIR lens. Extreme temperature swings and heavy rain eventually cause internal seals to fail, leading to moisture-induced short circuits.

