


Views: 0 Author: Site Editor Publish Time: 2026-10-03 Origin: Site


Stepping into your dark driveway without your security fixture turning on is undeniably frustrating. We expect these outdoor fixtures to illuminate our path flawlessly every single time. When a sensor malfunctions—whether it gets stuck on, flashes erratically, or stays completely dark—it creates significant security vulnerabilities and wastes precious energy. Ignoring these annoying glitches leaves your property exposed to potential intruders and unnecessarily drives up your monthly utility bills. In this guide, you will learn how to accurately diagnose common sensor faults quickly and safely. We will explore simple zero-cost calibration techniques alongside more complex electrical interventions. Ultimately, you will gain the knowledge needed to determine whether to attempt a DIY repair, call a professional, or invest in a brand-new replacement.
Speed of Resolution: 80% of sensor issues can be resolved through a rapid power-cycle reset or basic sensitivity calibration.
Component Lifespan: Passive Infrared (PIR) lenses and internal relays degrade naturally over 5–7 years due to UV exposure and thermal cycling.
Safety First: Any internal wiring adjustments require isolating power at the breaker; safety and local electrical compliance must dictate DIY limits.
The Replacement Threshold: If a fixture requires professional electrical labor or replacement boards, upgrading to a modern flood light or specialized motion sensor work light yields a higher ROI.
Before grabbing a ladder and disassembling your outdoor fixture, you must define the specific failure mode. Accurate diagnosis prevents wasted time and keeps you from buying replacement components needlessly. Passive Infrared (PIR) technology operates by detecting heat signatures moving across invisible grid zones. When this sensitive system fails, it typically presents one of three distinct behavioral patterns. We must categorize your issue precisely to apply the correct fix.
Symptom 1: The fixture stays on continuously. This annoying issue usually stems from a stuck internal relay. Relays act as physical gateways for electricity; when they fuse shut from power surges, the bulbs never turn off. Alternatively, you might have accidentally triggered the "manual override" mode. Many modern fixtures enter this bypass state when someone flips the connected indoor wall switch rapidly, forcing the unit to stay illuminated regardless of motion.
Symptom 2: The sensor fails to trigger. When you walk in front of the unit and nothing happens, the system is failing to register heat movement. This points directly to a dirty or severely degraded PIR lens blocking the infrared signals. You should also consider burned-out bulbs or a disrupted main power supply. If the circuit breaker tripped, the entire system naturally goes dead.
Symptom 3: Intermittent flashing or hypersensitivity. Erratic triggering drives homeowners crazy and annoys neighbors. Environmental interference often causes this specific behavior. Wind blowing warm branches, sudden temperature drops, or overlapping thermal zones confuse the passive infrared detector. Loose wiring inside the junction box also creates micro-disconnects, prompting the system to flash as it rapidly loses and regains electrical contact.
Common Fault Identification Chart
Observed Behavior | Primary Component at Fault | Underlying Cause |
|---|---|---|
Stays on 24/7 | Internal Relay / Control Board | Fused relay contacts or activated manual override switch. |
Never turns on | PIR Lens / Power Supply | Opaque lens blockages, dead bulbs, or tripped circuit breaker. |
Random flashing | Wiring / Sensitivity Dial | Environmental heat shifts or loose junction box connections. |
Most erratic behaviors do not require opening the junction box or exposing live wires. We always begin troubleshooting with low-risk, zero-cost interventions. These straightforward steps resolve the vast majority of user complaints in just a few minutes.
The Power-Cycle Reset
If your unit refuses to turn off, it is likely trapped in manual override. Breaking this software loop requires a hard reset of the electrical flow. Follow these steps sequentially:
Locate the dedicated wall switch controlling the outdoor fixture and turn it to the "off" position.
If no wall switch exists, locate your home's main electrical panel and switch off the corresponding circuit breaker.
Wait a full 1 to 2 minutes. This pause allows internal capacitors to drain completely.
Restore power by flipping the switch or breaker back on. The unit should blink or remain on for a short warm-up period before returning to automatic detection mode.
Recalibrating the Core Dials
Look beneath the motion detector head unit. You will typically find three small adjustment dials. Over time, vibrations or initial poor setup can cause these settings to fall out of alignment.
Range/Sens (Sensitivity): This controls how far out the unit looks for heat signatures. Turn this dial down slightly to prevent wind-blown branches, passing cars, or stray neighborhood animals from triggering the illumination.
Time (Duration): This dictates the illumination window once triggered. Set this between 30 seconds and 5 minutes. Setting it too high mimics the "stuck on" symptom.
Lux/Daylight: This photocell adjustment prevents daytime activation. Tune this dial toward the "moon" icon so the system only energizes after dusk.
Cleaning the PIR Lens
A dirty lens scatters incoming infrared signals, ruining detection accuracy. Grab a soft microfiber cloth and a mild solution of diluted dish soap. Gently wipe away spider webs, accumulated dust, and hard water stains. You must use extremely safe methods here. Never use abrasive sponges or harsh chemical solvents. The curved plastic cover is incredibly delicate; microscopic scratches will permanently deflect thermal signals and render the unit blind.
When basic resets and thorough cleaning fail to restore functionality, you must evaluate the internal hardware. Addressing hard technical faults demands respect for residential electricity. We must maintain rigorous safety standards before attempting any component interventions.
Evaluating PIR Lens Degradation
The plastic dome shielding the internal electronics endures harsh environmental conditions. Ultraviolet radiation systematically breaks down this material. You can easily identify UV-damaged plastic: it turns yellow, develops a cloudy haze, or feels chalky to the touch. Brittle or cracked lenses completely compromise the weather seal. Once water breaches this barrier, it corrodes the circuit board instantly. If the dome shows physical cracks, cleaning it will no longer help.
Checking Connections (Safety Warning)
Loose wire nuts create intermittent power disruptions. Inspecting these connections is a standard troubleshooting step, but it carries extreme danger if done incorrectly. You absolutely must state the necessity of turning off the main breaker before proceeding. Relying on a wall switch is never enough, as someone could accidentally flip it while you work. Furthermore, you must verify the wires are completely dead using a non-contact voltage tester. Only after confirming zero voltage should you unscrew the fixture from the wall. Gently tug on the black (hot), white (neutral), and bare copper (ground) wires. Tighten any loose wire nuts and secure them with electrical tape.
Replacing the Sensor Head Unit
If the internal relay fails, the entire detector head becomes useless. Hardware stores sell universal replacement heads. You can unscrew the broken detector arm and wire a new one into the existing fixture base. However, you must carefully assess the compatibility risks. Universal threads do not always match older proprietary housings. Forcing a mismatched joint creates tiny gaps, guaranteeing future moisture ingress. You must weigh the hassle of splicing new wires against simply replacing the entire assembly.
Knowing exactly when to stop troubleshooting saves you money and prevents intense frustration. We use a structured evaluation framework to balance expected outcomes against the actual cost of repair.
Cost of Labor vs. Unit Value
If standard resets fail and you feel uncomfortable handling live electrical wires, you might consider hiring help. However, you must compare the hourly rate of a licensed electrician against the value of the fixture itself. Electricians routinely charge substantial minimum call-out fees. Meanwhile, a brand-new commercial-grade unit often costs well under $100. Spending heavily on labor to patch a decaying plastic shell rarely makes financial sense.
Technology Obsolescence
Take a hard look at your current hardware. Evaluate whether the fixture utilizes outdated, energy-inefficient halogen or incandescent bulbs. Older technology runs extremely hot, which accelerates the degradation of nearby plastic components and wires. Modern integrated LEDs consume a fraction of the electricity and run significantly cooler. If your broken unit still uses fragile glass bulbs, a failure presents the perfect opportunity to abandon obsolete technology.
The Compliance & Risk Factor
We strongly advise against applying silicone caulk to patch heavily corroded or crumbling fixtures. Attempting to seal a fundamentally degraded unit introduces massive risk factors. Water always finds a way inside compromised housings. Moisture ingress leads directly to electrical arcing, tripped circuit breakers, and potential fire hazards. Maintaining local electrical compliance means abandoning hardware that no longer safely isolates live current from the weather.
If your current unit proves beyond safe repair, you must transition to selecting a highly durable upgrade. Establishing strict criteria ensures you do not end up replacing the new hardware again in two years.
Key Specs to Demand
Do not settle for cheap, unrated plastics. You must require IP65 weatherproofing or higher, ensuring the device remains entirely protected against dust and low-pressure water jets. Integrated LEDs are non-negotiable for longevity. Furthermore, seek out dual-sensor technology. Units combining standard PIR with microwave detection dramatically reduce false alarms. Microwave sensors penetrate thin barriers and detect physical mass movement, while PIR confirms the heat signature, creating a highly accurate trigger system.
Use-Case Alignment
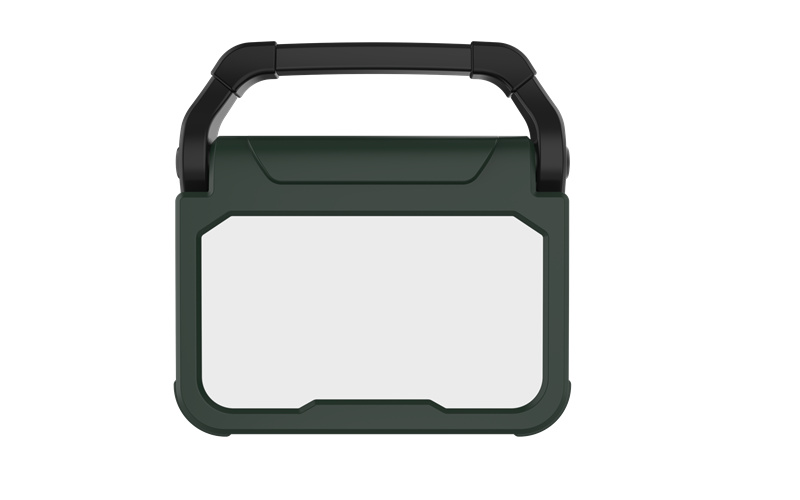
You need to differentiate between basic residential needs and heavy-duty task lighting. Understanding your environment dictates the form factor you should purchase. A standard perimeter Flood Light excels at broad, ambient security illumination across a backyard. It mounts permanently to eaves and requires minimal interaction. Conversely, if you spend time working in a large unheated garage, barn, or active job site, you require something built for demanding environments. A heavy-duty Motion Sensor Work Light provides frequent, high-lumen task illumination exactly when you walk into the workspace, offering rugged durability far beyond typical residential models.
Warranty and Brand Trust
Always scrutinize the fine print before checking out. Look for transparent warranty terms spanning at least three to five years. Crucially, verify the policy covers the entire unit. Many budget brands offer lengthy warranties on the LED diodes but exclude the fragile motion detector components from coverage. A trusted brand stands behind the electronic relays and plastic lenses just as firmly as the light source itself.
Restoring safety and visibility to your property requires a methodical, sequential approach. We always start by diagnosing the exact failure symptom to avoid random guesswork. Once you define the problem, execute standard power-cycle resets and sensitivity calibrations before you ever touch a screwdriver. These straightforward actions resolve the majority of annoying electrical hiccups.
If your physical hardware shows obvious signs of decay, you must prioritize safety. We strongly advise you to try the simple breaker reset first. However, if you discover the PIR lens is physically cracked, or if the internal relay is fried and clicking uselessly, pivot immediately to replacement. Upgrading your outdated hardware guarantees reliable property security and permanently eliminates the dangerous electrical hazards associated with water-logged outdoor wiring.
A: Wind moves tree branches and rapidly shifts varying temperature air masses across your yard. The Passive Infrared (PIR) sensor registers these sudden environmental changes as moving heat signatures, tricking the system into activation. Lowering the "Sens" dial usually resolves this issue.
A: Yes. Most modern security fixtures feature a manual override mode. You activate it by rapidly flipping the connected wall switch off and on twice. To revert to normal motion-sensing mode, turn the switch off completely for one to two minutes, then restore power.
A: While technically possible in DIY hardware forums, finding exact-fit OEM replacement parts is incredibly difficult. An imperfect seal between a generic replacement lens and the housing risks water ingress. This moisture quickly causes internal electrical shorts and ruins the circuit board.
A: You can realistically expect a standard unit to function reliably for 5 to 10 years. However, prolonged exposure to direct sunlight and severe weather accelerates the degradation of the plastic sensor housing, eventually causing the internal relays to fail or the lens to crack.

