


A sudden lighting failure on an active job site halts progress instantly. When primary equipment goes dark, the clock immediately starts ticking on operational efficiency. A malfunctioning Work Light represents more than a minor inconvenience; it creates immediate lost productivity and serious safety hazards. Defective illumination can even trigger compliance liabilities if unaddressed. Identifying the exact root cause demands a systematic diagnostic approach rather than risky electrical guesswork. We will provide a clear framework to isolate common electrical faults safely. You will learn practical repair steps for modern solid-state electronics and older analog fixtures. Finally, we will outline exactly when replacing your broken unit becomes the smartest, most compliant business decision.
Isolate the Fault: 80% of work light failures stem from power supply cords, faulty switches, or blown internal drivers, not the diodes or filaments themselves.
Understand the Tech: Fixing an LED Work Light requires different diagnostic steps (checking drivers and heat sinks) compared to legacy halogen models (checking filaments and fuses).
Evaluate the ROI of Repair: If a repair compromises the unit's IP (Ingress Protection) rating or requires more than 30 minutes of labor, upgrading to a commercial-grade unit is historically the better business decision.
Prioritize Compliance: Uncertified wire splicing or bypassing thermal switches voids OSHA-compliant safety certifications (UL/ETL).
Before disassembling any fixture, you need a logical troubleshooting hierarchy. Technicians often waste valuable hours tearing into sealed housings only to discover a tripped breaker. Adopting a methodical testing sequence isolates the true failure point quickly and safely.
Begin by validating the power supply. A dead light frequently points to a dead outlet. Use a digital multimeter set to AC voltage to test the receptacle. Alternatively, plug a known-working secondary device into the same outlet. Job sites heavily utilize Ground Fault Circuit Interrupter (GFCI) outlets, which trip easily under heavy loads or minor moisture exposure. Reset any tripped GFCI receptacles. Next, evaluate the extension cord powering the unit. Long runs of undersized gauge wire cause severe voltage drops. This voltage drop starves the light of power, leading to erratic behavior or complete shutdown.
Power cords endure massive abuse on industrial sites. They get crushed by heavy machinery, dragged across abrasive concrete, and yanked out of sockets. Perform a thorough visual inspection along the entire length of the cable. Look for visible abrasions, compromised outer insulation, or exposed copper wiring. Examine the plug face carefully. Bent, loose, or heavily oxidized prongs prevent secure electrical contact.
If the cord looks visually intact, perform a continuity test on the plug. Set your multimeter to the continuity function (the setting emitting a beep). Attach one probe to a plug prong and use the other probe to trace the circuit into the housing. A lack of continuity indicates a hidden internal break inside the cord jacket. You must replace the entire cord if it fails this baseline step.
Sealed rocker switches remain highly susceptible to microscopic job site dust and penetrating moisture. Silica dust acts as an insulator. When it infiltrates the switch housing, it coats the internal copper contacts. This blocks the electrical current entirely. To test the switch mechanism, follow these steps:
Disconnect the unit from all power sources.
Carefully remove the external switch cover or access panel.
Locate the two main electrical terminals on the back of the switch.
Set your multimeter to the continuity or Ohms setting.
Toggle the switch to the "ON" position.
Place one probe on the input terminal and the other on the output terminal.
A reading of zero ohms (or a continuous beep) means the switch functions correctly. Infinite resistance indicates an internally failed switch. Replacing a standard rocker switch is a straightforward repair requiring only basic hand tools and crimp connectors.
Modern solid-state lighting relies on completely different architecture compared to older technologies. Fixing an LED Work Light requires understanding electronic drivers and thermal management systems rather than simple filaments.
Many users mistakenly assume the light-emitting diodes (LEDs) themselves burned out when the fixture goes dark. In reality, commercial-grade LED diodes boast lifespans exceeding 50,000 hours. They rarely fail independently. When they do degrade, they typically dim slowly over years. Sudden, catastrophic failure almost always occurs upstream in the power delivery system. You should focus your diagnostic efforts on the internal circuitry delivering power to the diode board.
The driver acts as the heart of the fixture. It converts high-voltage AC wall power into the low-voltage DC current required by the diodes. Drivers absorb the brunt of electrical surges and thermal stress.
Flickering or Strobing: This typically indicates failing internal capacitors inside the driver. The driver can no longer smooth out the AC ripple.
Intermittent Shutoffs: Often points to a thermal overload inside the driver housing. As the component overheats, internal safeties cut the power.
Complete Failure to Illuminate: Usually signifies a blown internal fuse or a completely fried transformer coil inside the driver.
To test the driver, open the housing and locate the DC output wires leading to the LED board. Set your multimeter to DC voltage. Energize the light briefly and measure the output across these wires. Compare your reading against the manufacturer's specified voltage range printed directly on the driver label. If the driver receives 120V AC but outputs 0V DC, you have found the failed component.
Heat is the primary enemy of solid-state electronics. While LEDs run cooler than older bulbs, they still generate localized thermal loads. Manufacturers utilize large cast-aluminum heat sinks to draw this heat away from the sensitive diodes. Over time, the thermal paste connecting the LED board to the heat sink degrades, drying out and cracking.
Job site debris also clogs the external cooling fins. Mud, paint overspray, and thick dust insulate the housing, trapping heat inside. When temperatures rise beyond safe limits, built-in thermal protection sensors automatically shut off the power. Cleaning the external fins thoroughly and reapplying fresh thermal paste often resolves mysterious auto-shutoff issues.
Sourcing replacement parts presents a significant practical limitation. Many manufacturers use proprietary drivers sealed entirely in waterproof potting compound. You cannot repair a potted driver; you can only replace it. Finding a universal replacement driver requires matching the exact output voltage, constant current rating, and physical dimensions. If you install an incompatible driver, you risk instantly destroying the entire LED board upon activation.
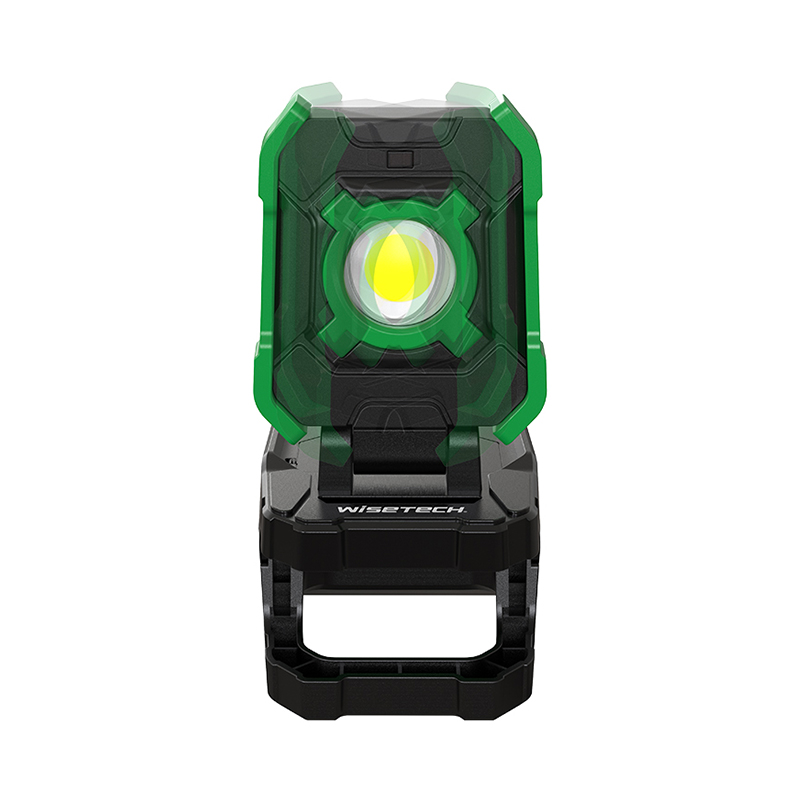
Many contractors still utilize older halogen fixtures due to their high lumen output and perceived simplicity. However, these analog systems suffer from distinct vulnerabilities. Users transitioning from legacy tech often encounter specific faults requiring unique diagnostic approaches.
The most common failure in a halogen fixture remains the bulb itself. These bulbs contain a fragile tungsten filament housed inside a pressurized quartz glass tube. Dropping the fixture, even from a few inches, frequently snaps the hot, brittle filament. Perform a visual inspection of the tube. A broken wire or heavy black soot inside the glass confirms a blown bulb.
When installing a replacement bulb, never touch the quartz glass with bare skin. Human fingers leave behind microscopic oils. Once energized, the bulb reaches extreme temperatures. These skin oils cause localized hot spots on the quartz surface, leading to rapid devitrification. The glass eventually blisters and shatters prematurely. Always wear clean cotton gloves or use a paper towel when handling new halogen bulbs.
Halogen bulbs generate intense, dangerous levels of radiant heat. To prevent fires, units exceeding 500 watts incorporate an internal thermal limit switch. This bimetallic switch monitors the internal housing temperature. If someone accidentally covers the protective grill or knocks the fixture face-down, the trapped heat forces the switch to open the circuit.
Once tripped, the light will not turn back on until it cools down completely. Many high-wattage units feature a manual reset button located on the back of the housing. Allow the unit to cool for at least thirty minutes, clear any obstructions, and firmly press the reset button. You should hear an audible click as the circuit closes.
Halogen tubes rely on spring-loaded ceramic sockets for power delivery. The extreme heat cycling causes these metal contact points to oxidize rapidly. Over time, a thick layer of carbon buildup and corrosion forms on the socket terminals. This oxidation creates immense electrical resistance, preventing sufficient power from reaching the bulb ends.
If you insert a brand-new bulb and the light remains dead, suspect socket oxidation. Disconnect the power completely. Use a small strip of fine-grit emery cloth or a specialized electronic contact cleaner to scrub the metal terminals. Polish the contacts until they appear shiny and clean. Reinsert the bulb and test the connection.
Not every broken tool deserves a repair. Technicians must calculate the true cost of fixing a unit versus upgrading to a modern alternative. Emotional attachment to an old piece of equipment often leads to poor financial decisions. Evaluating the bottom-of-funnel matrix helps you determine the optimal operational choice.
Labor costs represent the largest hidden expense in equipment maintenance. Billable time spent diagnosing electrical faults quickly outpaces the raw value of the fixture. Implement the standard 30-minute/50% rule across your organization. If diagnosing and fixing the light requires more than 30 minutes of labor, replace it. Similarly, if replacement parts exceed 50% of the cost of a brand-new unit, replacing the entire fixture becomes the economically optimal choice.
Repair vs. Replace Evaluation Matrix
Factor | Consider Repair If... | Mandate Replacement If... |
|---|---|---|
Labor Time | Fix takes under 15 minutes. | Diagnosis and repair exceed 30 minutes. |
Parts Cost | Components cost less than 20% of new unit. | Parts exceed 50% of replacement value. |
IP Integrity | Gaskets remain fully intact post-repair. | Housing seals break or warp during opening. |
Safety Certification | Using OEM approved plug replacements. | Requires internal splicing or bypassing safeties. |
Job site safety holds absolute priority over salvaging equipment. Bypassing a broken thermal limit switch to force a light to turn on creates an immediate fire hazard. Splicing a cut power cord with generic wire nuts and electrical tape directly violates OSHA regulations regarding flexible cords on construction sites.
Furthermore, unauthorized DIY repairs instantly void UL, CE, or ETL safety certifications. If a modified fixture causes a site fire or electrocutes a worker, your company absorbs massive liability. Commercial job sites demand strictly compliant equipment. Do not introduce unnecessary risk just to save a fifty-dollar fixture.
Manufacturers build robust lighting solutions to withstand heavy rain and airborne dust. They achieve this using precision-molded silicone gaskets and sealed lens covers. Opening a sealed housing often tears or compresses the factory waterproof gasket permanently. Once you break this seal, you compromise the unit's Ingress Protection rating. Even if you fix the electrical fault perfectly, the compromised housing remains vulnerable to future moisture intrusion. The next heavy rainstorm will likely short-circuit the repaired internal components.
When you decide to replace a failed unit, you must select hardware designed to survive the hazards that destroyed your previous equipment. Shortlisting the right features ensures your new investment delivers a longer, more reliable service life.
Modern job sites require uncompromising structural integrity. Prioritize fixtures featuring heavy-duty cast-aluminum housings over cheap plastic alternatives. Aluminum shrugs off blunt force impacts and serves as a superior thermal conductor. Evaluate the lens material carefully. Avoid fragile glass lenses. Specify polycarbonate covers instead, as polycarbonate resists shattering upon impact and handles extreme temperature fluctuations without cracking.
Do not settle for baseline water resistance. Evaluate units offering IP65 ratings or higher. An IP65 rating guarantees complete protection against microscopic dust ingress and defense against low-pressure water jets from any direction. This level of protection prevents the exact moisture and silica dust failures discussed in earlier diagnostic sections.
Look closely at the back of the fixture before purchasing. The best units feature oversized, integrated passive cooling fins. These deep fins maximize the surface area exposed to ambient air. Superior heat dissipation architecture dramatically extends the lifespan of the internal driver by keeping operating temperatures well below critical failure thresholds.
Assess how your team actually deploys lighting across large projects. Consider the massive value of hybrid power models. Units accepting both rechargeable battery packs and direct AC wall power offer unmatched flexibility during early construction phases. Additionally, look for daisy-chain capabilities. Models featuring integrated power take-off receptacles allow you to string multiple lights together using a single wall outlet, drastically reducing dangerous extension cord clutter on the floor.
Stop wasting billable hours patching obsolete equipment. Direct your procurement team to evaluate a shortlist of high-durability, commercial-grade LED fixtures today. Browse established replacement parts catalogs to verify component availability, or immediately upgrade your fleet to solid-state solutions engineered for uncompromising job site resilience.
Effective troubleshooting saves valuable time, but understanding exactly when a fixture remains beyond safe repair saves money and significantly mitigates operational risk. Methodical diagnostics isolate power source issues quickly, preventing unnecessary teardowns. However, once internal electronics fail or safety housings compromise, upgrading becomes essential. Maintain rigorous job site safety standards by permanently avoiding makeshift hack repairs on high-voltage equipment. Investing in durable, highly-rated solid-state illumination ensures your crews stay productive, compliant, and safe during every shift.
A: Flickering typically indicates a failing internal LED driver struggling to convert AC wall power into steady DC current. It can also result from severe voltage drops caused by using excessively long or undersized extension cords. Additionally, plugging the unit into an incompatible dimmer switch circuit will cause rapid strobing.
A: While plug-and-play LED conversion bulbs exist, they often fail quickly inside halogen housings. Halogen enclosures lack the necessary passive cooling fins required by LED electronics, causing immediate thermal overload. Recommending a full fixture upgrade provides vastly superior reliability and light distribution.
A: No. OSHA regulations strictly prohibit repairing flexible power cords with standard wire nuts and electrical tape on commercial sites. Proper cord repairs demand specialized heat-shrink connections and engineered strain relief to maintain safety certifications. Replacing the entire cord remains the safest, most compliant solution.
A: This indicates thermal overload protection kicking in. As the internal components overheat, built-in safety sensors cut the power to prevent fires or permanent driver damage. This usually occurs when heavy mud, dust, or paint blocks the external heat sink cooling fins.

