


Views: 0 Author: Site Editor Publish Time: 2026-09-20 Origin: Site


Exterior lighting significantly boosts property security while enhancing evening aesthetics. Upgrading a legacy fixture offers a direct path to modernizing outdoor protection. It also maximizes energy efficiency over time. However, this project presents serious technical challenges. You must safely handle live electrical components. Proper weather sealing is equally critical. It prevents moisture ingress and dangerous short circuits. Furthermore, selecting a unit tailored to your exact coverage requirements determines the ultimate success of the upgrade. This comprehensive guide walks you through the entire replacement lifecycle. We cover evaluating modern replacement options. We also explain how to conduct a pre-installation safety audit and gather the right tools. You will learn how to execute a code-compliant, secure DIY installation step-by-step. Read on to transform a potentially hazardous task into a smooth, rewarding home improvement project.
Upgrading a failing fixture requires assessing the existing junction box compatibility and wiring condition before purchasing a replacement.
Modern replacements should be evaluated on lumen output, IP (Ingress Protection) weather ratings, and sensor types.
Strict adherence to electrical safety protocols—specifically dual-verifying power disconnection—is non-negotiable for DIY implementation.
Proper weatherproofing (using silicone sealant and standard gaskets) prevents premature failure and electrical shorts.
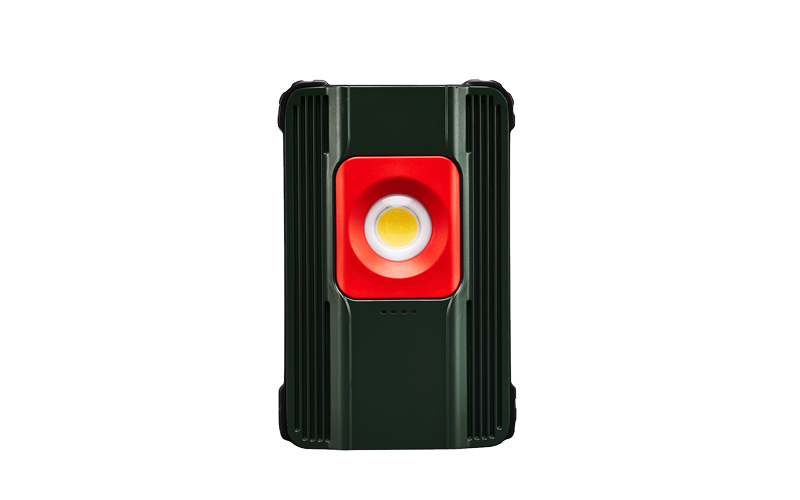
You must first define your primary use case. Different environments demand distinct lighting strategies. Assess whether your space requires a motion-activated security fixture to deter intruders. You might instead need a dusk-to-dawn area light for continuous background illumination. Alternatively, you may need an Outdoor LED Work Light for high-visibility tasks in driveways or workshops. Tailoring the beam angle and intensity to the specific application prevents light pollution. It also ensures you achieve adequate coverage without blinding neighbors.
Modern lighting relies on lumen output rather than wattage. Lumens measure actual brightness. Wattage only measures energy consumption. Evaluate the required lumen output for your specific zone. A standard driveway typically needs between 1,500 and 3,000 lumens. Frame the transition from legacy halogen bulbs to modern LEDs as a long-term cost reduction strategy. LEDs consume roughly eighty percent less electricity. They also boast lifespans exceeding 50,000 hours. This drastic reduction in energy consumption directly impacts monthly utility expenses.
Outdoor fixtures endure brutal environmental conditions. You must prioritize high Ingress Protection (IP) ratings. Detail the importance of IP65 or IP66 ratings for outdoor exposure. An IP65 rating ensures the housing blocks all dust. It also resists low-pressure water jets from any direction. IP66 offers even greater protection against heavy seas or powerful water jets. Additionally, verify electrical safety certifications. Look for Underwriters Laboratories (UL) or Electrical Testing Laboratories (ETL) stamps. These marks guarantee the device passed rigorous independent safety testing.
Your property layout dictates the ideal sensor type. Compare passive infrared (PIR) motion sensors against photocell sensors carefully. PIR sensors detect heat signatures moving across their field of view. They work best for security applications. Photocell sensors measure ambient light. They automatically trigger the fixture when the sun sets. Consider false-trigger risks before buying. Heavy street traffic or swaying trees can easily fool overly sensitive PIR units.
Sensor Type | Trigger Mechanism | Best Application | Common Limitations |
|---|---|---|---|
Passive Infrared (PIR) | Heat signature movement | Security zones, pathways | False triggers from animals or cars |
Photocell | Ambient light levels | Driveways, continuous overnight lighting | Can be confused by nearby streetlamps |
Dual-Tech (PIR + Photocell) | Heat and ambient light | Smart home setups, entryways | Higher initial purchase cost |
Electrical safety demands absolute certainty. Emphasize the necessity of a non-contact voltage tester. Explain why turning off the wall switch remains insufficient. Someone could accidentally flip the switch during your installation. Furthermore, faulty wiring might leave the circuit energized even when switched off. Breaker-level disconnection is mandatory. You must isolate the circuit at the main service panel. Lock the panel door if possible. Alert all family members about the ongoing electrical work.
You must identify the structural integrity of the existing outdoor junction box. Remove the old faceplate carefully. Inspect the internal mounting threads. Rusted or stripped ear threads will fail to hold a new base safely. Note heavier fixtures may require upgrading the mounting bracket entirely. Standard plastic boxes often warp over time. Heavy metallic fixtures usually demand a reinforced, weatherproof metal junction box. Upgrading a brittle box prevents catastrophic structural failure later.
Gathering proper tools prevents dangerous workarounds. Using improvised tools often damages wiring insulation. It can also compromise weather seals. Keep these essential items within arm's reach.
Non-contact voltage tester
Wire strippers and cutters
Philips and flathead screwdrivers
Exterior-grade silicone caulk
Wire nuts (appropriately sized for your wire gauge)
Ladder (fiberglass preferred for electrical work)
Begin at your main electrical panel. Locate the main panel and flip the corresponding breaker to the off position. Return to the exterior workspace. Turn on the connected wall switch. Use a voltage tester on the existing fixture wires to confirm zero electrical current. Touch the tester probe to the exterior housing. Next, probe near the base where wires enter. The tester should remain silent and unlit. Never skip this dual-verification step.
Remove mounting screws carefully. Support the weight of the old housing as you work. Carefully pull the old fixture away from the wall. You will expose the internal wiring connections. Detach the wire nuts one by one. Separate the black (hot) wires, the white (neutral) wires, and the green or bare copper (ground) wires. Inspect the exposed house wiring thoroughly. Look for fraying, oxidation, or heat damage. Scorched insulation indicates an underlying circuit overload.
Your new unit includes hardware designed for universal fitment. Secure the new universal mounting strap or crossbar to the existing junction box. Drive the provided screws through the strap slots into the junction box ears. Do not overtighten them. Excessive force can crack older plastic boxes. Ensure the center hole is aligned perfectly for the new fixture’s mounting bolt. Check the bracket with a small torpedo level. A level bracket ensures straight, professional-looking sensors.
Correct wiring order protects you from shock hazards. Connect the grounding wire first. Join the house ground directly to the fixture ground. Next, connect the neutral wires. Twist the white house wire together with the white fixture wire. Follow this by joining the hot wires. Connect the black house wire to the black fixture wire. Secure all connections tightly with wire nuts. Turn the nuts clockwise until they bite into the copper. Gently tug each wire to test grip strength. When you connect your new Flood Light correctly, you eliminate the risk of reverse polarity.
Careful wire management prevents pinching. Tuck wires neatly deep into the junction box. Fold them in an accordion pattern. Mount the fixture flush against the wall or eave over the provided foam gasket. Insert the central mounting bolt and tighten it firmly. Apply a continuous bead of exterior silicone caulk around the top and sides of the fixture base. Leave the bottom edge completely open for moisture drainage. Trapped condensation causes internal corrosion.
Improper positioning of PIR sensors routinely leads to performance issues. If you aim the sensor too low, you create dangerous dead zones. Intruders could walk beneath the detection beam. Conversely, pointing the sensor too high captures street traffic. Explain how improper positioning leads to continuous false triggering. Adjust the sensor head downward slightly. Mask off specific lens zones if the unit includes sensitivity shields. This focuses the detection field precisely on your property.
Moisture represents the biggest threat to exterior electrical work. Detail the risks of bypassing the foam gasket entirely. Water will inevitably run behind the mounting plate. Furthermore, fully sealing the bottom of the fixture traps natural condensation. Temperature shifts draw humid air into the housing. This moisture must escape through the bottom gap. Sealing the entire perimeter guarantees early hardware failure. Always use flexible, exterior-grade silicone rated for extreme temperatures.
Electrical connections must remain mechanically secure. Discuss how improperly sized wire nuts cause major issues. A loose nut creates electrical arcing. Inadequate stripping can cause flickering or complete circuit failure. If you expose too little copper, the wires cannot interlock. If you strip too much, bare copper extends beyond the plastic skirt. This creates an immediate short-circuit hazard. Always match your wire nut color to the combined gauge of the wires.
DIY installations have firm boundaries. Provide clear criteria for abandoning the DIY approach immediately. Stop working if you observe signs of scorched wiring. Melting inside the junction box signals a dangerous electrical fault. Notice a lack of a grounding wire in older homes built prior to the 1960s? You must stop. Operating exterior electronics without a proper ground path poses lethal shock risks. Also, abandon the project if you need to run entirely new conduit. Installing a new junction box where none currently exists requires professional permitting. Licensed electricians possess the expertise to fish new wires safely. They also ensure the upgraded circuit complies with the latest National Electrical Code (NEC) standards.
Upgrading your exterior illumination requires a methodical approach. Summarize the critical path clearly. First, execute careful selection of the right lighting unit based on output and application. Second, maintain uncompromising electrical safety through strict voltage verification. Third, apply meticulous weather sealing techniques to guarantee longevity. Taking shortcuts during any of these phases compromises both performance and home security. Prompt the reader to audit their current exterior lighting today. Verify your junction box type and check wiring health before finalizing a purchase decision. Armed with the right preparation and tools, you can successfully enhance your property’s safety and visibility for years to come.
A: Yes. Standard plastic boxes often support only lightweight fixtures. Heavy commercial-grade units require a reinforced, weatherproof metal junction box. These boxes feature heavy-duty mounting threads and specialized weight ratings. Always check the manufacturer specifications to ensure your current box supports the fixture's stated weight.
A: This usually indicates an issue with photocell calibration or sensor override features. Many fixtures enter a manual override mode if you toggle the wall switch too quickly. Reset the unit by turning the power off for one minute. Additionally, check if dirt or a shadow blocks the photocell sensor.
A: It depends on the hardware compatibility. Eave-mount installations require fixture heads that articulate downward. Wall-mount fixtures project outward. Verify the packaging explicitly states "eave mount compatible." Using a strictly wall-mount unit under an overhang limits adjustability and traps moisture against the housing.
A: Reversing the hot and neutral wires creates dangerous reverse polarity. The fixture might still light up normally. However, the metal socket sleeve remains constantly energized. This poses a severe, potentially lethal shock risk to anyone changing a bulb or touching the external housing during wet conditions.

