


Views: 0 Author: Site Editor Publish Time: 2026-09-10 Origin: Site


Replacing an outdated or failing outdoor lighting setup is more than a weekend DIY project. It acts as a direct investment in property security, energy efficiency, and functional visibility. Rusted legacy halogen units frequently compromise safety. Modern exterior lighting significantly elevates your perimeter defense. You might face a heavily oxidized halogen unit. Or, you might want to upgrade to a modern motion-sensing LED model. Either way, swapping a fixture requires basic electrical safety knowledge. You must also master precise weatherproofing techniques.
Failing to seal a fixture correctly causes premature failure. Neglecting voltage checks can lead to serious electrical hazards. This guide outlines the exact technical steps for safe removal and proper installation. We will also explore critical decision frameworks. You will learn how to verify structural integrity and calibrate motion sensors. These steps ensure your new fixture meets your long-term security and daily performance requirements.
Safety is absolute: Verifying zero voltage at the junction box is a mandatory prerequisite before beginning any physical removal.
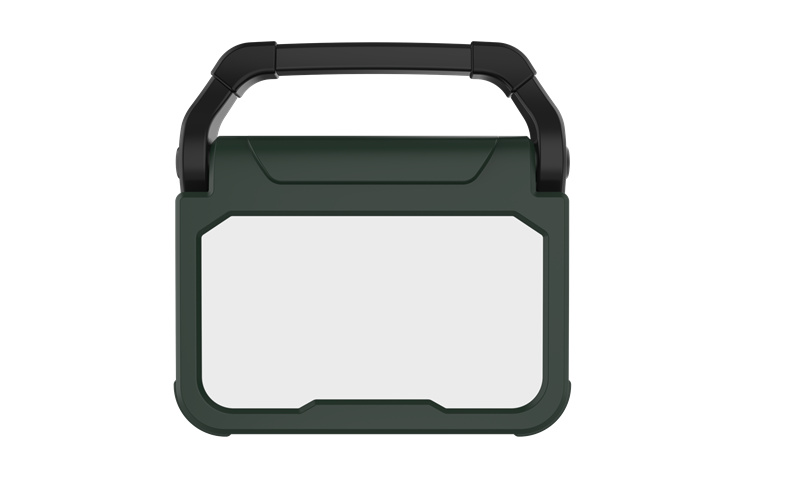
Assess before replacing: Evaluate if a hardwired fixture is necessary, or if a portable LED Work Light better serves temporary or structural illumination needs.
Weatherproofing determines lifespan: Improper sealing at the junction box is the leading cause of premature flood light failure and electrical shorting.
Code compliance matters: Properly grounding the fixture and utilizing correctly sized wire connectors ensures adherence to basic residential electrical standards.
Before touching a screwdriver, you must clearly frame the problem you want to solve. You should define the primary goal of your exterior lighting upgrade. Some homeowners need continuous perimeter security to deter trespassers. Others want motion-triggered illumination to safely navigate dark driveways. You might also simply need high-lumen task lighting for nighttime yard work. Clarifying this purpose dictates the hardware you ultimately purchase.
You must determine if your current junction box and housing remain structurally sound. Sometimes, a fixture simply has a dead bulb. However, older housings degrade over time. Sunlight causes plastics to become brittle. Rain causes metal components to rust. Water might pool inside the lens. If the housing shows severe rust or degradation, a full fixture replacement is mandatory. Replacing the entire unit proves far more effective than repeatedly replacing blown bulbs inside a compromised shell.
Permanent security requires a dedicated, hardwired Flood Light. These units mount directly to a junction box. They draw power from your home electrical panel. However, permanent fixtures lack flexibility. For active job sites, detached garages, or temporary outdoor projects, you should evaluate portable options. A heavy-duty, plug-in LED Work Light often offers superior scalability. It provides targeted illumination right where you need it. You can deploy them instantly without opening junction boxes or modifying circuit wiring.
Modern fixtures offer specific features designed for distinct outcomes. You need to align these features with your daily needs.
Integrated LEDs: These models feature built-in light panels rather than screw-in bulbs. They require zero maintenance and offer exceptional energy efficiency. However, you must replace the entire unit when the internal diode eventually fails.
Motion Sensors and Dusk-to-Dawn Photocells: These features automate your home security. They drastically reduce energy consumption because they only activate when necessary. However, they require strict calibration. Poorly adjusted sensors suffer from nuisance tripping caused by wind, passing cars, or neighborhood animals.
Feature Category | Hardwired Fixture | Portable Plug-in Fixture |
|---|---|---|
Installation Complexity | High (Requires electrical wiring) | Low (Plug and play) |
Mobility | Fixed location only | Highly portable |
Best Use Case | Permanent perimeter security | Temporary projects, job sites |
Power Source | Home 120V circuit | Standard wall outlet |
Working with residential electricity requires unwavering focus. Home exterior lighting typically runs on standard 120V circuits. This voltage carries severe risks of electric shock. Poorly executed connections can spark localized electrical fires. You must respect the implementation risks before you begin the physical work.
Never rely solely on a wall switch. Wall switches only break the hot wire connection temporarily. Someone could easily flip the switch while you work. Instead, you must locate your main electrical panel. Find the specific breaker supplying power to the outdoor circuit. Flip this breaker to the "Off" position. Place a piece of tape over it to alert family members.
Next, you must use a non-contact voltage tester. Bring your tester near the fixture. Once you remove the housing, touch the tester directly to the internal wiring. Do this before your bare skin touches any exposed copper. The tester will beep or flash red if voltage remains present. If it stays silent, the lines are dead and safe to handle.
Gathering the right tools beforehand prevents dangerous frustration on the ladder. You will need the following items:
Non-contact voltage tester: This is your primary safety lifeline.
Wire strippers and cutters: Required for trimming damaged copper and preparing clean connections.
Screwdriver set: Bring both Philips and flathead drivers. Older boxes often use flathead screws.
Outdoor-rated silicone caulk: Essential for weather resistance. Do not substitute indoor acrylic caulk.
Sturdy step ladder: Ensure it sits on level, solid ground. Never stand on the top rung.
Penetrating oil: Helpful for loosening oxidized hardware.
Best Practice: Always wear rubber-soled shoes and protective eyewear when working above your head. Debris frequently falls when removing old outdoor fixtures.
Removing the old fixture is often the most physically demanding part of the process. Years of severe weather take a heavy toll on exterior hardware. Patience is vital during this extraction phase.
Start by climbing your ladder safely. Locate the mounting bracket screws. Carefully unscrew the base of the fixture from the wall or eaves. Support the weight of the fixture with your free hand. Do not let the unit drop. If it falls, it will violently rip the internal wires out of the junction box. Once you remove the screws, pull the fixture away from the wall gently. This exposes the electrical wire nuts inside.
Older outdoor fixtures frequently feature heavily oxidized screws. Standard tools will strip these screw heads instantly. If a screw resists turning, stop immediately. Apply a generous drop of penetrating oil to the threads. Allow the oil to sit for at least fifteen minutes. This fluid breaks down the microscopic rust bonds. After waiting, try again with firm, steady pressure. If the screw head is already stripped, you might need a specialized screw extractor bit.
With the fixture hanging loose, you can clearly see the wire connections. Follow these steps to disconnect them safely:
Twist the wire nuts counterclockwise to remove them.
Untwist the fixture wires from the house wires.
Disconnect the black (hot) wire first.
Disconnect the white (neutral) wire next.
Disconnect the green or bare copper (ground) wire last.
Take a moment to inspect the existing house wires emerging from the junction box. Look closely for fraying, brittleness, or melted insulation. Sometimes, old incandescent bulbs generate extreme heat. This heat literally bakes the wire insulation until it cracks. If you spot compromised wires, you must stop. A licensed electrician may need to pull new lines to ensure code compliance.
Installing the new unit demands precision. You must create strong mechanical and electrical connections. Following standard wiring protocols ensures your lights function reliably for decades.
First, examine the new mounting strap provided in the box. Ensure it aligns securely with the screw holes on your existing junction box. A loose bracket compromises the entire installation. Wind will cause a loose fixture to rattle. This movement eventually snaps the copper wires inside. Fasten the new mounting strap tightly to the box.
Assuming standard US 120V wiring, you will connect three specific lines. Always work in a logical sequence to maintain grounding safety.
Establish the Ground: Connect the house ground wire (bare copper or green) to the new fixture's grounding wire. If your fixture lacks a ground wire, wrap the house ground around the green grounding screw on the mounting bracket. Tighten it securely.
Connect the Neutrals: Pair the white wire from the house with the white wire from the fixture. Hold them parallel. Twist a newly supplied wire nut over them clockwise until tight.
Connect the Hot Wires: Pair the black house wire with the black fixture wire. Secure them with an appropriately sized wire nut.
Crucial Verification Step: You must tug gently on each individual connection. Pull the wire nut with one hand while holding the wires with the other. The wire nut must bite into the copper securely. If a wire slips out, you must redo the connection. Loose wires cause electrical arcing, which is a primary fire hazard.
Once you secure all connections, carefully fold the wires. Push them back into the junction box in an S-shape. Ensure you do not pinch any wires between the mounting bracket and the fixture base. Lift the housing onto the bracket. Align the center mounting screw. Tighten it firmly, but do not overtighten and crack the plastic base. Place the rubber gasket over the screw hole to seal it.
Wiring makes the light operate, but weatherproofing makes it survive. Water is the greatest enemy of exterior electrics. You must seal the installation perfectly.
Grab your outdoor-rated silicone caulk. Apply a steady, continuous bead of caulk around the perimeter of the fixture base. Seal exactly where the canopy meets the siding or brick wall. Run this bead across the top and down both sides.
Common Mistake: Do not caulk the entire perimeter. You must leave a small 1-inch gap at the very bottom. Electricians call this the "weep hole." Temperature fluctuations cause condensation to form inside the metal housing. The weep hole allows internal moisture to drain out harmlessly. If you seal the bottom, the water will fill the junction box and short the circuit.
Next, position the individual light heads. You want to maximize your coverage area. Point them toward driveways, walkways, or dark yard corners. Ensure you angle them slightly downward. Pointing them horizontally causes severe glare for your neighbors. It can also blind passing street traffic. Proper angling keeps the illumination focused exactly where you walk.
If you installed a motion-activated unit, you must dial in the settings. Most sensors have three distinct controls:
Range / Sensitivity: This dial dictates how far the sensor "sees." Set this to match your perimeter depth. If your driveway is twenty feet long, dial the range to twenty feet. Over-extending the range causes cars in the street to trigger the light.
Time: This dictates how long the light remains illuminated after motion stops. A setting of one to three minutes is standard for residential security.
Lux / Light Level: This setting tells the sensor when to become active. Adjust it so the unit only triggers after dusk, preventing daytime operation.
Perform a walk-test at dusk. Walk across your yard at various angles. Verify the trigger zones and adjust the sensor head left or right as needed.
Even meticulous installations occasionally face minor hiccups. Do not panic if the fixture fails to operate perfectly on the first try. You can solve most problems quickly by checking a few common failure points.
If you restore power and the light remains dark, start at the source. Re-verify that the main breaker is firmly in the "On" position. Breakers sometimes trip immediately if a short exists. Next, check the interior wall switch. Someone may have bumped it. If both switches provide power, the issue lies in the wiring. Turn the breaker off again. Open the fixture. Check all wire nut connections. A black wire likely slipped out of its nut while you pushed the assembly into the box.
Modern diodes sometimes flicker rapidly like a strobe light. This usually stems from incompatible dimmer switches on the circuit. Standard LEDs require full, stable voltage. Older mechanical dimmers chop the electrical wave, causing the flicker. You must ensure you use standard single-pole switches. Only use dimmers if the new fixture packaging explicitly states "Dimmable." A loose neutral (white) wire connection inside the junction box can also cause intermittent flickering.
A light that refuses to turn off defeats the purpose of an automated system. Usually, the sensitivity is simply set too high. The sensor detects minor foliage movement in the wind. It might also detect ambient heat changes rising off a warm asphalt driveway. To fix this, reduce the sensitivity dial by half. Point the sensor head slightly downward to limit its horizon view. Finally, ensure the fixture is not accidentally set to "Manual Override" mode, which forces continuous operation.
Changing an outdoor flood light serves as a high-impact property upgrade. It actively modernizes your residential security layout. It also eliminates the persistent, annoying maintenance of older bulb-based systems. A successful installation relies heavily on preparation and discipline.
By rigorously following voltage testing protocols, you protect yourself from serious injury. By adhering to standard wiring practices, you guarantee reliable operation. Finally, by prioritizing exterior weatherproofing with a proper weep hole, you ensure a durable installation. Review your specific environmental needs first. Select the appropriate motion-sensing model or dedicated portable unit. Gather the correct tools, respect the electricity, and execute the replacement safely. You will immediately enjoy enhanced visibility and peace of mind.
A: If you have an existing, up-to-code junction box and the wires look healthy, you can perform the swap yourself. Most homeowners handle this safely. However, if there is no junction box, or the existing wires appear cracked or scorched, stop immediately. Hiring a licensed electrician is strongly recommended to fix underlying hazards.
A: Yes. The underlying household wiring remains identical for both types. You still connect hot, neutral, and ground lines. The motion sensor simply acts as an internal, automated switch built directly into the new fixture. No extra house wiring is required.
A: Apply penetrating oil and wait fifteen minutes. If it still refuses to turn, use a specialized screw extractor bit. Alternatively, carefully drill out the center of the screw head. Avoid using excessive hammer force. Banging on the fixture could shatter the underlying junction box or crack the exterior siding.
A: Yes. LED fixtures deliver much higher lumen output at a mere fraction of the wattage. They provide superior, crisp brightness while significantly reducing your electricity consumption. Furthermore, they generate very little heat, which prolongs the life of the internal wiring and plastic lenses.

