


Views: 0 Author: Site Editor Publish Time: 2026-09-13 Origin: Site


Poorly illuminated environments carry heavy operational and aesthetic burdens. They increase safety liabilities, decrease productivity, and cause visual discomfort for everyone navigating the site. Facilities often suffer when decision-makers misunderstand basic lighting principles. Upgrading existing fixtures or installing new ones requires a strategic, analytical approach. We must move past arbitrary wattage claims and focus instead on measurable optical performance. A proper assessment relies on precision, not guesswork. This article provides a transparent, evidence-based framework for evaluating modern fixtures. You will learn how to navigate complex installation realities safely. We will explore optical distribution patterns, glare reduction, and environmental compliance. By understanding these technical variables, we guide you toward making a confident, informed upgrade decision.
Over-illuminating with raw lumens causes glare and energy waste; optical distribution is the true driver of a brightened physical space.
Selecting a high brightness area light requires balancing luminous efficacy (lumens per watt) with thermal management capabilities.
Compliance with local lighting ordinances (e.g., Dark Sky, BUG ratings) is a mandatory evaluation criteria, not an afterthought.
Before purchasing any new equipment, you must properly diagnose your existing space. Many facility managers skip this crucial step entirely. They guess the required brightness based on outdated assumptions. We strongly advise against this careless approach. You must calculate the exact square footage first. Assess your existing light levels meticulously. Use a reliable, calibrated foot-candle or lux meter. Walk the site at night and record readings at various grid points. Hold the meter at ground level or working plane height. Note the brightest spots and darkest corners carefully. This contrast ratio determines your baseline uniformity. Evaluating an existing Area Light installation requires this baseline data. It helps you pinpoint exactly where illumination falls short.
Next, consider the Light Reflectance Value (LRV) of surrounding physical surfaces. Look closely at your walls, floors, and pavement. A fresh concrete parking lot reflects light efficiently. Conversely, freshly laid black asphalt absorbs significant light. Darker environments require careful planning. They absorb light heavily. You may need adjusted lumen outputs to achieve your target brightness. You might also need different optical angles to compensate for the lack of ambient reflection. Ignoring LRV often leads to under-lit spaces despite installing powerful new fixtures.
Finally, identify physical barriers across your footprint. Shelving, trees, and architectural elements block light. Mature landscaping often disrupts planned lighting patterns. These obstructions create harsh, dangerous shadows. They necessitate a multi-fixture approach. Relying on a single ultra-bright point source rarely works well. Multiple strategic placements provide uniform coverage. They eliminate blind spots effectively. We recommend mapping out these obstructions on a physical site plan before proceeding.
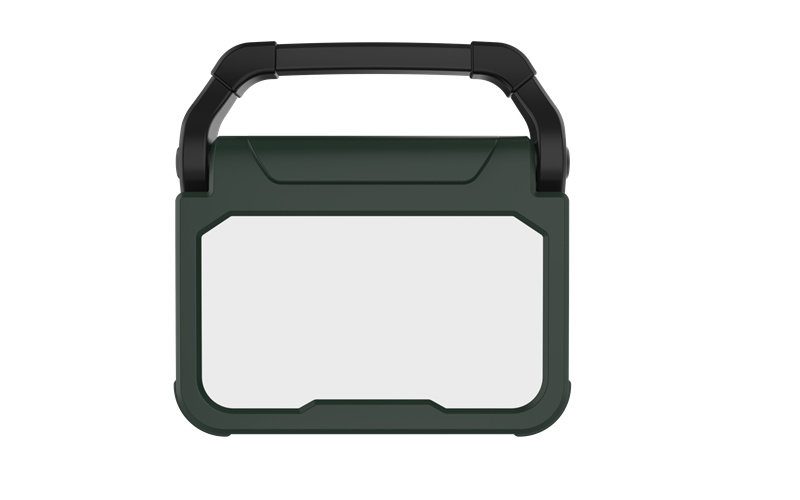
Modernizing your facility demands understanding current technology. Compare modern LED modules against legacy HID or Metal Halide systems. Evaluate their realistic lumen depreciation curves. Legacy systems lose up to 50% of their brightness rapidly. This drastic drop happens within half their advertised lifespan. They waste energy while producing diminishing returns. Commercial-grade LED fixtures behave differently. They maintain 70-90% brightness over long periods. We refer to these as L70 or L90 standards. They offer superior longevity and consistent performance.
When choosing a High Brightness Area Light, evaluate standard form factors carefully. Look at shoebox, flood, and architectural designs. You must base this choice on specific mounting constraints. Shoebox designs fit well on tall parking lot poles. Architectural designs suit pedestrian walkways perfectly. Also, consider wind-load ratings. Engineers call this the Effective Projected Area (EPA). A bulky fixture catches wind easily. It places dangerous stress on older poles during storms. You must match the fixture's EPA rating to your pole's structural capacity.
Optics play a monumental role in performance. The Illuminating Engineering Society (IES) defines specific distribution types. Select the right one for your layout.
Type III: Ideal for perimeter brightness. It pushes illumination outward from the edge. Use it along roadways or facility borders.
Type IV: Offers a strong forward throw. It works best for deep physical areas. Mount these on the sides of buildings.
Type V: Delivers a 360-degree symmetrical distribution. Use it for central open spaces. They work beautifully in the middle of large parking lots.
A higher lumen count does not automatically equal a brighter area. Many buyers make this costly assumption. They chase massive lumen numbers unnecessarily. Focus instead on usable light. Targeted foot-candles must hit the ground or target surface directly. Wasted light shining into the sky does nothing for site safety. You need precision optics to direct light downward efficiently.
Evaluate Color Temperature (CCT) closely. Assess how 4000K versus 5000K impacts perceived brightness. CCT affects visual acuity and starkness immensely. Avoid color temperatures above 5000K. Very high Kelvin ratings produce harsh blue-light scattering. This scattering causes severe visual fatigue. It also creates a stark, unwelcoming atmosphere. A 4000K fixture provides a clean, neutral white light. It balances visibility and human comfort perfectly.
Optimal Application by Color Temperature (CCT)
CCT Level | Visual Appearance | Best Application Scenario |
|---|---|---|
3000K | Warm, inviting tone | Residential exteriors, parks, hospitality venues |
4000K | Neutral, clear white | Commercial parking lots, public pathways, campuses |
5000K | Cool, stark daylight | High-security zones, industrial yards, transit hubs |
Review the Color Rendering Index (CRI). This metric measures how accurately a light source reveals true colors. A CRI of 70+ is sufficient for basic exterior fixtures. You do not need perfect color accuracy for a standard driveway. However, 80+ is required for specific zones. Loading docks and retail exteriors need accurate color discrimination. Workers must read color-coded warning labels clearly.
Prioritize glare reduction during your selection process. Intense glare ruins visibility completely. Evaluate fixtures utilizing internal louvers. Look for frosted lenses or specific cutoff shields. These features prevent temporary blindness. They protect drivers and pedestrians from visual discomfort. A fixture heavily shielded against glare outperforms a brighter, unshielded alternative every time.
Detailing the installation process requires basic physics. Understand the inverse-square law of light. Doubling the pole or mounting height requires four times the lumen output. This calculation maintains the same ground brightness. You cannot simply raise a pole to cover more ground. Space your fixtures properly to ensure uniform coverage. Calculate your spacing-to-mounting-height ratio carefully. Use a 3:1 spacing ratio as a general starting point.
Highlight proper thermal management. Heat destroys LEDs quickly. High temperatures risk premature diode failure. Enclosed areas magnify this threat significantly. Look for heavy-duty die-cast aluminum heat sinks. They dissipate heat effectively away from critical components. Flimsy housings trap heat continuously. They guarantee early failure and frequent replacements.
Demand proper environmental and regulatory compliance. Municipalities enforce strict codes.
IP Ratings: Demand IP65 or IP66 certification. These ratings protect sensitive electronics against wet and dusty environments. They prevent moisture intrusion during heavy storms.
Light Pollution: Check BUG (Backlight, Uplight, Glare) ratings carefully. Ensure strict compliance with neighborhood or municipal Dark Sky ordinances. High uplight ratings cause severe light pollution.
Assess control integration early. Modern energy codes mandate smart controls. Check compatibility with standard photocells. Photocells automate dusk-to-dawn operation easily. Test motion sensors like PIR or Microwave units. They dim the fixture when no one is present. Microwave units handle extreme temperatures better than PIR sensors. Ensure 0-10V dimming systems integrate smoothly. They provide the backbone for advanced energy code compliance.
Filter out vendors lacking basic transparency. Do not buy from manufacturers missing downloadable IES files. Independent photometric testing reports are essential. They verify the manufacturer's optical performance claims. Without an IES file, you cannot simulate the fixture's output. You are flying blind. Request LM-79 and LM-80 test reports. Reputable brands publish these documents freely on their websites.
Differentiate warranty and lifespan terms aggressively. A standard 1-year parts warranty offers minimal protection. It signals low confidence from the manufacturer. Look for a comprehensive 5-to-10-year warranty instead. It should cover driver failure and severe lumen degradation. The LED driver usually fails before the diodes. Ensure the warranty explicitly covers this specific component.
Prototype and sample before rolling out a large purchase. Order a single unit first. Mount it on site. Observe its performance at night. Alternatively, request a photometric layout software simulation. Ask your supplier for this service. Programs like DIALux or AGi32 provide accurate predictions. They map foot-candle levels across your exact site plan. Review these layouts thoroughly before executing a full-scale installation.
Effectively brightening a physical space relies on precise optical distribution. It requires appropriate CCT levels and rigorous glare control. You cannot succeed by simply maximizing raw lumens. A calculated approach guarantees safety, visual comfort, and regulatory compliance. Proper planning eliminates dangerous shadows and wasted energy.
Take immediate action today. Measure your specific footprint carefully. Identify your reflection variables and physical obstructions. Request a photometric layout from your chosen supplier. Treat this layout as your immediate next step in the purchasing process. This data-driven approach removes guesswork. It ensures you select the perfect fixture for your unique environment.
A: Upgrading just the bulb rarely works well. Existing ballasts face strict physical limitations. They also carry serious thermal constraints. Retrofitting an improper high-intensity source causes severe glare. It can lead to complete fixture failure. You must upgrade the entire optical system for safe, reliable results.
A: Flood lights project directional, concentrated beams. You can often adjust their angle to highlight specific targets. In contrast, standard area fixtures provide broad, engineered downward illumination. They ensure uniform coverage across large footprints without harsh spotlighting effects or severe uplight issues.
A: A baseline rule dictates 10-20 foot-candles for commercial parking or active areas. However, exact lumen requirements vary widely. They depend strictly on your mounting height and chosen IES distribution type. Always run a photometric simulation to determine exact lumen needs accurately.
A: Higher Kelvin temperatures only increase perceived brightness. The light looks harsher and cooler to the human eye. It does not provide more actual measurable light or higher foot-candles. Overly cool light scatters easily and causes severe visual fatigue over extended periods.

