


Views: 0 Author: Site Editor Publish Time: 2026-09-22 Origin: Site


Unfinished cellars and basements provide incredible utility space. However, they often lack adequate illumination. Struggling to see in dim, shadowy corners makes DIY projects frustrating. Poor lighting also makes storage organization nearly impossible. Exposed overhead beams present unique mounting challenges. You cannot simply drill holes wherever you please. Homeowners must navigate strict clearance limits and complex wire management rules. Improper installation risks serious structural damage to your home’s framework.
This guide evaluates the safest mounting methods and hardware choices available today. We provide definitive, step-by-step techniques to attach fixtures securely. You will learn how to select the right low-heat LEDs. We also explain how to strictly adhere to vital safety protocols. Following these guidelines ensures a secure, hazard-free installation. By the end, you will know exactly how to achieve robust basement illumination without compromising your ceiling.
Structural Safety Dictates Method: Never drill into the bottom flange of a steel I-beam or the lower edge of a wooden joist; use appropriate non-destructive clamps or center-drilled lag screws.
Hardware Match: The choice between C-clamps, magnetic bases, and permanent screw mounts depends entirely on the beam material (wood vs. steel) and usage duration.
Thermal Constraints: Low cellar ceilings require low-heat LED fixtures to prevent fire hazards against exposed wood.
Portability vs. Permanence: A versatile portable work light with built-in clamping mechanisms often negates the need for complex hard-mounting in low-clearance spaces.
Before purchasing hardware, evaluate the physical limitations of your basement ceiling. Every installation must prioritize safety and structural integrity. A successful mount cannot compromise the framework of your home. It must maintain safe head clearance for anyone walking underneath. Furthermore, the mount must handle the weight and ongoing vibration of the fixture. Ignoring these factors leads to dangerous working conditions.
Your mounting approach depends entirely on the material supporting your floor above. Wood and steel require vastly different handling techniques.
Wood Joists: These solid timber beams are common in residential homes. They are susceptible to splitting if drilled incorrectly. Installers must drill pilot holes carefully. You must strictly adhere to the "center-third" rule for any drilling. This rule states you can only drill through the middle third of the joist's depth. Drilling near the top or bottom edges destroys the beam's load-bearing capacity.
Steel Beams: Industrial homes and newer builds often use steel I-beams. Drilling into structural steel is highly discouraged. It introduces severe structural risks and requires highly specialized tools. For steel surfaces, non-destructive friction mounts are mandatory. Installers commonly use magnetic bases to avoid metal penetration.
Cellars notorious for low ceilings demand careful planning. Evaluate how far the fixture will drop from the beam. Basements with under 7-foot ceilings present serious collision risks. Tall individuals can easily strike their heads on protruding fixtures. In these tight environments, low-profile flush mounts are necessary. Alternatively, you can use side-mounted brackets. Side-mounting tucks the fixture up between the joist bays. This strategy preserves valuable headroom while maximizing light spread.
Selecting the correct mounting hardware prevents premature failures. Different brackets serve different materials and permanence levels. Review the three primary approaches below to find your ideal match.
Mounting Hardware Comparison
Approach | Best Material Fit | Installation Type | Vibration Resistance |
|---|---|---|---|
Beam Clamps | Steel I-Beams | Temporary / Semi-Permanent | Moderate (requires set screws) |
Magnetic Bases | Steel Surfaces | Frequent Repositioning | High (with neodymium magnets) |
Direct Screw Mounts | Wooden Joists | Permanent | Maximum |
Clamp mechanisms offer excellent versatility. They are best for steel I-beams and temporary setups. Plumbers and electricians frequently rely on them for quick illumination.
These devices deliver high holding power without causing structural damage. However, you must choose quality components. Cheap stamped-steel clamps can vibrate loose if accidentally bumped. Look for industrial malleable iron beam clamps. These heavier models feature threaded set screws. The screw bites firmly into the steel flange for a rigid hold.
Magnetic mounting offers ultimate convenience. This method works best for steel beams requiring frequent repositioning. Mechanics and DIY enthusiasts favor this zero-tool installation method.
You can snap the fixture into place instantly. Yet, standard refrigerator magnets will fail immediately. Safe installation requires heavy-duty rare-earth magnets. Neodymium magnets safely support the substantial weight of a commercial Work Light. Always verify the manufacturer's shear weight rating before hanging any overhead fixture.
Screwing fixtures directly into the frame provides unmatched stability. This approach works best for wooden joists and permanent lighting solutions.
Hard-mounting is the most secure defense against physical impact. A solidly screwed bracket will not fall if hit by a carried ladder. However, the process requires careful measurement. Careless driving can split aged wood. You must also map the area carefully. Hitting existing concealed electrical wiring causes severe safety hazards.
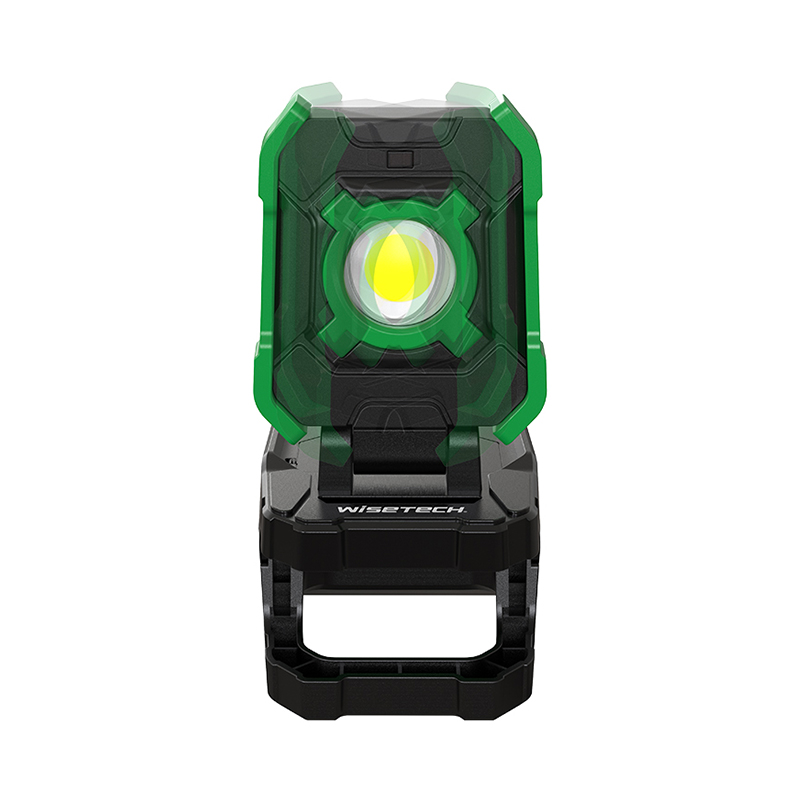
Hardware only solves half the problem. Selecting the correct fixture prevents long-term safety hazards. Basement environments demand specific performance features.
You must evaluate potential fixtures based on heat, spread, and power routing. Making informed choices here guarantees a safer workspace.
Heat Dissipation: Traditional halogen lights generate extreme heat. They frequently exceed 600 degrees Fahrenheit during operation. Placing them within inches of dry cellar wood is incredibly unsafe. LED technology is non-negotiable for low-clearance beam mounting. LEDs convert energy to light, remaining cool to the touch.
Lumen Output and Beam Angle: Cellar layouts naturally cast deep shadows. A narrow spotlight beam leaves most areas dark. Wide beam angles exceeding 120 degrees are required. Broad dispersion eliminates harsh shadows cast by neighboring joists. High lumen output ensures you can read labels and perform detailed tasks clearly.
Power Source and Cord Management: Decide between hardwired and plug-in options. Hardwired fixtures look cleaner but require professional electrical knowledge. If choosing a plug-in model, the fixture must allow secure cable routing. Cords must hug the beam tightly to prevent dangerous snag hazards.
Permanent installations consume time and money. Sometimes, flexibility outweighs permanence. An industrial Portable Work Light often proves the most cost-effective decision.
These units typically feature an integrated ratcheting hook or heavy-duty clamp. Users can simply hook the unit over a joist cross-brace. This method allows you to bypass permanent electrical work entirely. You maintain professional-grade illumination immediately. When your task moves to a different corner, the light moves effortlessly between bays.
Proper execution ensures safety and longevity. Gather your tools before starting. Use safety glasses to protect against falling debris.
Begin by scanning the installation zone. Locate your available power sources. Map your intended wire paths well away from hot plumbing pipes. Identify your beam material to confirm your hardware selection.
Follow these specific steps to safely mount brackets to wooden beams. Accuracy prevents structural damage.
Mark the center line of the joist using a pencil. Always avoid the extreme upper or lower edges to maintain load capacity.
Select a drill bit slightly smaller than your mounting lag screws. Pre-drill pilot holes carefully to prevent wood splitting.
Place the mounting bracket flush against the wood surface. Insert the lag screws. Ensure you use wide metal washers to distribute the physical load evenly.
Secure the light housing to the mounted bracket. Route the power cords neatly along the wood grain. Fasten the cables using insulated cable staples every two feet.
Steel requires heavy-duty friction hardware. Follow this sequence for a rock-solid grip.
Clean the lower flange surface thoroughly. Wipe away dust, grease, and loose rust. A clean surface ensures a flush, secure grip.
Slide the jaw of the malleable iron beam clamp onto the lower flange edge. Position it away from active walkways if possible.
Tighten the integrated set screw firmly. This often requires a dedicated wrench, not just hand-tightening. Turn the screw until it bites deeply into the steel finish.
Thread the light fixture's mounting yoke onto the clamp's receiver hole. Secure the assembly using a locking nut to prevent rotational slipping.
Basements carry inherent environmental risks. High moisture, exposed wires, and heavy foot traffic demand strict adherence to safety guidelines. Never cut corners during final inspection.
Exposed wood framing poses a fire risk if heated continuously. Establish clear rules on minimum clearance distances. Always maintain several inches of air gap between the light housing and the wooden subflooring above. Standard electrical safety practices mandate ventilation around heat sinks. Even cool-running LEDs require airflow to prevent internal driver failures. Trapped heat reduces fixture lifespan dramatically.
Messy wiring invites disaster. We strongly warn against draping extension cords across open air. Walking blindly into a hanging wire can rip the fixture from the ceiling. Outline a clear path for every cord. Secure cables tightly along the side face of the beam. Use proper tension relief near the plug head. Tension relief prevents internal wire fraying if the cord gets bumped accidentally.
First-floor activity transfers vibration downward. Environments experiencing heavy foot traffic above the cellar face dropping hazards. Constant stomping loosens poorly secured screws and weak clamps over time. We highly mandate the use of secondary safety tethers for heavier fixtures. Wrap a braided steel wire lanyard around the beam. Attach the lanyard's carabiner to the light housing. If the primary bracket fails, the tether prevents the heavy fixture from striking someone below.
Securing adequate illumination transforms a dark cellar into a productive, safe environment. Your installation strategy directly correlates to your ceiling's building material.
Summarize the Decision Path: Always match the hardware to the environment. If dealing with structural steel, buy heavy-duty iron beam clamps. If dealing with wood, use direct screw mounts. Alternatively, grab a clamp-friendly Portable Work Light for immediate, safe illumination.
Take Action on Clearance: Measure your available floor-to-ceiling clearance carefully before purchasing any hardware.
Verify the Framework: Double-check your beam type to avoid bringing drill bits to a steel I-beam.
Prioritize Thermal Safety: Purchase an LED fixture featuring the appropriate mounting bracket geometry to keep temperatures low.
Implement Secondary Fall Protection: Always utilize wire tethers in high-vibration households.
A: No. Drilling into the bottom edge of a floor joist compromises its structural integrity. The bottom edge handles immense tension loads. Damaging this zone can cause the beam to sag or crack. You should only drill pilot holes into the side face of the joist, strictly staying within the center third of its depth.
A: Yes, it is safe under certain conditions. The fixture must utilize low-heat LED technology. Additionally, you must secure the power cord tightly to the beam to prevent snagging. While safe, hardwiring a dedicated fixture remains the superior choice for permanent, long-term illumination needs.
A: Running cables neatly along the upper corners of the joist bays hides them from typical viewing angles. Use insulated cable staples to keep the wires tight against the wood. For a cleaner look, you can run cords through rigid PVC conduits painted to match the ceiling.
A: It depends entirely on the magnet's quality. Cheap craft magnets will fail under overhead shear weight. You must use industrial neodymium (rare-earth) magnetic mounts specifically rated for the fixture's weight. Always verify the manufacturer's shear load rating before attempting overhead magnetic installation.

