


Views: 0 Author: Site Editor Publish Time: 2026-09-07 Origin: Site


When you buy an outdoor fixture, you likely check the lumen rating first. You might assume a higher number guarantees better visibility. But a lumen rating only tells you how much light leaves the bulb. It does not measure the usable light reaching your target surface. This creates a massive gap between expectations and real-world results.
Relying solely on raw lumen specs often causes major design failures. You might create over-illuminated hotspots. These bright patches waste significant energy. Alternatively, you might leave critical zones heavily under-lit. Dark spots compromise pedestrian security and fail to meet safety compliance standards.
The purpose of this guide is to translate theoretical light output into practical, ground-level illuminance. We will show you how distance, optics, and environmental factors impact true visibility. You will learn how to accurately evaluate performance. This knowledge helps you shortlist the perfect Area Light for your commercial or residential space.
Distance dictates intensity: According to the inverse square law, doubling the mounting height reduces the light intensity reaching the ground to one-quarter of its original value.
Lumens vs. Foot-candles: Evaluate fixtures based on foot-candles (or lux) at the surface level, rather than just total lumen output.
Optics matter most: An LED Area Light with targeted distribution (e.g., Type III or Type V) delivers significantly more functional light to the ground than omnidirectional bulbs of the same wattage.
Factor in real-world loss: Accurate calculations must include Light Loss Factors (LLF) like dirt accumulation and long-term lumen depreciation.
Buyers frequently purchase high-lumen fixtures but still experience poor visibility on the ground. This happens because they fundamentally misunderstand how light travels. A bright source does not guarantee a bright surface. You must understand the underlying physics to design effective outdoor illumination.
Light spreads out spherically as it travels from a source. This behavior follows a principle called the inverse square law. As distance from the source increases, light intensity drops exponentially. If you double the distance from the fixture to the ground, the light does not simply cut in half. The intensity drops to one-quarter of its original value. If you triple the distance, the intensity drops to one-ninth. A fixture mounted high on a pole loses a massive percentage of its intensity before the beams ever touch the pavement.
To navigate this, you need to understand two critical terms. People often confuse them, but they measure entirely different things. Let us look at the distinct roles they play.
Table 1: Understanding Key Lighting Metrics
Metric | What It Measures | Where It Is Measured | Primary Use Case |
|---|---|---|---|
Lumens | The total volume of light emitted by the fixture. | At the source (the bulb or diode). | Evaluating the energy output of the fixture itself. |
Foot-candles (fc) / Lux | The actual amount of light falling on a surface area. | At the target (the ground, walkway, or wall). | Evaluating practical visibility and safety compliance. |
The core takeaway for buyers is simple. You must stop buying fixtures based purely on perceived brightness. Instead, you need to start evaluating them based on delivered illuminance. A standard Area Light might boast massive raw lumens. However, if it lacks the proper design to push those lumens downward, it becomes practically useless for your property.
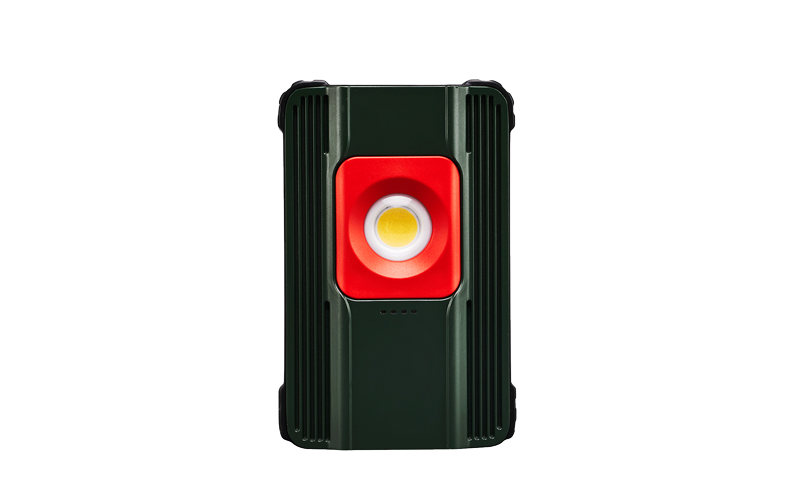
We can broadly divide outdoor lighting into two solution categories. First, we have omnidirectional legacy bulbs like HID or Metal Halide. These blast light in 360 degrees. Much of it gets trapped inside the housing or shoots upward into the sky. Second, we have directional LED optics. These precisely control where every single beam lands. A well-designed LED Area Light uses specialized lenses to maximize ground delivery.
Mounting height plays a defining role in how you should configure these optics. You cannot use the same approach for a low walkway and a towering parking lot pole. Each scenario demands a specific strategy.
Low mounting (10-15 ft): You generally need lower lumen packages here. You also require wider beam angles. If you use an intense, narrow beam at this height, it creates severe glare. Glare blinds pedestrians and drivers, creating serious safety hazards.
High mounting (20-30+ ft): You require high lumen output for tall poles. More importantly, you need tighter optics. The lenses must push the light directly down to the surface before it dissipates into the surrounding air.
Manufacturers design specific optical distribution patterns to solve these placement challenges. They categorize these patterns into standardized types. You must match the type to your physical layout.
Type III Distribution: This throws light forward and to the sides. It is ideal for perimeter lighting and roadways. You typically mount these along the edge of an area. They push light outward into the space without spilling it backward behind the pole.
Type IV Distribution: This provides an asymmetrical, forward throw. It generates minimal backlighting. It is ideal for wall-mounting or tight property lines. You use this when you need to respect light trespass laws and avoid illuminating a neighbor's yard.
Type V Distribution: This provides a 360-degree symmetrical spread. It distributes light equally in all directions. It is ideal for center-of-lot pole mounting. You use this in the middle of large, open parking structures or central courtyards.
Choosing the right fixture requires a structured approach. You cannot simply guess the requirements. You must match specific feature sets to your expected outcomes. Professional lighting designers use a proven framework to calculate ground-level needs. You can easily adapt this process for your own projects.
Determine the target foot-candles based on the application. Different spaces require vastly different levels of visibility. Basic parking lot security might only need 1 to 2 foot-candles. High-activity pedestrian walkways might require 5 to 10 foot-candles. Retail auto dealerships often demand 20 foot-candles or more to showcase inventory. You must define this baseline first.
Calculate the true coverage area. Determine the exact square footage of the zone requiring illumination. Do not estimate loosely. Use property blueprints or a digital measuring wheel. Accurate measurements prevent under-specifying your final order.
Apply the basic lighting formula. You can find a rough estimate using simple math. Multiply your target foot-candles by your total area. The result gives you the minimum delivered lumens needed on the ground. For example, 5 foot-candles across 1,000 square feet requires 5,000 delivered lumens.
Adjust for specific fixture efficacy. Delivered lumens differ from source lumens. You must factor in the distribution pattern and optical efficiency. A highly efficient LED Area Light might deliver 85% of its source lumens to the ground. A poorly designed fixture might only deliver 60%. You must increase your initial calculation to compensate for this internal loss.
By following these steps, you shift from guessing to engineering. You ensure every unit you install actively contributes to your target ground-level visibility.
Theoretical calculations look perfect on paper. However, they rarely match real-world, year-three performance. The moment you install an outdoor fixture, the environment begins degrading its output. You must practice active risk mitigation. If you design a layout based solely on day-one performance, your property will eventually suffer from dark spots.
Lighting professionals use Light Loss Factors (LLF) to build a safety buffer into their designs. You must account for several major variables. The first is lumen depreciation. Even premium LEDs degrade over time. Industry standards measure this using an L70 rating. An L70 rating indicates how many hours it takes for the fixture to drop to 70% of its original brightness. You should calculate your layout based on the light output at year 5 or year 10. Do not base it on day one.
Dirt depreciation presents another significant challenge. Outdoor fixtures face constant environmental assault. They accumulate dust, pollen, exhaust soot, and bird droppings. This grime acts as a physical barrier. It blocks light from escaping the lens. You should always assume a 10% to 15% reduction in usable light due to environmental factors. Regular cleaning helps, but you must still plan for this inevitable drop.
Finally, you must consider thermal management. LED diodes generate heat. They do not project heat forward, but heat builds up directly behind the diode. Poorly designed housings trap this heat inside the casing. Excessive heat physically damages the internal components. It dramatically accelerates lumen drop-off. When shortlisting vendors, always evaluate their heat sink designs. Heavy-duty, die-cast aluminum heat sinks draw heat away from the electronics. This preserves the diode and maintains consistent ground-level illuminance over the product's lifespan.
You now understand the physics and the calculations. Your next step is building strict procurement criteria. Do not let vendors distract you with flashy marketing terms. Force them to prove their claims using concrete data.
Never buy high-volume lighting without requesting a photometric plan. A photometric layout is a digital simulation of your specific site map. The vendor inputs their exact fixture data into specialized software. The software maps out precise foot-candle distribution across your property. It highlights potential dark spots and excessive glare zones. If a vendor refuses to provide a photometric analysis, you should find another supplier. This document is the only way to verify how much light will actually fall to your ground.
You must also verify independent certifications. Do not rely entirely on internal manufacturer testing. Look for DLC (DesignLights Consortium) Premium listings. The DLC is an independent organization. They rigorously test commercial fixtures. A DLC Premium badge verifies the usable lumen output. It confirms the optical efficiency and color rendering accuracy. This badge protects you from exaggerated marketing claims.
Finally, evaluate the warranty in relation to build quality. Cheaper fixtures often seem appealing initially. However, they typically use inferior polycarbonate lenses. Intense UV exposure from the sun causes these cheap lenses to yellow and cloud over time. A yellowed lens dramatically reduces the light that falls to the ground. It acts like a dirty filter. Prioritize fixtures featuring UV-stabilized acrylic or tempered glass lenses. Ensure the manufacturer specifically covers lens degradation in their warranty terms. A strong warranty guarantees the physical components will support long-term optical performance.
Assessing how much light falls from a bulb requires a complete perspective shift. You must move your focus away from the raw power of the source. Instead, you need to analyze the engineered delivery of the fixture itself. Raw lumens matter very little if they scatter uselessly into the night sky.
To achieve successful outdoor illumination, always factor in the inverse square law and mounting heights. Define your actual foot-candle needs before you ever look at a product catalog. Overcome inevitable performance degradation by calculating for environmental dirt and L70 lumen loss.
We recommend you strictly prioritize fixtures with the correct optical distribution patterns for your layout. Whether you need a Type III forward throw or a Type V 360-degree spread, the optics dictate the outcome. Partner only with vendors who willingly provide a site-specific photometric analysis. This evidence-based approach ensures your space remains safe, highly visible, and perfectly illuminated.
A: No. Lumens only measure the total emitted light at the source itself. The inverse square law applies exclusively to illuminance. Illuminance measures how that specific light spreads out and weakens over a distance. You measure this weakened, delivered light in foot-candles or lux, not in lumens.
A: It depends strictly on your pole height and your target area size. A 20-foot pole lighting a 50x50 foot area typically requires a 15,000 to 20,000-lumen LED fixture. This range usually maintains safe ground-level visibility. Taller poles or larger zones require significantly higher output packages.
A: Dark spots, or poor uniformity, usually result from the wrong optical distribution pattern. Using a narrow beam angle on a low pole restricts coverage. Spacing your poles too far apart also creates gaps. The issue rarely stems from a lack of total fixture lumens.
A: You can easily use a digital light meter, also known as a lux or foot-candle meter. Hold the device horizontally at ground level beneath the fixture. You can also hold it at waist height depending on specific safety requirements. This reading verifies if vendor claims match physical reality.

