


Views: 0 Author: Site Editor Publish Time: 2026-09-08 Origin: Site


Securing bright, reliable illumination for outdoor spaces often feels frustrating and restrictive. You want intense visibility immediately but likely dread scheduling expensive, permanent electrical work. Many property owners try bypassing this hurdle by converting hardwired fixtures into plug-in units. They need high-output lighting without the permanence or structural intrusion of a standard installation. The short answer is yes. You can wire a hardwired Area Light to a standard plug, provided you use correctly rated components and adhere strictly to local electrical codes. However, modifying outdoor fixtures introduces specific water ingress and grounding risks. You must evaluate whether a DIY conversion is practical or if purchasing a purpose-built Plug In Area Light offers a more secure, compliant route. This guide applies to standard residential voltages, including 120V in the US and 240V in the UK or EU. Commercial-grade, high-voltage fixtures strictly require professional hardwiring.
Feasibility: Most standard residential area lights can be legally retrofitted with a grounded plug, but specific environmental ratings (IP65+) must be maintained.
Safety First: Outdoor installations mandate the use of GFCI/RCD protected outlets, heavy-duty outdoor-rated cable (e.g., SJTW), and waterproof strain relief.
Compliance Risk: Altering a factory-sealed hardwired fixture may void the manufacturer’s warranty and UL/CE safety certifications.
Cost-to-Benefit: The cost of proper wiring components and weatherproof housing often approaches or exceeds the price of an off-the-shelf plug-in equivalent.
Renters, temporary job site managers, and homeowners face unique lighting challenges. Seasonal outdoor setups require high flexibility. Hardwired junction boxes simply cannot provide this adaptability. Once installed, a hardwired fixture stays put permanently. If your lighting needs change, you must hire a professional electrician again. You might just want to move the light source across the yard for an evening event. Renters face even stricter limitations. They cannot legally drill into exterior walls or modify residential electrical systems. This rigidity frustrates users who need temporary, powerful illumination.
How do we define a successful conversion? A reliable setup must deliver equivalent lumen output to a hardwired counterpart. It cannot compromise electrical safety under any circumstances. The fixture must endure adverse weather conditions without tripping circuit breakers. We must guarantee waterproof integrity at every physical connection point. If the modified light flickers or trips a breaker during a rainstorm, the conversion has failed.
You must weigh permanent installations against flexible conversions carefully. Hardwiring offers a robust, permanent solution. It leaves zero exposed cords to trip over. A properly installed junction box remains inherently code-compliant for outdoor exposure. The wires stay perfectly protected inside sealed metal or PVC conduit. Conversely, a converted plug-in unit delivers maximum flexibility. You face zero electrician labor costs. You can reposition the fixture whenever necessary. However, this flexibility introduces distinct points of failure. The plug connection itself becomes vulnerable to moisture. The wire entry point on the fixture housing faces potential water ingress. We summarize these elements below.
Hardwired vs. Converted Plug-in Lighting Trade-offs
Installation Type | Flexibility | Labor Requirements | Weather Vulnerability | Compliance Level |
|---|---|---|---|---|
Hardwired | Low (Fixed location) | Requires licensed electrician | Very Low (Sealed junction box) | High (Meets standard codes) |
Converted Plug-in | High (Easily movable) | DIY feasible | Moderate (Exposed cord entry) | Variable (Depends on components) |
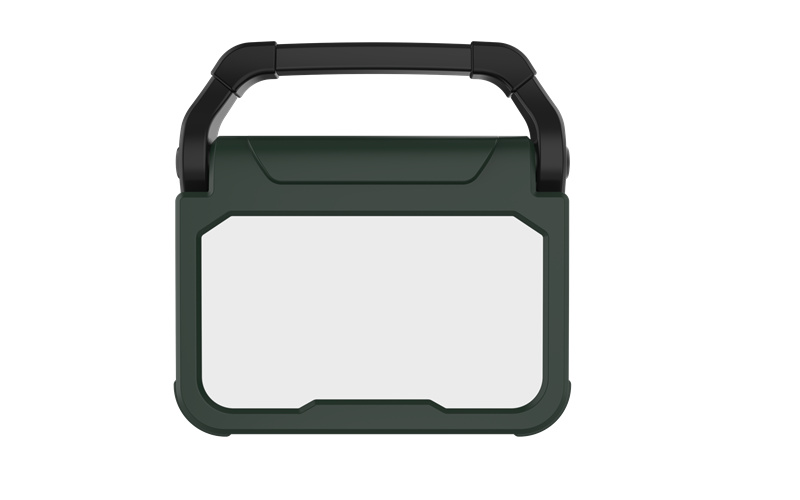
Every DIY electrical project requires strict component evaluation. Using indoor-rated parts outdoors invites disaster. You must carefully evaluate the necessary cable. The cord must match or exceed the amperage draw of the fixture. Most standard residential units operate safely on a 14/3 or 16/3 cable. Ensure you use SJTW outdoor-rated cable. The letters indicate a hard service cord rated for weather exposure. Thicker wire gauges handle heavier loads without overheating. Never use a thin indoor extension cord to power a metal outdoor fixture.
We must highlight the requirement for a grounded plug. You must buy a heavy-duty, 3-prong replacement plug. Two-prong plugs are strictly hazardous for metal-housed fixtures. If an internal short circuit occurs, the metal body becomes fully electrified. A grounded 3-prong plug channels rogue electricity safely back to the panel. It prevents the metal casing from shocking anyone who touches it.
The most common point of failure is cable pull-out. Water ingress at the fixture's base also causes major functional issues. You must mitigate these risks aggressively. Threaded cable glands are absolutely necessary. A cable gland is a mechanical fitting designed to grip the wire jacket. Liquid-tight connectors maintain the fixture's IP rating effectively. When you remove a factory seal, you destroy its original waterproofing. A proper cable gland pinches the wire jacket tightly. This action creates a waterproof seal around the entry hole.
You cannot plug outdoor fixtures into just any wall socket. The receptacle itself must be GFCI or RCD protected. A Ground Fault Circuit Interrupter detects dangerous electrical current leaks. It shuts off power in milliseconds to prevent severe shocks. You must also equip the outdoor outlet with an "in-use" weatherproof cover. This cover protects the plug connection even while raining continuously. Standard flat covers only offer protection when nothing is plugged in.
We must discuss the actual steps required to execute this safely. Slapping some electrical tape over twisted wires will not suffice. You need the right tools and a solid understanding of basic grounding principles. Gather your equipment before touching any live wires. You need precise wire stripping tools to avoid damaging the copper core. A digital multimeter remains mandatory for continuity testing. You must select proper wire terminals carefully. Avoid cheap, traditional wire nuts for outdoor applications. We strongly recommend using Wago lever nuts instead. Weatherproof butt splices also provide excellent, secure connections.
Here is a recommended tool and material list:
Digital multimeter for fault testing
Precision wire strippers and cutters
Wago lever nuts or heat-shrink butt connectors
Liquid-tight cable gland (sized precisely for your cord)
SJTW 3-prong outdoor replacement cord
Detailing the critical step of grounding is essential. You must connect the green or bare earth wire directly. Attach it firmly to the metal chassis of the fixture. Failure here creates a severe shock hazard. Electricity always seeks the path of least resistance to the ground. If the hot wire touches the metal casing, it energizes the whole unit. Proper grounding gives the electricity a safe escape route. This ensures the breaker trips before anyone gets hurt.
We strongly advise step-by-step verification logic. Perform these tests before introducing mains power. You will use a digital multimeter to ensure no short circuits exist.
Set your multimeter to the continuity or resistance setting.
Place one probe firmly on the hot plug prong.
Place the second probe directly on the metal casing.
Verify there is no continuity (the meter should remain silent).
Repeat the exact process for the neutral prong.
This strict testing logic confirms the live wires do not touch the metal housing internally.
We must offer a transparent warning regarding DIY electrical modifications. Uncertified alterations can drastically impact homeowner insurance claims. If an electrical fire starts due to faulty wiring, inspectors will investigate. They easily spot uncertified modifications. Unauthorized changes often void property insurance protections immediately. You carry the full burden of safety. Weigh this liability carefully before cutting factory wires.
Sometimes, the best DIY project is the one you avoid entirely. Building a custom cord assembly sounds appealing initially. However, off-the-shelf solutions often provide superior safety and value. Let us evaluate why purchasing a factory-sealed unit makes sense. A factory-made Plug In Area Light often yields a better return on investment. You avoid purchasing separate cables, glands, and waterproof connectors. The manufacturer already solved the rigorous waterproofing challenges. You get a reliable outcome instantly without spending hours splicing wires.
Off-the-shelf solutions retain their UL, ETL, or CE listings. Testing laboratories issue these safety certifications after rigorous evaluation. These stamps of approval matter immensely. They remove compliance anxiety and drastically reduce your liability risks. When you cut the cord on a hardwired fixture, you void the warranty immediately. Pre-built units keep your warranty fully intact. If the unit fails prematurely, you simply request a free replacement.
Modern pre-built options often include integrated photocells. These dusk-to-dawn sensors add incredible convenience for daily use. Many units also feature built-in motion detectors. Some even offer smart-home connectivity via Wi-Fi or Bluetooth protocols. You will find these features exceptionally difficult to retrofit safely. Attempting to wire a motion sensor into a DIY build complicates the circuitry. Manufacturers integrate these smartly into sealed, waterproof housings.
We offer a simple rule for your purchasing decision. If your required lumen output is under 10,000 lumens, buy pre-built. A factory plug-in solution is highly recommended for this brightness range. You find excellent options readily available for residential use. For commercial-grade lighting exceeding 15,000 lumens, the logic changes entirely. Professional hardwiring becomes the only scalable and safe choice. High-output fixtures pull significant amperage safely. They demand dedicated circuits and rigid conduit installations.
Wiring an outdoor fixture to a plug remains a viable solution. It works well for temporary or highly flexible lighting needs. However, you must maintain strict adherence to safety protocols. Proper grounding, adequate wire gauge, and precise waterproofing are strictly non-negotiable.
We cannot stress the trustworthiness angle enough. Do not compromise on component quality just to save a few dollars. Using indoor-rated parts outdoors guarantees inevitable failure. If your installation environment faces severe bulk water exposure, reconsider the DIY route. If you lack confidence in your electrical termination skills, stop immediately. Opt for a factory-made plug-in fixture instead.
Your next steps are straightforward. Assess your specific installation location first. Check for GFCI outlet availability near your desired mounting spot. Calculate your required lumen output based on the target yard size. Finally, compare the component costs of a DIY conversion against upgrading to a pre-wired fixture. You will often find the pre-built route safer and surprisingly cost-effective.
A: Yes, provided the fixture holds a proper IP rating. Look for IP65 or higher for wet environments. You must also ensure the wall outlet features an in-use waterproof cover. Factory-sealed fixtures generally offer better rain protection than DIY modifications. A DIY seal can degrade over time, leading to internal water ingress and dangerous short circuits.
A: You absolutely need a heavy-duty, grounded 3-prong plug. Two-prong indoor plugs are unsafe for metal-housed outdoor fixtures. Your cable should be outdoor-rated, such as an SJTW cord. Furthermore, you must connect this plug to a GFCI or RCD-protected receptacle to prevent severe shock hazards.
A: Yes. Cutting factory wires or bypassing intended junction box installations almost universally voids manufacturer warranties. Modifying a fixture alters its original safety certifications, such as UL or CE listings. If the light fails after modification, the manufacturer will likely deny your replacement claim immediately.
A: Daisy-chaining high-output lights introduces severe overloading risks. Standard residential circuits handle a maximum of 15A or 20A. You must calculate the total amperage draw of all connected fixtures. Overloading the circuit will trip breakers and overheat wiring. Always review maximum amperage limits before linking multiple units together.

